I’ve purchased 16 switches and have installed 2 so far. They work fine, but the overhead of each switch install is something I’d like to shorten a bit. Wiring takes as long as it takes, but it’s the pairing and then updating of each switch that can take a bunch of time. I have a hubitat hub and each time I’ve had to move the hub very close to the switch inorder to get it to pair. Once it’s paired, I can move the hub back to the original location and everything still works great (due to z-wave repeaters I’m assuming).
I was thinking about creating a very basic jig if you will that will allow me to install the switch into my jig (simple lamp wiring that I can plug into the wall), configure the switch, update the firmware, etc and then reinstall it to the real location. Alternative is to hook up my hub to travel router I have laying around and with a battery I can move it close to the switch that needs to be paired.
Not sure what other folks are doing to make their installs go efficiently.
I used a Z-Wave USB stick and carry my laptop near the switch I’m updating. The switches were already installed (by the time firmware updates were a thing). The USB Stick is a secondary controller part of the Hubitat network. It was worth the $30 for me; however, a jig that you’re proposing could be a good thing if your switches aren’t already installed.
Initial pairing shouldn’t matter if you are within range of the existing z-wave mesh. I’m on ST, but I have initial pairs that work through 2 devices before getting to the hub.
I’ll say it a different way, these SHOULD pair if you get “green” in the z-wave signal test. Refer to manual for that information as it’s different for different products.
With both switches, I needed to bring the hub close to the switch to get a green light and pairing. I even have a zwave extender that I added between the first and second switch install and still no success without moving the hub.
Completely agree. I am on ST and can pair ~30’ away through multiple walls, etc. But i do have over 30 devices on the mesh now, so it’s probably really strong.
I know moving the device after it is paired is frowned upon however…
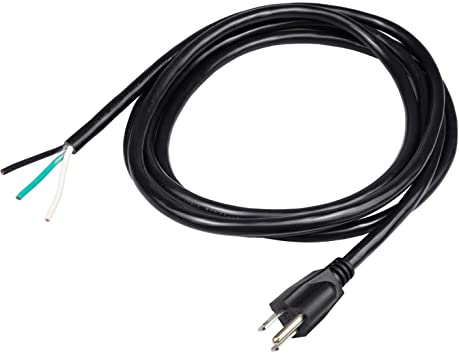
I use a sacrificed extension cord (one with the 3rd prong for safety ground). I connect it to the switch, wrap some masking tape around the live screws and pair at my desk.
I connect the line (black) to the switch line.
I connect the neutral (white) to the switch neutral
I connect the safety ground (green) to the safety ground screw (also green)
I do not connect a load.
I have taken to testing switches before installs after spending the better part of a day troubleshooting a defective switch (not Inovelli). Instead of sacrificing an extension cord, appliance cords for things like dishwashers are just a few dollars on Amazon.
What is your Z-Wave setting for security set to? By default it should be set to secure garage door controllers and locks only. Usually pairing secure devices require the hub to be very close to the device due to the reduced signal strength to prevent interception during the process. With most Z-Wave switches it should be able to pair in place hopping through the other Z-Wave devices if necessary.
With the C7 hub I don’t know if that has changed or not though since the S2 security is available on a much wider range of devices than the S0 security was and luckily S2 security is supposed to be considerably less overhead and faster than the S0 was.