Making good wire connections is extremely important when installing any electrical device. I’ve read in these forums that not everybody is familiar with wiring switches and plugs. Some also know that some devices have “push in” connections where the wire is simply pushed into an opening and the edge of a spring holds the wire and conducts the current.
I’m very happy the Inovelli dimmers and switches employ a superior method of capturing wires.
For those who have not used this type of terminal the below illustrates the proper use.

7 Likes
Thanks for sharing this @JohnRob!
We actually created a video too, but the illustrations are perfect ![]()

2 Likes
Can you just loop the wire under the screw head as well (like you would with a traditional switch?
I tried this with my first one not realizing there were holes to insert and it seems to work fine, but not sure if there’s a reason to prefer inserting into the hole.
Yes that is an acceptable way to connect the wires. If you look at the back of the switch, you’ll see two different lengths of wire to be stripped. One is for through the holes and the other is to wire it around the screw head.
1 Like
The reason the hole is better for most folks is; it is easier to get a good connection.
With a screw you have to close the loop a little else the screw will push the wire out from under the screw.
If you loop the wrong direction the screw tends to push the wire out from under the screw.
The wires can still get loose or pull out some times even when they were installed correctly and the screw is tight. I have tightened them and pulled and they were tight only to find one was loose as I installed it.
So, I tend to tighten the screws, rotate the device back and forth as if I was going to turn it upside down but then decided not to and tighten the screws again. About a 1/4 turn in both directions is usually enough. The twist can seat the wires under the pads into a better installed position but the screw then needs tightened again to re-tension it.
As a minimum, always do a pull test right before installing it. Hold the device and give a pull on each wire.
I’ve never had this happen to me with solid wire. The few times I’ve used stranded wire I’ve not had an issue but this was only for bench testing. I would imaging a combination of #12 solid and #14 stranded could be an issue, don’t know.
I know if the wire is on the wrong side of the clamping plate the wire will not be held.
As for giving the wire a pull to test the connection is always a good habit. Also inspect the bare wire for cracks before installing it into the switch. Often if the switch has been changed out a few times and the loop bent back and forth the wire can be cold worked to the point of cracking.
It happened to me 3 or 4 times wiring the new house. They are tight and then come loose as soon as the wire has any twisting force put into it. It’s like the wire isn’t exactly round and it has flipped from being clamped on the wide diameter to the narrow diameter.
2 Likes
I’ve never has this happen to me but I agree folks should be aware of the possibility.
One thing to watch out for is the depth of the ground wire - since it’s often bare copper, there is no “built in max depth gauge” and you can hit this scenario where the ground wire interferes with the paddle’s upper half.
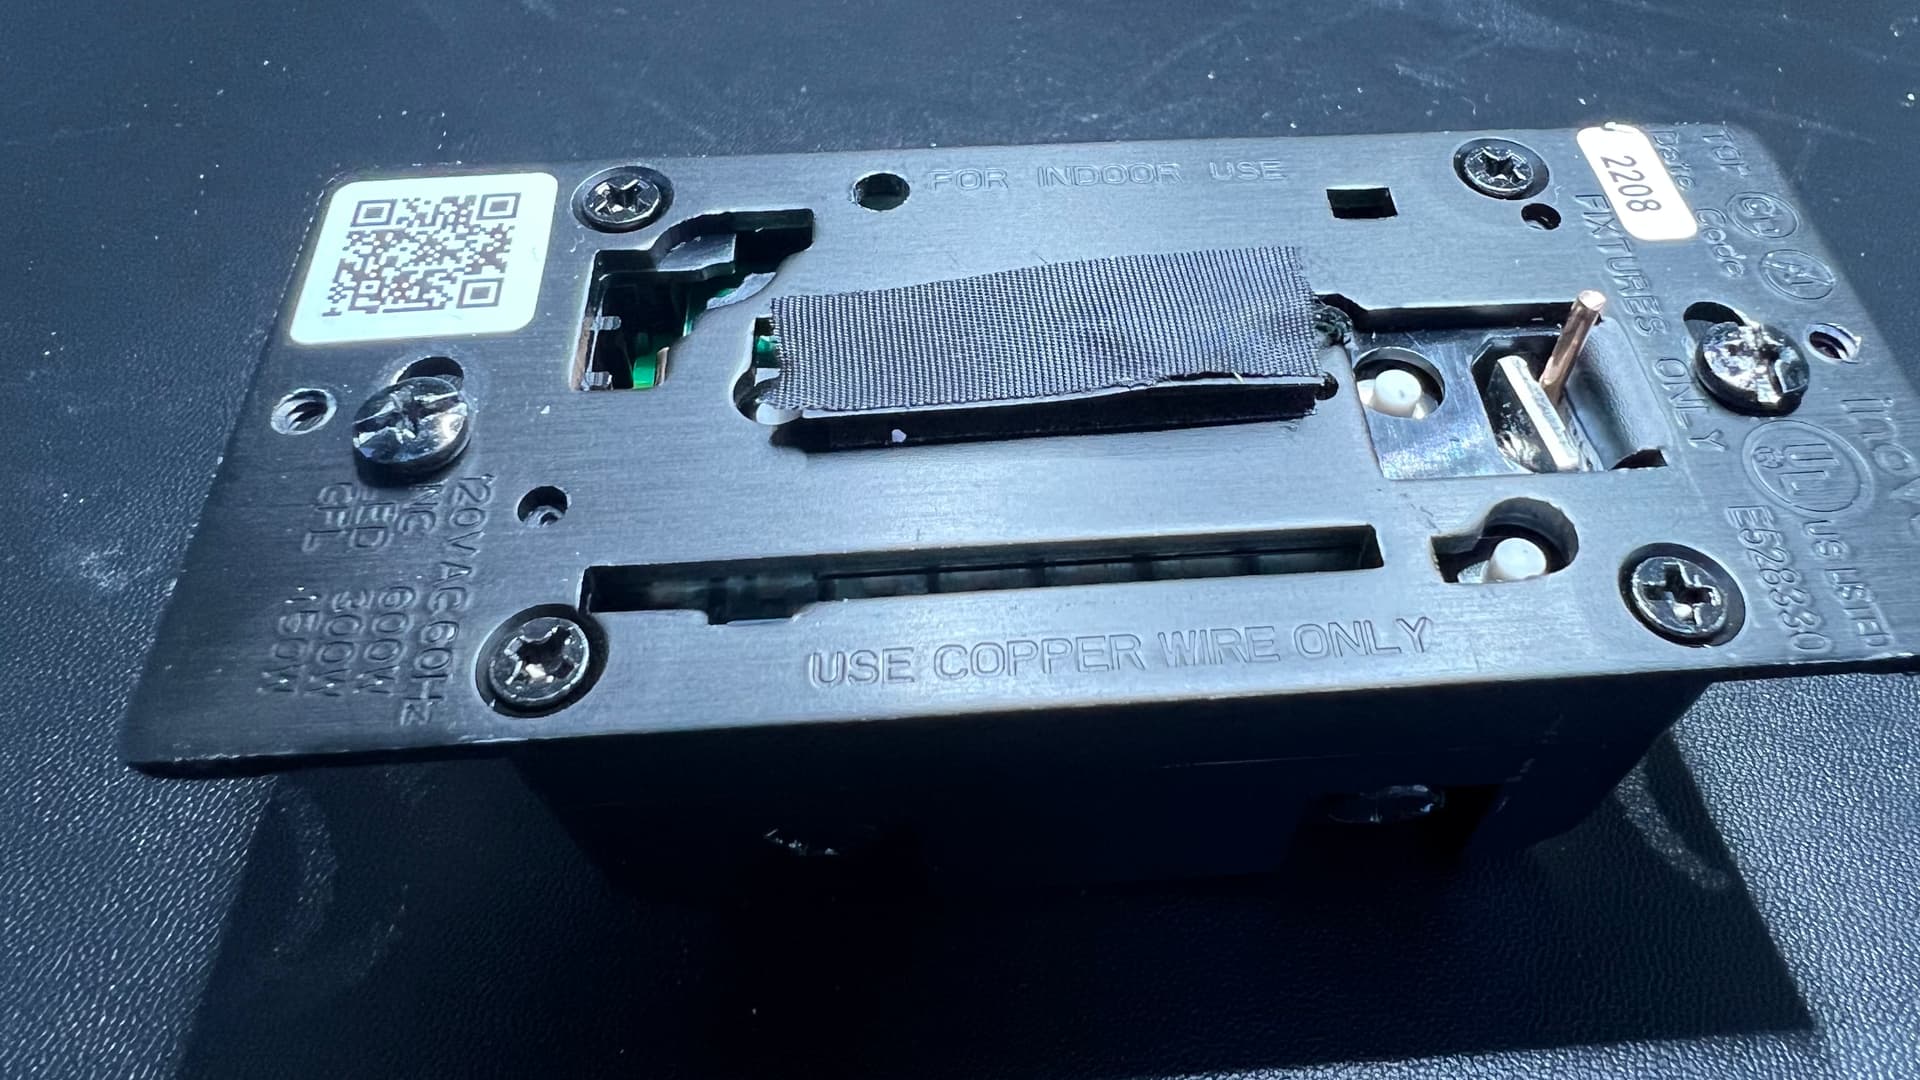
2 Likes
The one I have the most trouble with is the grounding wire. For some reason that never wants to stay seated. The others work great but it may also be the position on the white series swtitches.
To start, make sure that the ground screw is backed all the way out. Don’t over torque it when you do that. When you insert the ground wire, make sure that it is in between the backing plate and the screw so that the backing plate draws toward the screw and sandwiches the ground conductor.
1 Like