I am having a hard time figuring out how/if I can make the blue canopy with blue 2-1 switch setup work with my hunter simple connect smart fan that supports HomeKit (WiFi).
My light switch is single pole and I’ve wired per the wiring inovelli schemes at the switch.
However, I cannot figure out the canopy wiring.
I only have 3 wires coming out at the ceiling junction box (hot, neutral, ground)
I’ve tried different combinations of wiring for the light and fan wires on the module.
Nothing has worked to allow me to fully control the lights and fan across all levels (either all or nothing).
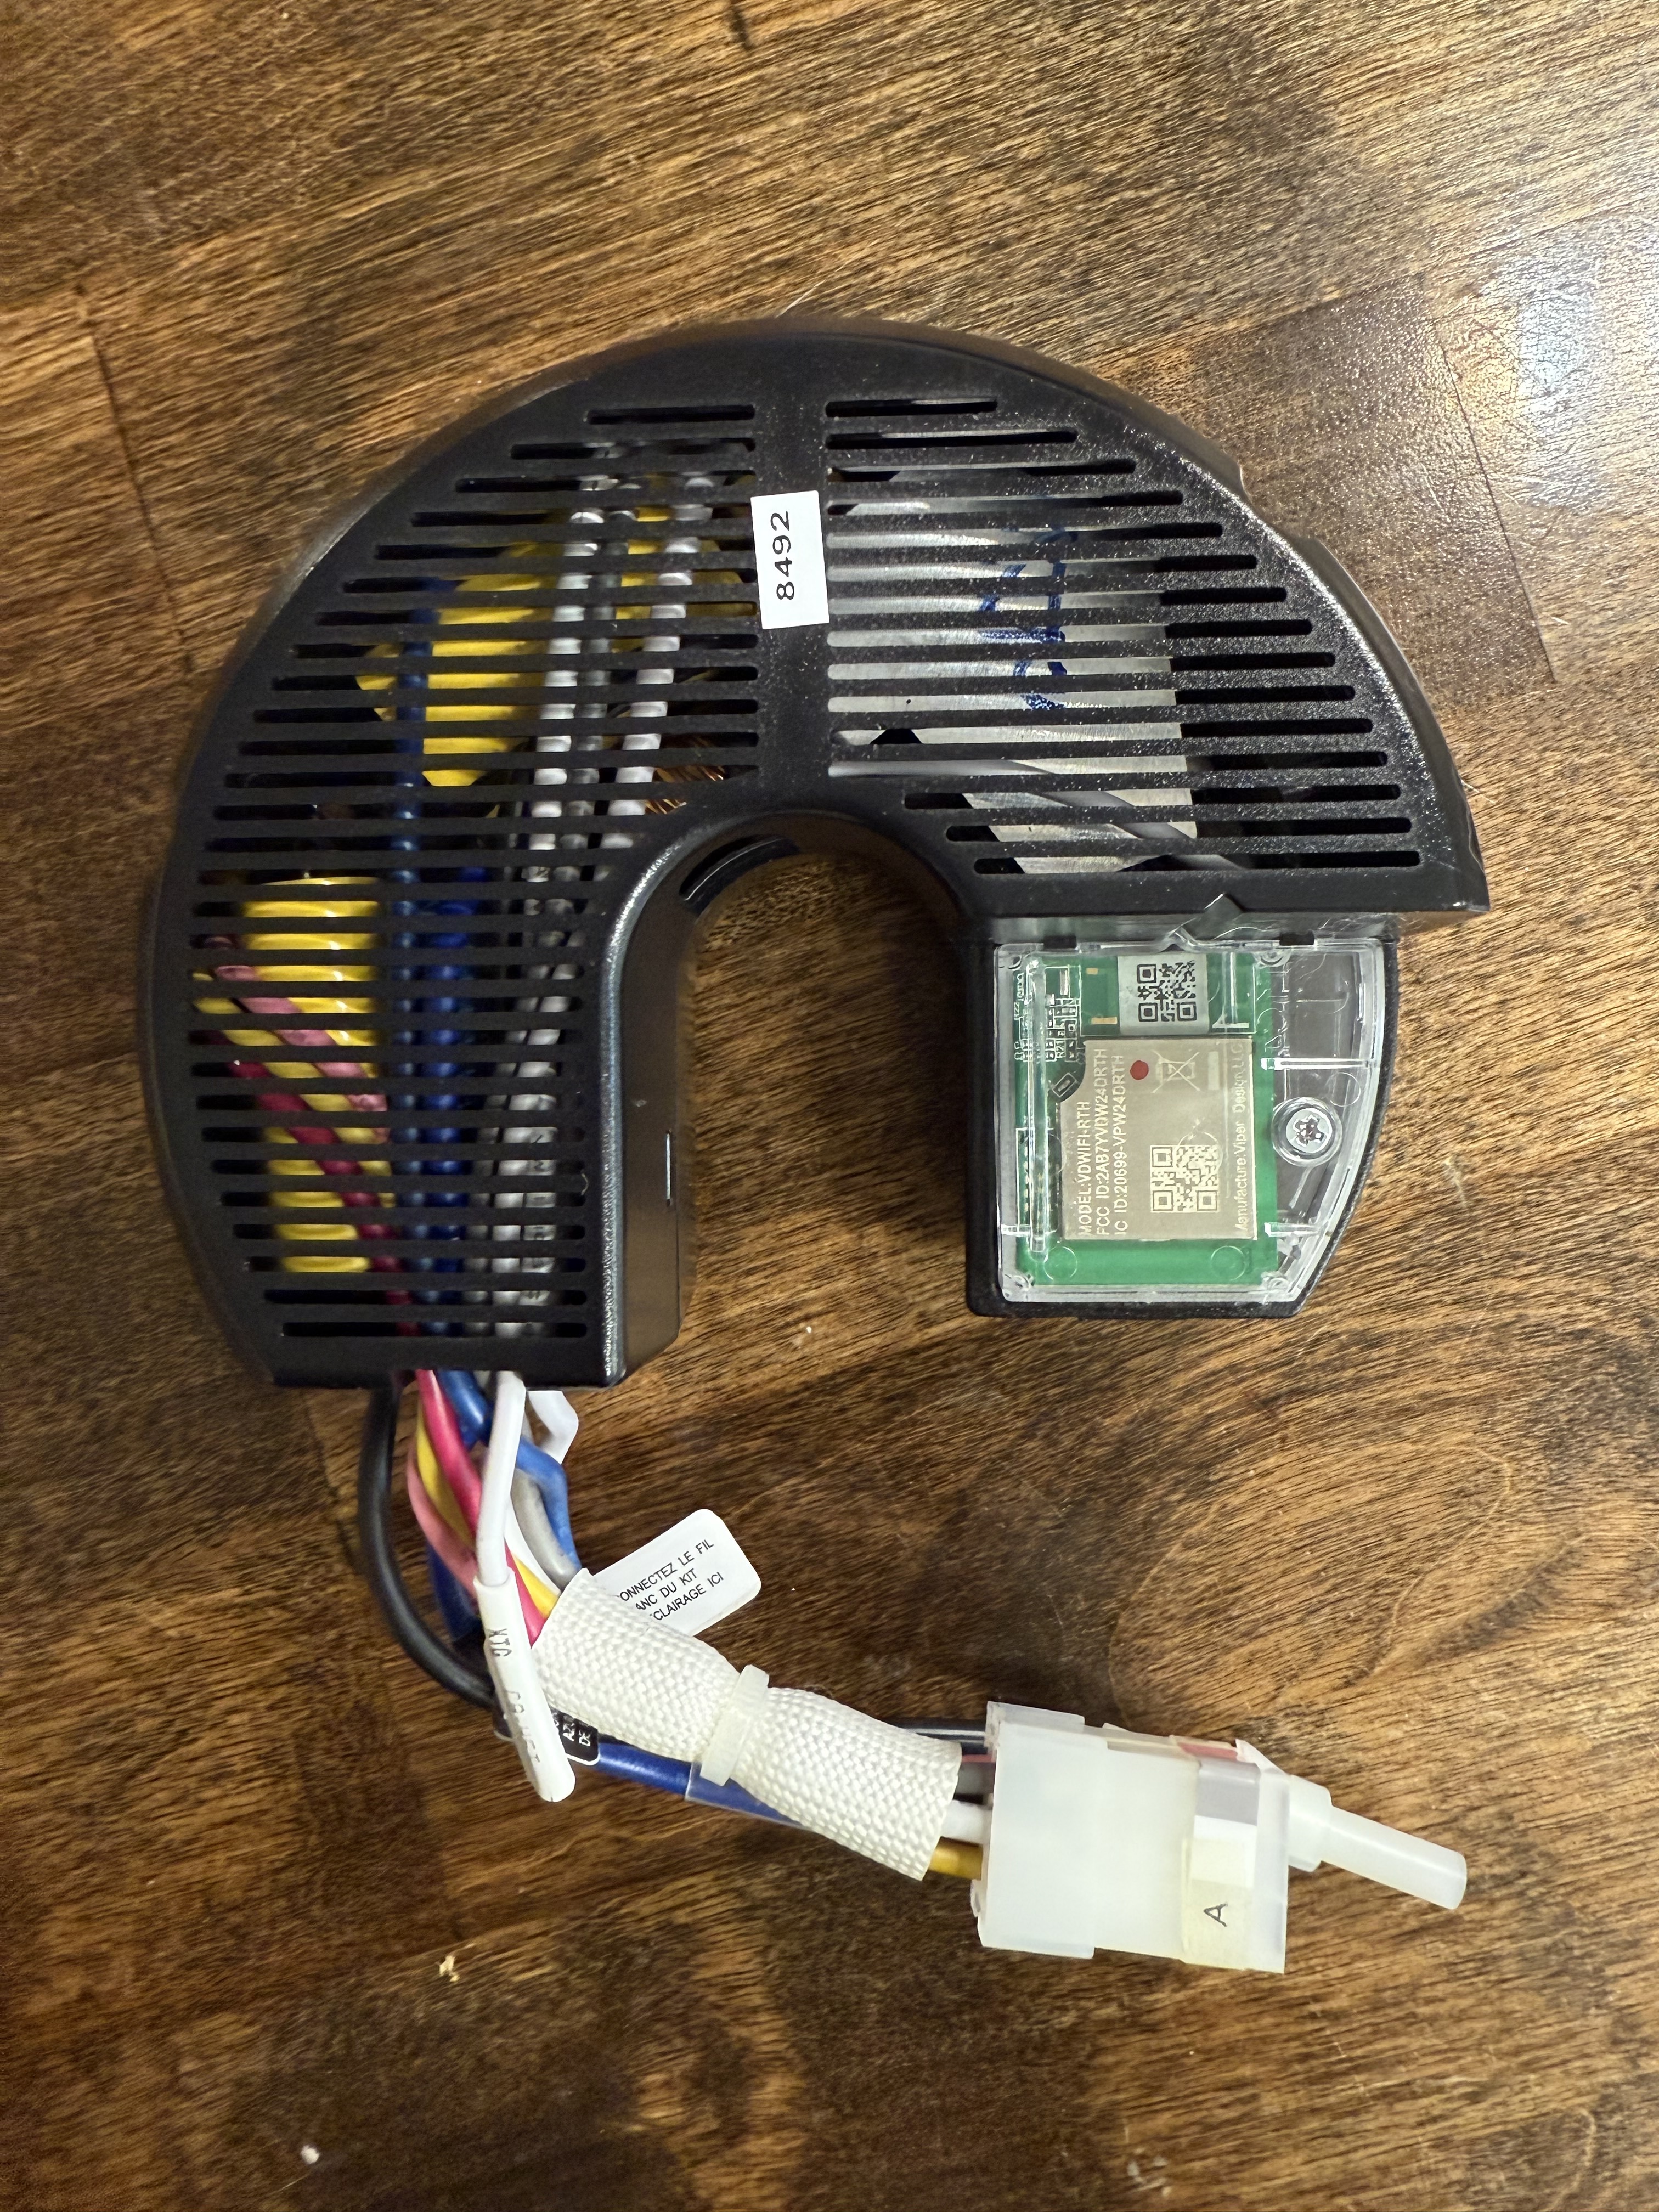
I found another post that said the built-in hunter module that is in the motor had to be removed (pictured).
I have removed it and now there is no power going to any of the fan (fan or lights).
You are correct that you must remove (or at least wire around) the remote control module to wire the fan switch directly to the fan. I think your fan and light weren’t getting power after you removed the module because the connector on the module has connections for incoming hot and neutral and the connections for the wires going to the fan. So simply removing the module breaks the connection between the incoming power and the fan’s motor and light.
I tried to find a wiring diagram for that module, but wasn’t successful. Unfortunately, the Hunter Fan site lists the module in the replacement parts section, but doesn’t have a picture.
You will have to inspect the connector that remains in the fan to determine which wire is which, then wire appropriately. Maybe someone here has already gone through this exercise and can help out.
I too was unable to dig up anythng on this fan aside from a copy of the user manual, and that wasn’t helpful for any technical details.
@la38920, since this fan is discontinued, if you contacted Hunter, perhaps they could send you any additional documentation they may still have (spec sheets, technical documentation, etc).
I can probably figure out the wiring from the hunter module I removed. I was hoping to find someone that has gone through this before as you mentioned - so I can get confirmation what I’m about to do will work/be worthwhile.
I had read on some similar unrelated posts that those modules usually have a capacitor in them needed for function so you can’t really do a full bypass without replacing that capacitor.
I draw the line on my tinkering with electronics once soldering gets involved. Really hoping I can make this work without getting to that.
Capacitors are usually used for speed control. There are capacitors in the module you removed because the module controls speed. But after you remove it, the speed control is passed to the fan switch, which has its own capacitors.
It looks like the reverse function is controlled by the fan remote. Is it important for you to retain that functionality?
I ask because the Blue module doesn’t have that and you’ll lose reversibility if you replace the built-in with the Blue.
I have a similar fan (RF, not Wi-Fi), and installed the Blue canopy to control the light, but left the built-in installed so I could still reverse the fan.
I can’t remember if I wired them in parallel, or passed power through the Blue to the built-in (which requires running the Blue in Smart Fan Mode).
The reason I was asking is that if you can control the fan to your satisfaction via the hub and Homekit, you could then just power the Inovelli as a scene controller with no load and then control the light and fan speed with multi-taps.
Hunter claims that Homekit allows for full control of the fan. Maybe the Hubitat driver is lacking? Not sure . . .
“Through HomeKit, you can control your fan’s speed, light, and direction. You’ll also be able to create settings and Scenes that utilize other smart devices that are connected through Apple HomeKit,”