Anyone wondering about specific info / instructions for your hub there are some resources here:
1 Like
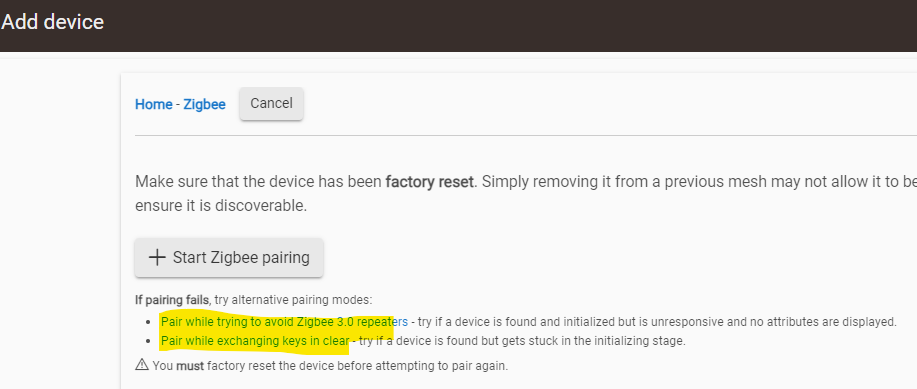
Sounds like something during the key exchange may be erroring out. I’d try to factory reset the switch. Also, put the C8 in inclusion mode first then push the air gap in on the fan switch to get it to start pairing.
Might want to try these two options as well:
Factory reset hold up and config for 20 seconds until red flash correct?
Yep.

1 Like
@EricM_Inovelli, no joy. Rebooted hub also. Goes right back into pairing as soon as hub is done with the initializing.
I guess today I am officially an Inovelli fanboy?
Not only do I now control all the fans in my house with Inovelli switches, but every single light switch in my house (and my shed) are Inovelli switches now ![]()
Sure hope they don’t go out of business, coz I’ve got a lot invested.
2 Likes
Welcome to the club.
1 Like
I’ll pop in later tonight to try to help troubleshoot as best as I can, but in the meantime for those that can’t get the switch to change from an exhaust to ceiling via their hub, here are the instructions for manually doing it:
Ceiling Fan (3-Speed) Mode
To put your Blue Series Fan Switch in Ceiling Fan (3-Speed) Mode, hold down on the bottom part of the paddle (off) while simultaneously tapping the configuration button three (3) times (do not let go of the paddle when finished tapping the config button). Wait for the LED Bar to flash solid orange (and then let go of the paddle) indicating the switch has changed to a Dimmer switch.
NOTE: If your switch does not have a neutral wire, you will only have 2-Speeds.

Exhaust Fan (On/Off) Mode
To put your Blue Series Fan Switch in Exhaust Fan (On/Off) Mode, hold down on the top part of the paddle (on) while simultaneously tapping the configuration button three (3) times (do not let go of the paddle when finished tapping the config button). Wait for the LED Bar to flash solid red (and then let go of the paddle) indicating the switch has changed to an Exhaust Fan switch.

Multi-Way (3-Way) + Aux Switch Mode
To have your Blue Series Fan Switch work with an Auxiliary (Add-On) switch in a multi-way (3-Way) setting, hold down on the top part of the paddle (on) while simultaneously tapping the configuration button five (5) times (do not let go of the paddle when finished tapping the config button). Wait for the LED Bar to flash solid white (and then let go of the paddle) indicating the switch has enabled 3-Way + Aux Switch Mode.
NOTE: If your switch does not have a neutral wire, you will need to program it to work with an Aux switch. Please follow these instructions to do so: Blue Series Fan Switch • Special Programming for Aux Switch in Non-Neutral Mode

1 Like
I am looking into the Hubitat driver to see why its not changing modes.
EDIT: I found the bug and squashed it. Updated drivers will be committed to github by Monday
4 Likes
Got the first 6 of 10 in today (separate orders), and the first 2 went perfect. I already have Jasco switches in these locations, so wiring took barely 2 minutes. The only install issues I have are with my electrical boxes. The plastic boxes are terrible, and the electrician who installed the dumb switches years ago ruined the screw holes. I’m having to install wall box repair clips (G-Clip on Amazon) in most of my boxes.
OMG I had no idea these existed. Thank you so much! I have put off fixing a couple areas bc I didn’t feel like replacing the whole box and now I can.
Just ordered them ![]()
2 Likes
Just got my 2 fan switches today and installed the first! I guess I got into ceiling fan mode (manual method at the switch, oddly enough the SmartThings edge driver didn’t recognize the change so I changed it there too) but I seem to have 4 speeds in the SmartThings app, not 3 (low, medium, high, max). What’s the difference in high and max? Note I’m using neutral wire.
Also on low my fan speed is quite low. Would changing parameter 9 (minimum level) from 1 to say 10 or higher help in this case?
1 Like
Or just use a sheetrock screw. ![]()
Yep, some had those too but some were completely broken because of those screws!
Yeah these little things are a blessing and work great. Definitely way better than replacing a whole box for sure.
Make sure the fan itself (not the wall switch) is set to its highest setting. In most cases this is a pull-chain on the fan motor and is the position immediately after “off”. (typically the pull-chain is off–>hi–>med–>low–>off)
Exactly what @mamber said ![]() - check that. I should update my instructions. Great reminder!
- check that. I should update my instructions. Great reminder!
Regarding ST, I have the same question. I think it’s how the base code from SmartThings is setup and Eric M had to work within its confines, but let me check.
@EricM_Inovelli - can you answer the 4-Speed question?
I’ve noticed High and Max are the same fyi.
2 Likes
Got the first one installed and working like a charm, thanks Eric & team!
Can’t wait to install the other 6!
PS - @Eric_Inovelli, There’s one step missing in the HomeAssistant / Zigbee2Mqtt guide for anyone using that before the converter goes live in the released stable version.
The quick step instructions here should have one extra step to add the new converter as an external converter into the config file. Once I added the following to the zigbee2mqtt configuration file and restarted the zigbee2mqtt addon, it worked like a charm:
external_converters:
  - VZM35SN.js
2 Likes
SmartThings default capabilities have it setup that way for fans. Max is the same as high. The speed of the fan is determined by the fan itself. You might want to make sure that the pull string has the fan set on the highest speed possible. Some of the settings like dimming speed, ramp rate, etc. are mostly intended to be used when you have the module in “Smart Fan Mode”.
FYI, thanks @mamber for fixing the “ceiling fan mode setting not sticking” in Hubitat. There is a new driver available for it.
1 Like
Thanks for the reminder, I just added that additional info.