Short version. I tried every slim recessed downlight I could find at Home Depot Canada (we call them “pot lights”). Most of them kind of works, probably even good enough for most people. But in the end I went with a more expensive option option from somewhere else.
Here is the full journey.
Going into this, I was hoping to find something that checks all of these boxes:
- Warm colored, ideally 2700K.
- Can be dimmed to a very low %.
- Dims up and down smoothly.
Specifically, I was hoping to automate these as motion-triggered night lights, so it’d need to come up gently to the lowest possible level, giving just enough light that you can find your way around to the bathroom, but doesn’t wake you up completely.
Having dabbled a little bit in stage lighting in school, it also turned out that I was quite sensitive to the smoothness of the dimming so that’s also important to me.
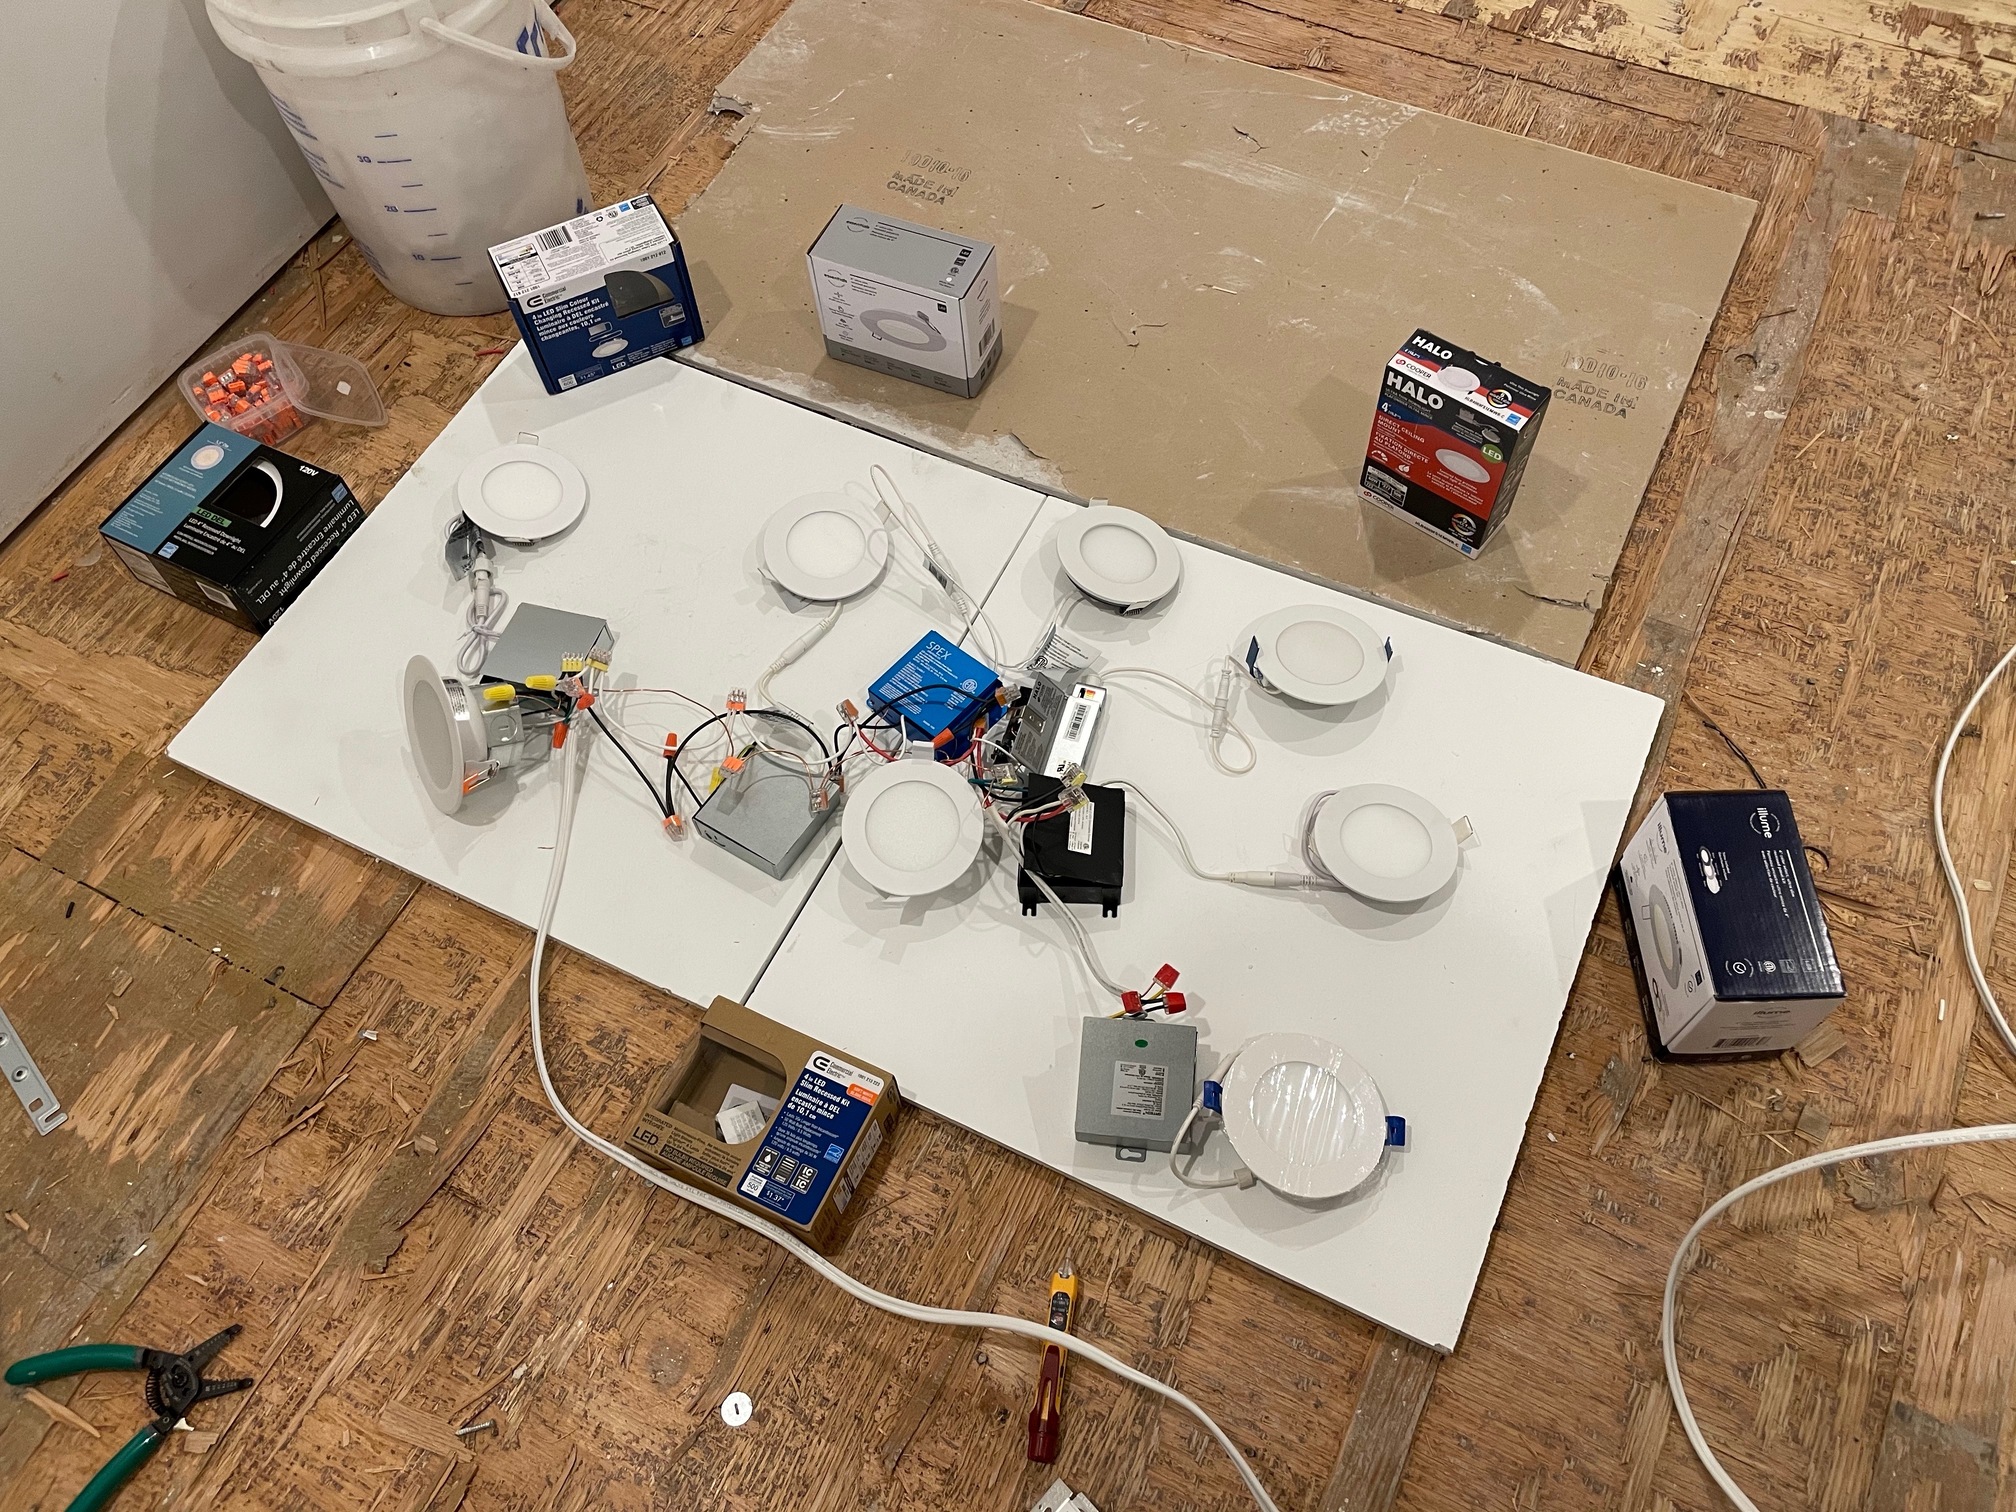
So I tested out all the options I could find at the local (Canadian) Home Depot. Here are the contenders, in no particular order (all prices are CAD):
- Commercial Electric 4" 3000K G1TP120RT4P30 ($9.95)
- Commercial Electric 4" 3000K/4000K/5000K I-PROCCT4WH ($24.98)
- Illume Essential 4" 3000K I-ESP4WH ($24.98)
- Illume 4" 3000K/4000K/5000K I-CCMDPN4 ($34.98)
- SPEX by Liteline 4" 2700K/3000K/3500K/4000K/5000K SL-SLM4-CCT5-90WH ($39.98)
- HALO (Cooper/Eaton) 4" 2700K/3000K/3500K/4000K/5000K HLB4069FS1EMWR-C ($34.98)
- Canarm 4" 3000K LED-SR4P-WT-HD ($21.98)
- ORTECH 4" 3000K (supplied by contractor)
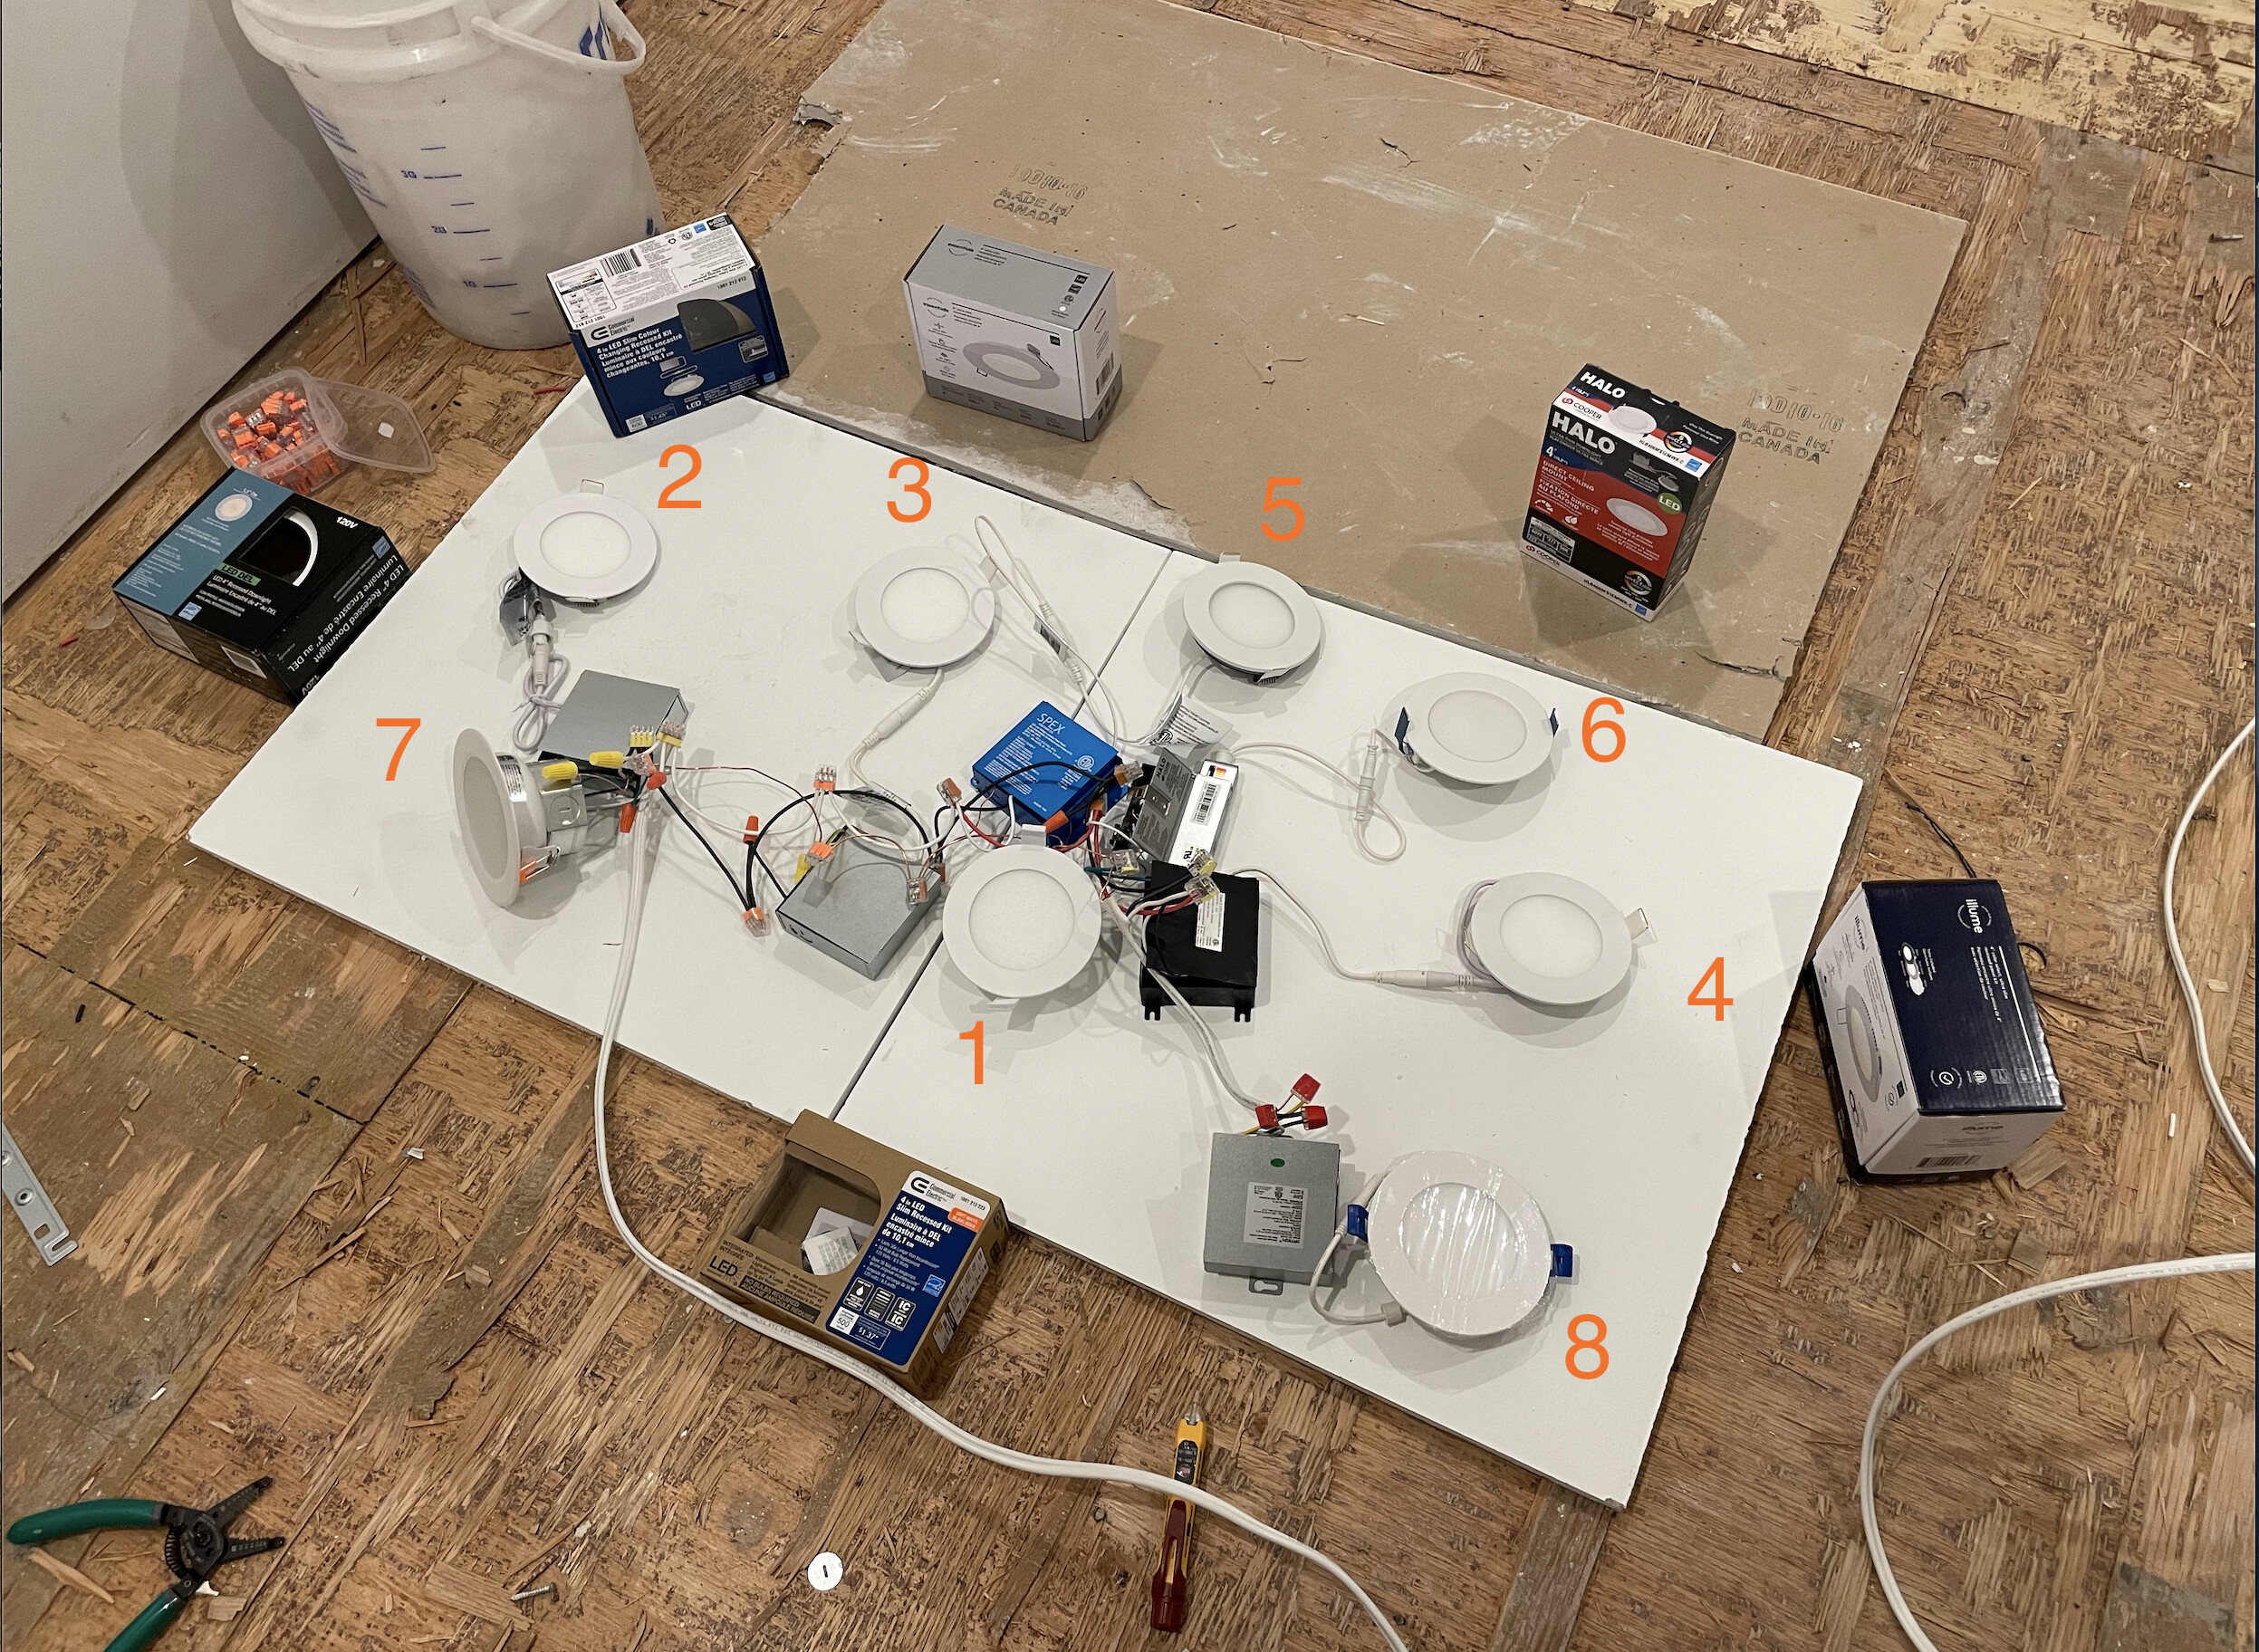
Here is video of them fading from 0-100% over 10 seconds, then from 100%-0% over 10 seconds.
Here is what I learned.
Avoid the Canarm unless you are picking something for a disco. Otherwise, the generally all worked, and most of them worked reliably and predictably at the upper half of the dimming range (say, above 50%), despite some of them asking for an ELV dimmer on the spec sheets. Some of them do buzz a little but it’s pretty minimal and probably won’t be audible once the driver is hidden away in the ceiling.
At the lower half of the dimming range, that’s when things get inconsistent.
For starter, all of them requires at least 20%+ (most closer to 30%) to turn on. Some of them would turn on immediately as soon as a certain minimum threshold is hit. Some would take up to a second to warm up when turned on at their lowest possible power level. Some would turn on with an initial burst of brightness and then dims back down to where it’s supposed to be. It’s kind of all over the place.
I think this actually accounts for a lot of the complaints about a “delay” with the Inovelli dimmers on the Amazon reviews and maybe some of the forum posts. The 700ms delay is part of it, certainly, but with the default dimming speed set to 3 seconds and most of these not turning on until 30% power, that adds an extra second of perceivable delay out-of-the-box. I noticed the Lutron dumb dimmer switch I used as a control doesn’t actually let you go nearly as low as the Inovelli, even when you adjust the trim lever on the switch to the lowest setting. I wonder if they would be better off setting the default min power level to 25% or so out-of-the-box, and let the power users adjust the setting later, for a better on-boarding experience (cc @Eric_Inovelli).
The threshold is also asymmetrical. Once turned on, most of these lights can actually dim to a lower level. A firmware update that takes this into account would be nice (cc @Eric_Inovelli). Most of them also have some built-in fade off thing in them, so that even if you are using an on/off switch, they would still have a one second (or so) fade off which is nice. Probably something something capacitors in the drivers.
That minimum threshold obviously vary (quite a bit) depending on the manufacturer, but even within the same brand/model, things could still vary quite a bit within a few % points. My contractor installed four of the ORTECH in one room as a sample (on the same switch/circuit), and when I turn them on at their lowest level, only 2 of them would turn on initially, and if you wait long enough, maybe another one will decide to join the party.
And that was just lights from the same 6-pack box. I initially tested one of the HALO lights with an Eaton logo on the box and was quite impressed by it, but when I did this round of testing, the one I got had a Cooper logo on the box and performed much worse.
That being said, they generally start performing consistently at a few % above the minimum, so if you are no particularly picky, setting the minimum a but higher than that (therefore losing a bit of the dimmable range) should basically solve all the problems for all of these lights I tested, except the Canarm.
The spec sheets would indicate something like “5-100%”, “10-100%”, “15-100%”, etc, but I found that it had no real correlation with how they actually perform. Also, the dimming “percentage”, as indicated on the box and reported by the switches, are quite arbitrary. I’m not exactly sure what the “1%” or “50%” means – it certainly didn’t mean 1% or 50% of the 120V RMS voltage, nor does it mean the 1% or 50% “brightness”. It just seemed like some arbitrary unit with no real standard meaning.
But at the end of the day, that doesn’t really matter. You don’t actually care what is the lowest “percentage” where it starts to turn on, because you are able to trim that on the switch. As long as it turns on with a minimal amount of perceivable light, you can still achieve smooth dimming once you configure the switch correctly. However, even if the light only takes 10% power to turn on, if it gives out 30% of the perceived brightness at that power level, it will still turn on rather abruptly instead of smoothly fade on.
The blue graph represent a fixable problem with the right configuration on the switch, the rest are problems that are unfixable (with the current firmware at least):
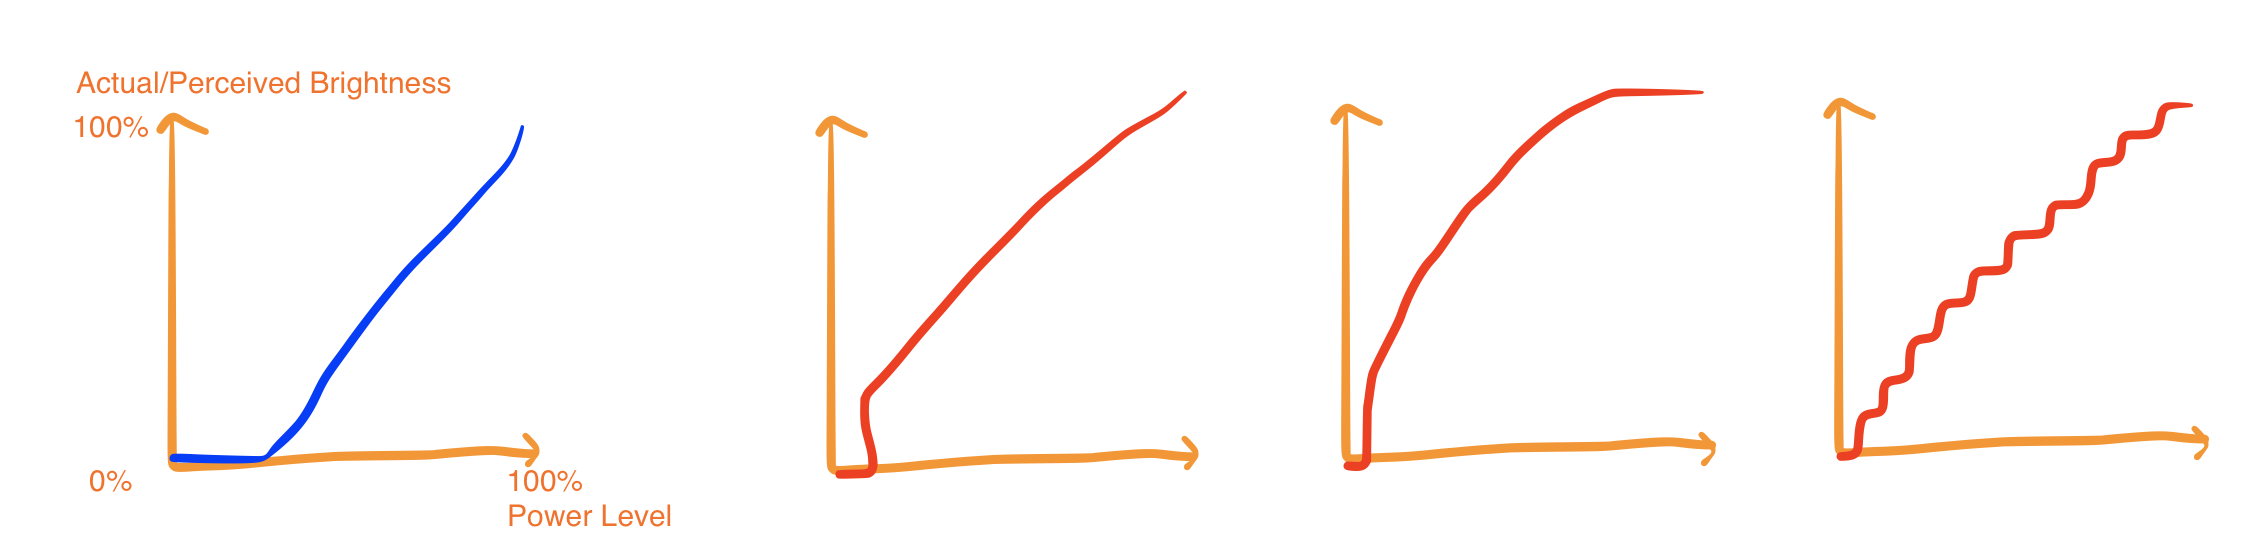
This wasn’t really apparent to me until later on in the testing, as I was originally focused on finding the LED that would turn on at the lowest power level, which didn’t actually turn out to be that important.
Unfortunately, I wasn’t able to find something that matches the ideal blue graph. All the lights I tested are exhibiting some combination of the red lines. Some are better than the other. The ORTECH and SPEX are both reasonably good, though still noticeably “step-y” when fading – they all do to a certain extent.
Ultimately, I figured what I want is not really feasible. Not that the LEDs themselves can’t do it, but because the “signaling” of the desired level is coupled to the AC power level supplied to the drivers, that combination makes things quite tricky. Perhaps something like the blue curve that “remaps” the power level after the minimum threshold of the driver is reached is theoretically possible, but that would probably require dumping the excess power at the lower level as heat which would have other undesirable consequences I imagine.
Eventually I found this product from Liteline (SLM4I-3020DTW):
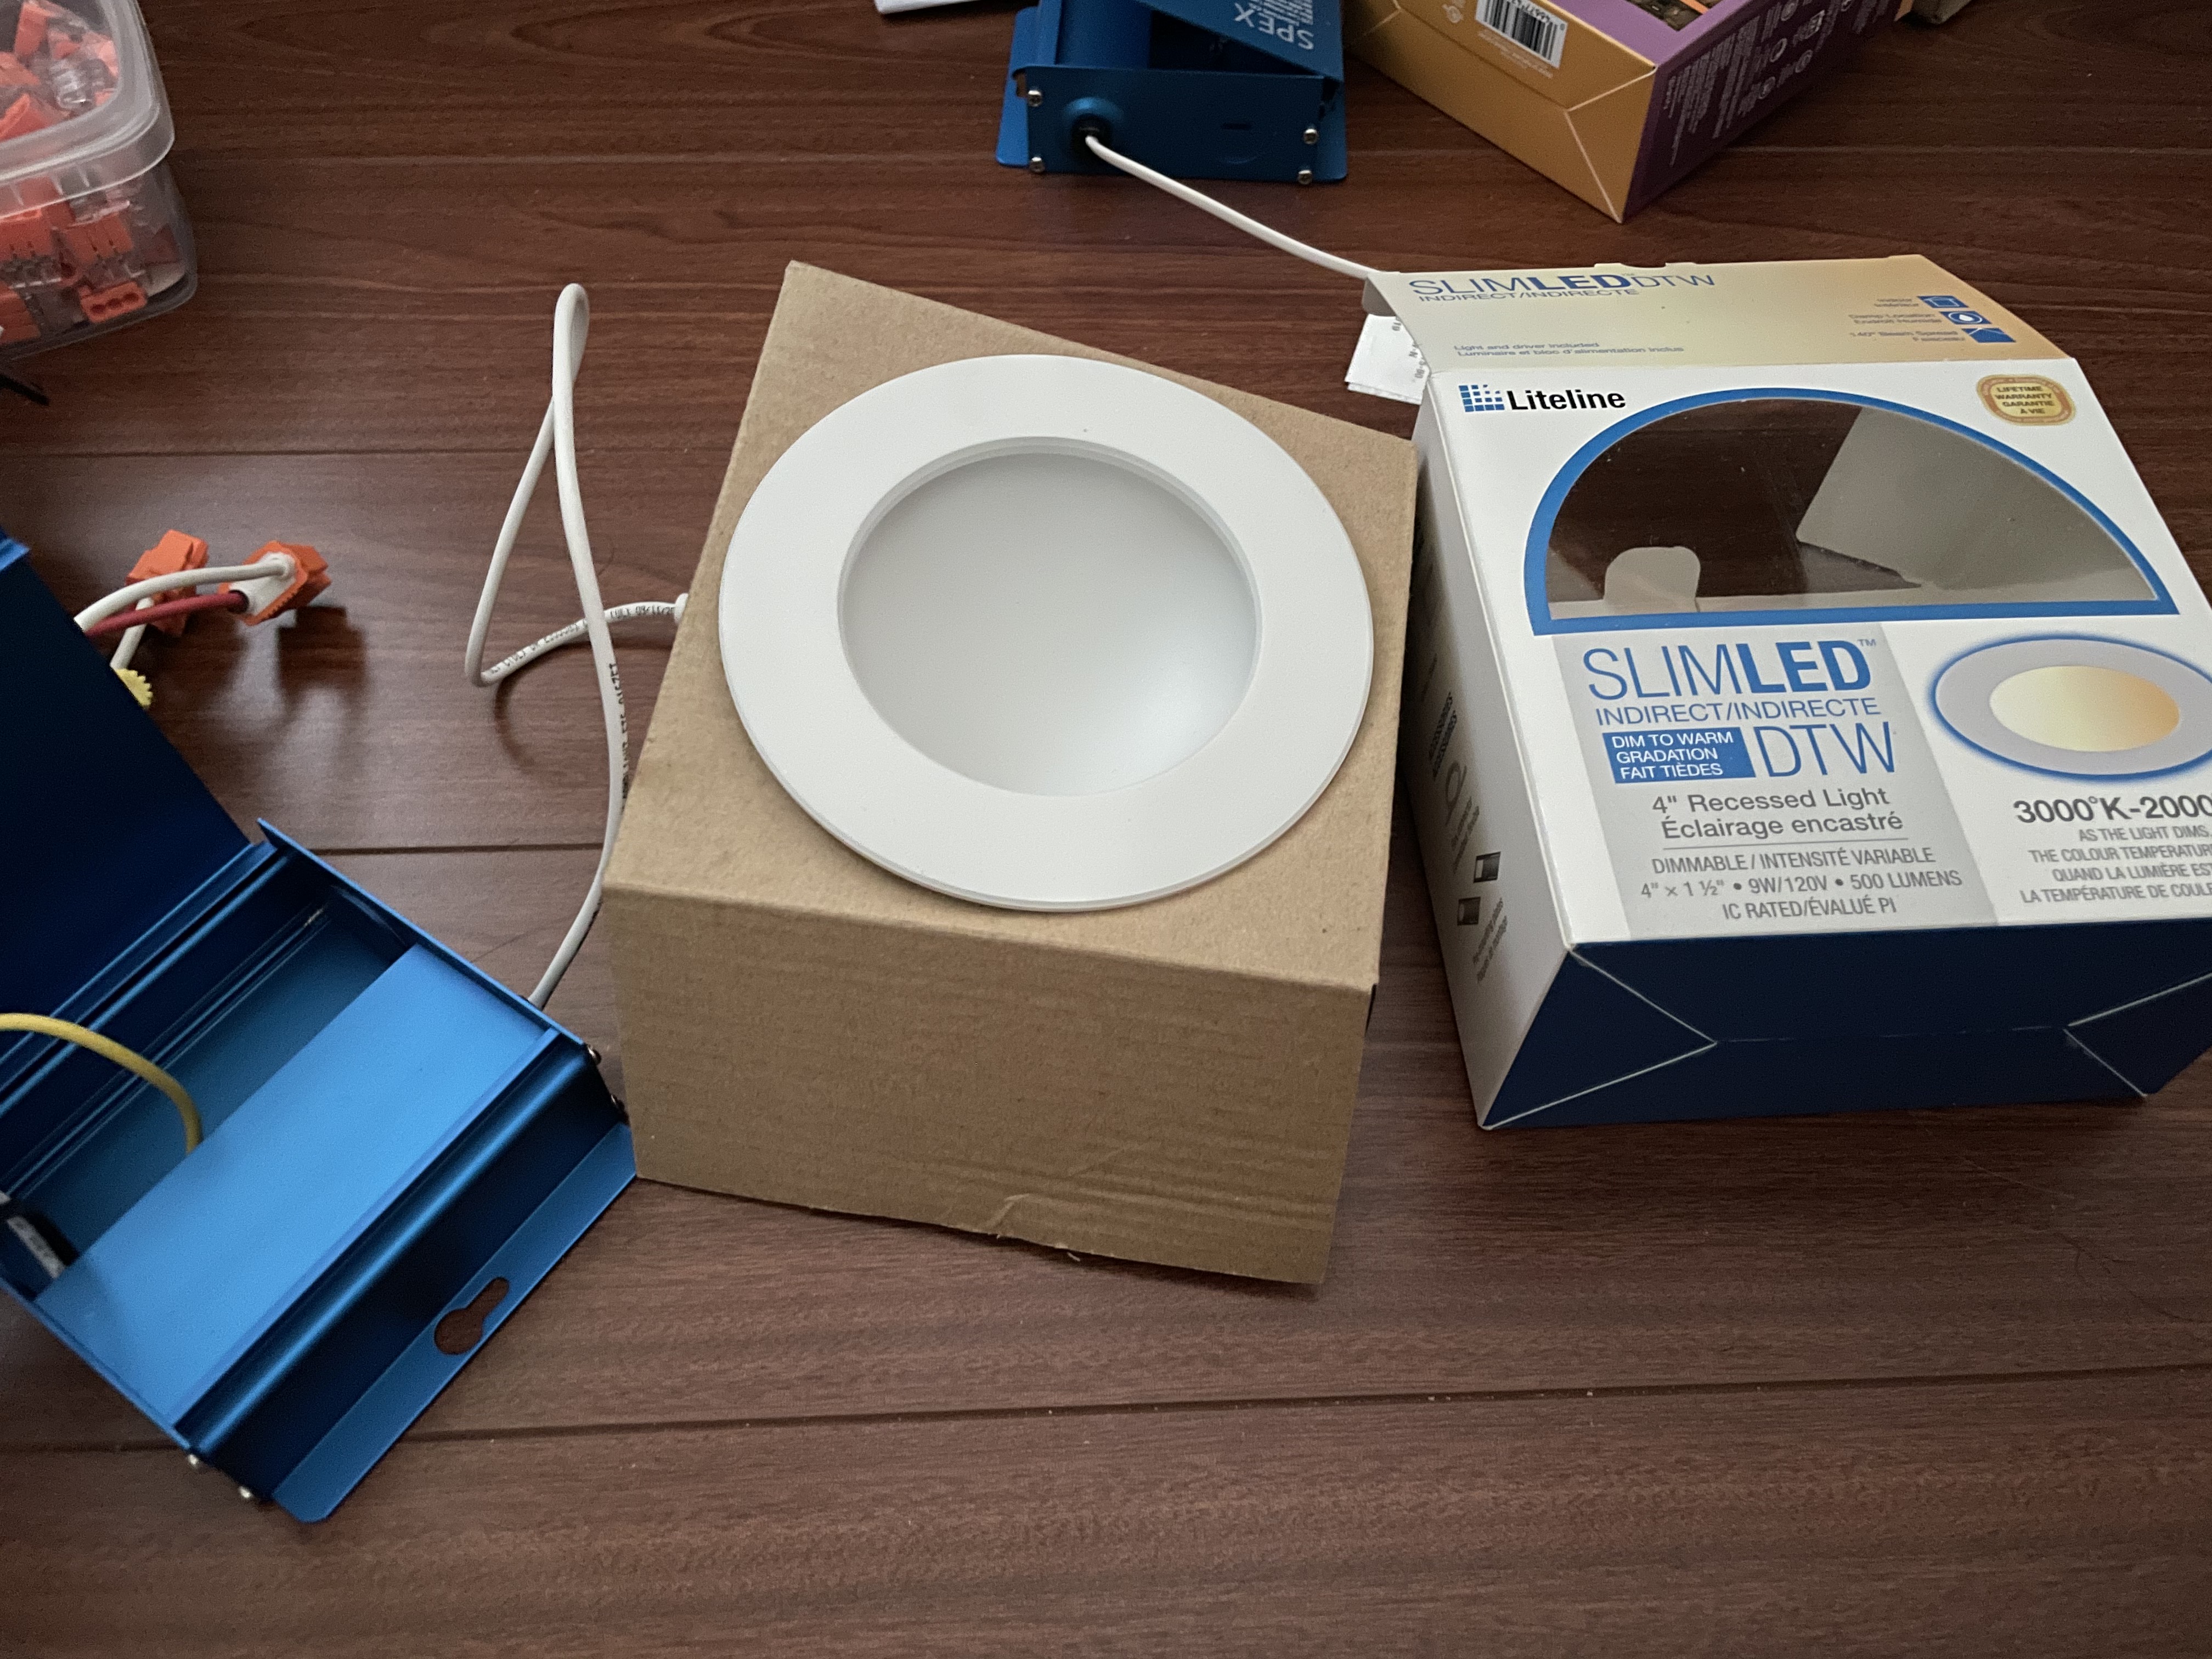

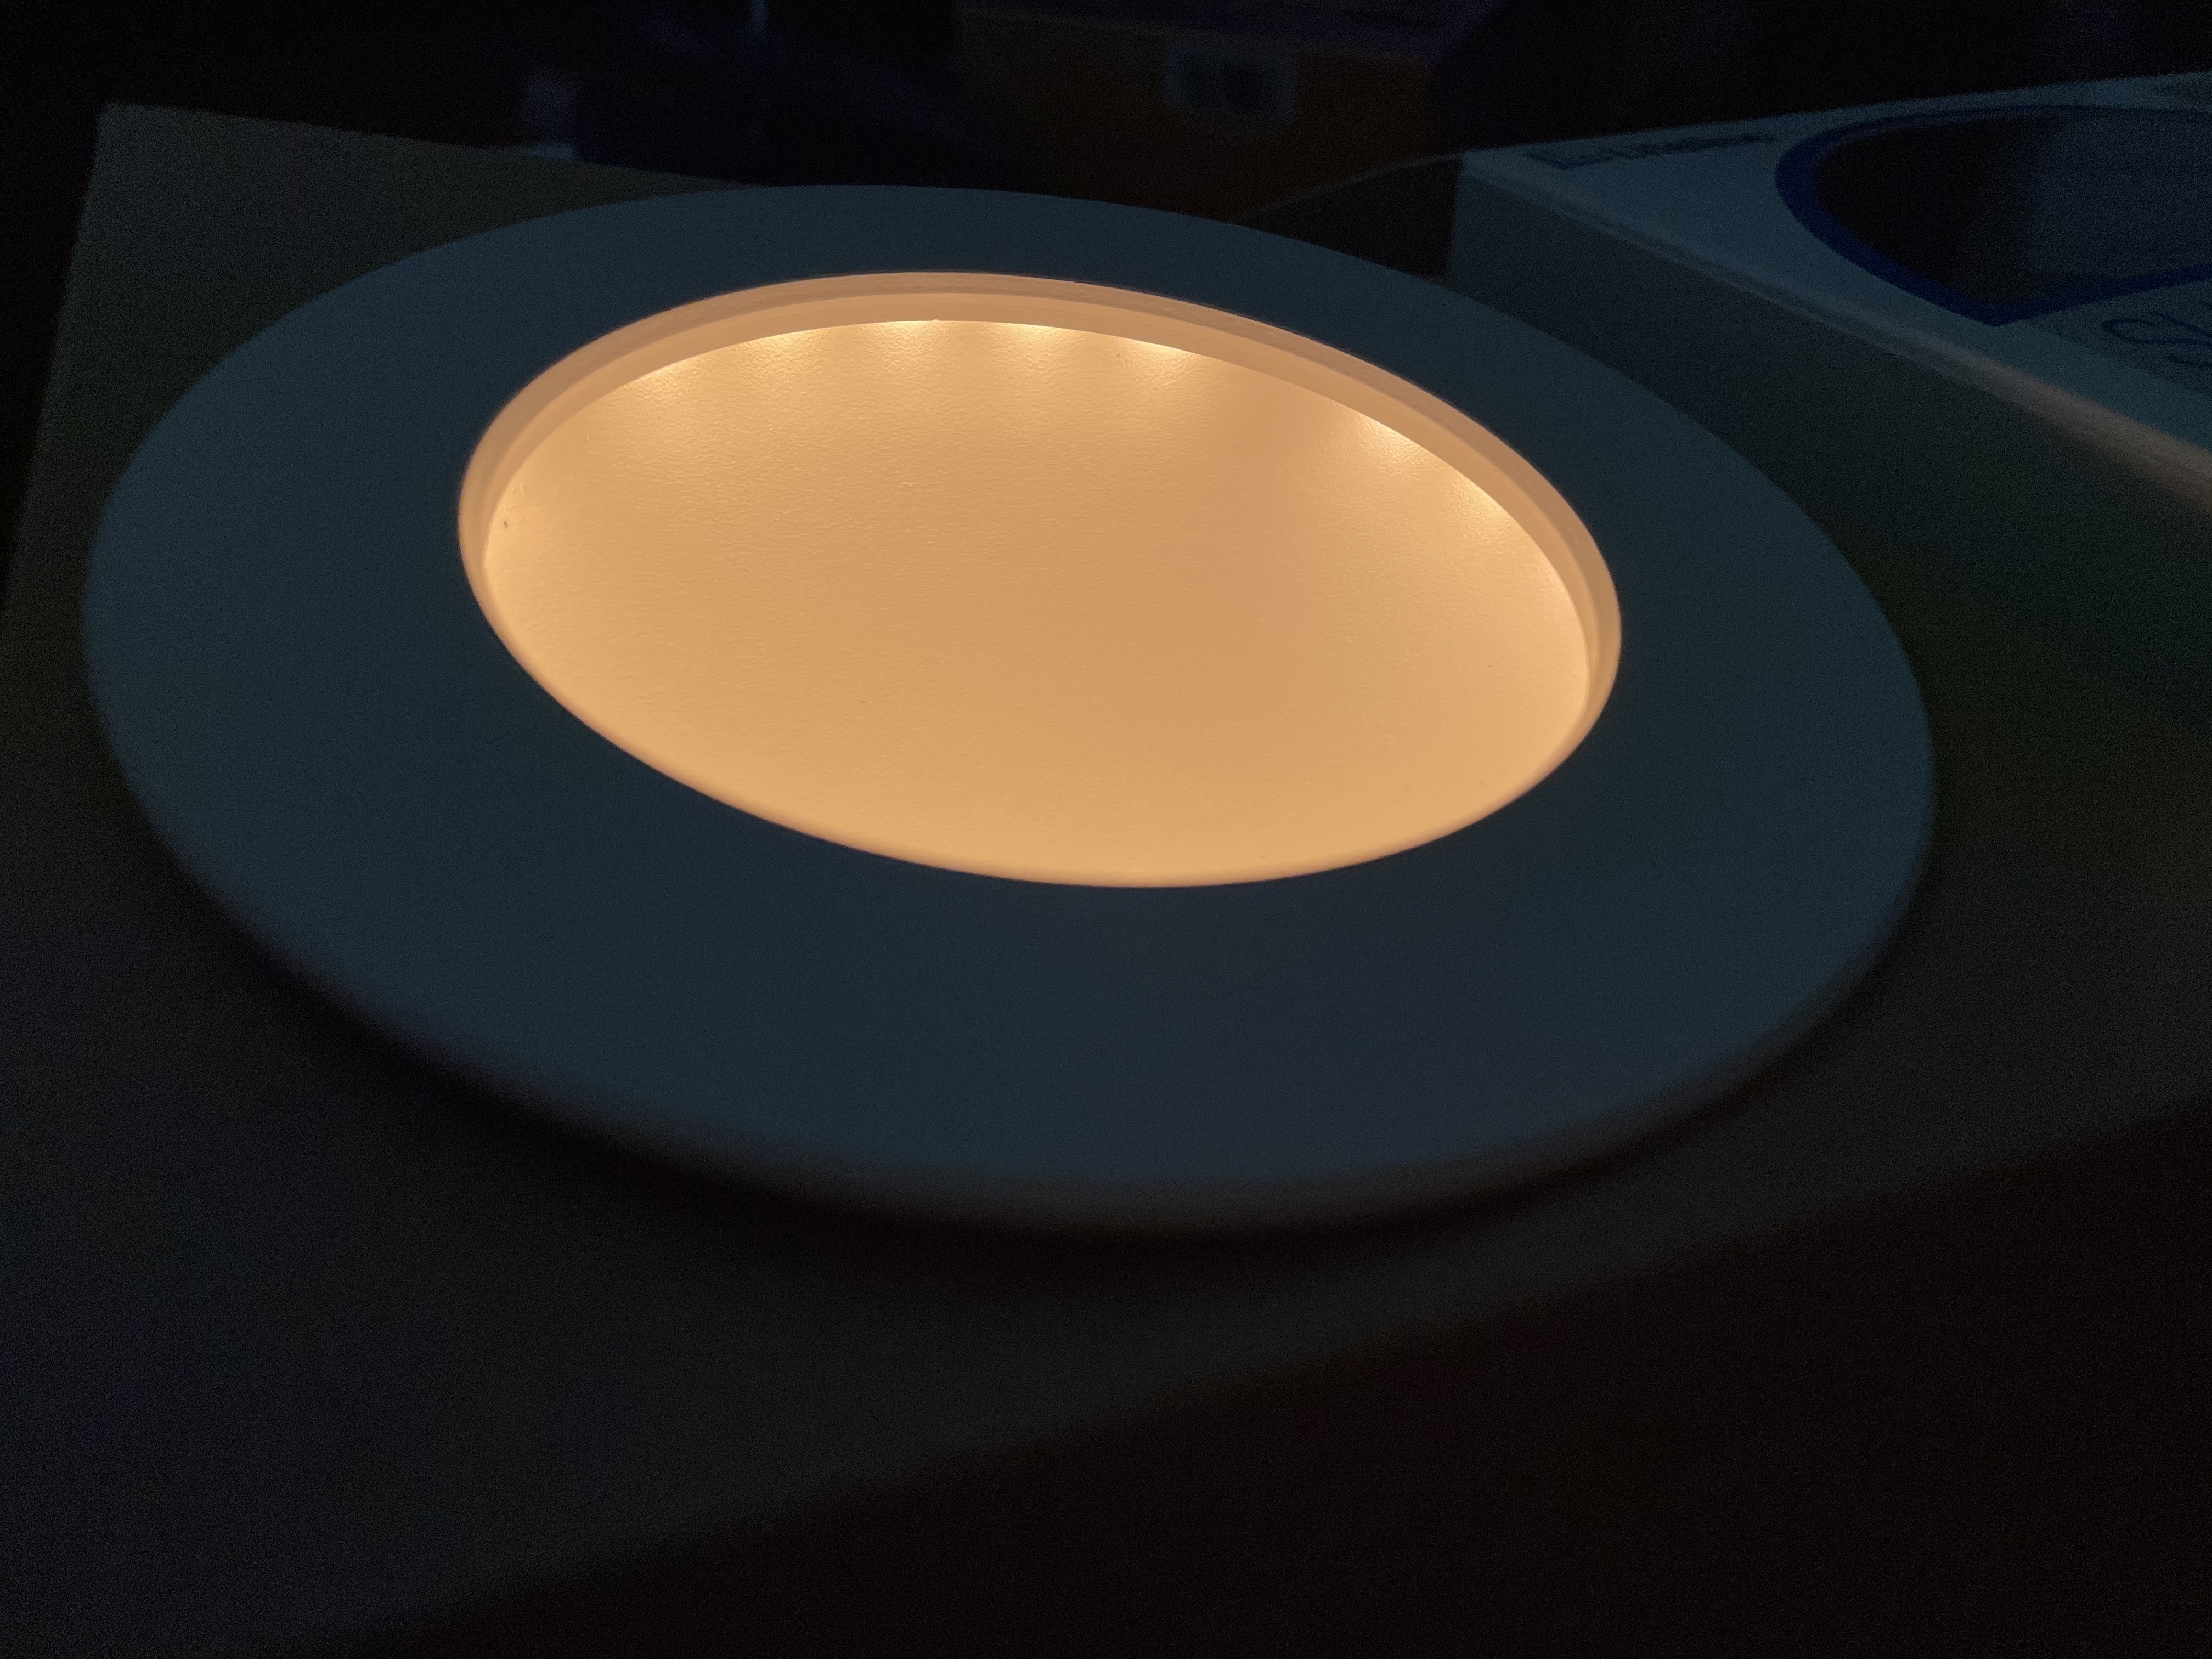
It is an “indirect” light – it lights are hidden on the rim and reflects off of the concave dome. You don’t really notice the dome when the lights are on, it just softens the light a bit. It also has dim to warm so the CCT is closer to 2000K on the lowest levels and then more on the 3000K side at full brightness.
It definitely still doesn’t check all the boxes still (notably it’s quite “step-y”, but maybe not the worst offender), but it’s the best option I could find, plus I am really into the DTW CCT.
Sorry for the meandering post. Hopefully there is enough useful tidbits in there to be helpful!