While we try to keep this article up to date, it’s often hard due to the many updates of both our firmware and SmartThings firmware. If any updates/edits need to be made to this article, please comment on this thread: https://community.inovelli.com/t/wiki-general-feedback-suggestions-thread/7399
Overview
This page will be discuss everything related to the Red Series Dimmer Switch and the SmartThings software (hardware made by Samsung or Aeotec).
Make: Inovelli
Model #: LZW31-SN
Amazon ASIN: X0026IBVJT
UPC: 850007431006
Setup Instructions
Quick Setup Instructions
If you are familiar with SmartThings and/or Inovelli switches and just need a quick guide to setup, remove and factory reset the Red Series Dimmer switch, please use the below instructions. However, if this is your first time with SmartThings and/or an Inovelli switch, please click on the the following link:Inclusion / Pairing
NOTE: If you want the advanced features of this switch, you’ll have to install the DTH. Please do this first following these directions: Red Series Dimmer DTH Installation Instructions
- In the SmartThings App, click on the (+) button, then “Device”
- Next, click, “Scan QR Code” (physical QR Code is located at the bottom left of your switch)
- Click, “Start”, select your hub and room where you’d like your switch to show up and click, “Next”
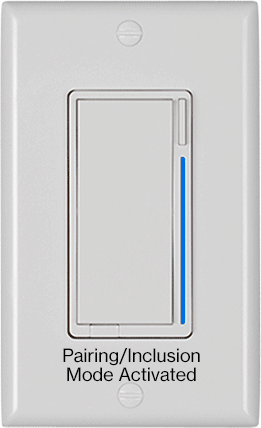
- Press the config button (Button A - Figure 1.1) 3x rapidly until it pulses blue.
- Once complete, the LED bar should flash GREEN if successful and you’ll be taken to a screen where you can rename the switch.
NOTE: Sometimes it will make you scan the QR Code again (please do so) or it will say something like, “Not all Security Features Implemented” – you can either ignore this (switch will be paired with S0 Encryption) or try pairing closer to the hub (to get S2 Encryption).
Exclusion / Removal
- From the home screen, click on the three lines at the top left of your screen to open the menu
- Click on the, “Devices” icon
- In the search bar, search, “Hub” and select your Hub
- Click on the three dots at the top right of the screen and select, “Z-Wave Utilities”
- Then press, “Z-Wave Exclusion” and the process will start
- On your Inovelli Switch, press the config button 3x rapidly (the LED bar should pulse blue)
- If the exclusion was successful, your Inovelli switch LED bar should turn from pulsing blue to GREEN
- In addition, the SmartThings app should say that your switch was excluded successfully
Factory Reset
To factory reset your device, please hold down the config button (Button A - Figure 1.1) for 20 seconds until the LED Bar (Button B - Figure 1.1) turns red and blinks (should timeout after 5 seconds). Please only do this if your SmartThings hub is not responding or is unavailable.
Full Setup Instructions
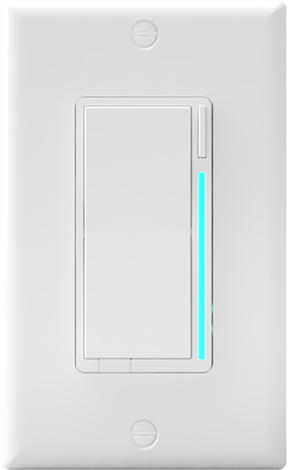
Before we go into the device setup instructions, it's important to note a couple of things.- You must have installed the switch into your wall and confirmed the LED Bar is lit up blue (it may be faint, but it needs to be lit up). For wiring instructions, please click here: LZW31-SN Wiring Schematics
- If you want all the advanced features (scene control, notifications, power monitoring, etc) you will need to install a device handler. We will go over this below here: Installing the LZW31-SN Device Handler
NOTE: Please read through the instructions from top to bottom for the easiest user experience. We tried to walk you through this from start to finish in the most logical order and have numbered them accordingly.
Installing Your Switch
Please click here for wiring instructions (right click and open up a new tab): LZW31-SN Wiring Schematics
Once the switch is wired up, please ensure the LED Bar (Button B - Figure 1.1) is lit up blue (it should be faint). Feel free to test your switch to see if it turns on/off your light.
NOTE: If your switch is setup in a multi-switch setting (ie: 3-Way, 4-Way, etc), you will need to program your switch to work properly. It’s easier to do this within SmartThings, so please follow the instructions below (#'s 2-4) first, before programming your switch. (INSERT HYPERLINK HERE TO PROGRAMMING INSTRUCTIONS)
Installing the Device Handler
NOTE: Device Handlers are often referred to in shorthand by using DTH (device type handler). Shorthand will be used to save on character space.
About
As noted above, if you’d like full functionality of your switch, SmartThings requires you to install special code, which tells the hub that the device has extra features available. It essentially unlocks all the advanced features. All code has been written by Inovelli and it should take 5 minutes to install it via copy/paste.
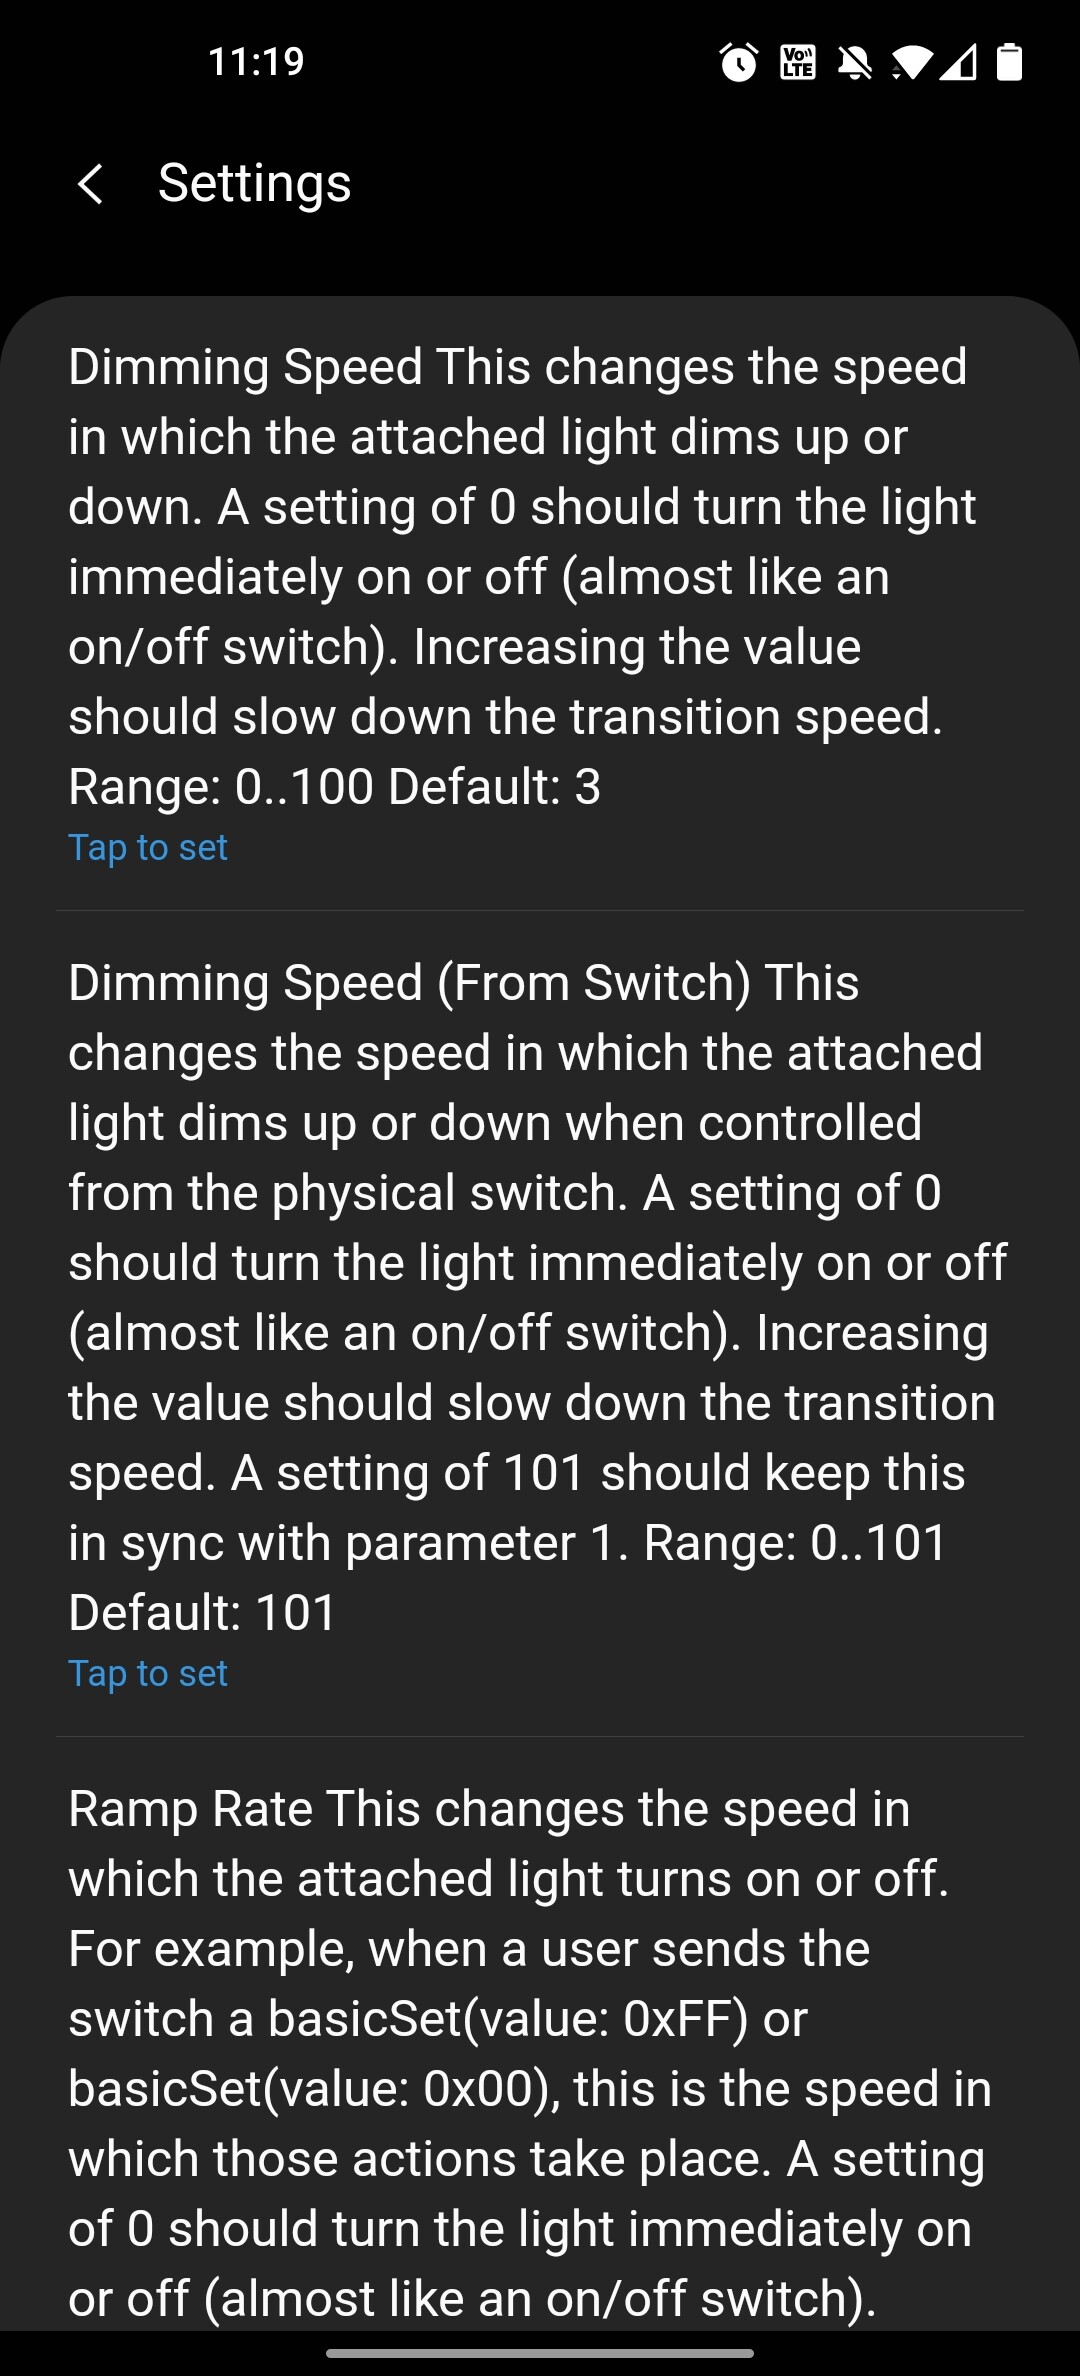
To see a full list of the parameters and extra functionality the Red Series Dimmer will receive, please click here: Red Series Dimmer Parameters
NOTE: If you’ve already included/paired your switch to SmartThings and have not installed the DTH, but would like to now, please follow the instructions below and then go to the section titled, “Applying the DTH”.
Prerequisites
Please right click the below links to open them in a new tab as you’ll need both windows open during installation.
- SmartThings IDE (sign in with the same info as you do with the app)
- DTH Code
Step-By-Step Guide
- Open up IDE and go to “My Device Handlers”
- Then click on, “Create New Device Handler”
- Next click on, “From Code”
- Now switch tabs and go to the LZW31-SN Raw Code link in GitHub
- Select all code and copy it
- Go back to the IDE tab (where you’re at the, “For Code” tab) and paste the code into the white box
- Scroll to the bottom of the page and click, “Create”
- Then on the next page, click, “Save”
- Finally, click on, “Publish” and “For Me” and you’re all set
(Insert Video Here When Ready)
Including / Pairing Your Switch
Please note the switch diagram below for reference in the instructions below.
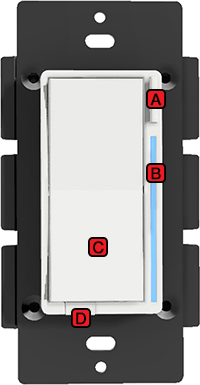
Figure 1.1 - LZW31-SN
NOTE: If you want the advanced features of this switch, you’ll have to install the DTH. Please do this first following these directions: Red Series Dimmer DTH Installation Instructions
- Open your SmartThings App
- Press the (+) button at the top right of the screen
- Click on, “Device”
- Click, “Scan QR Code” at the top right of the screen
- Scan the QR Code at the bottom left of your switch (faceplate should be off)
- SmartThings should start the inclusion process - click, “Next” and select your hub and room and then click, “Next” again
- On your Inovelli switch, press the Config Button (Button A - Figure 1.1) 3x rapidly and the LED Bar (Button B - Figure 1.1) will pulse BLUE (if it doesn’t, please tap the config button faster)
- If successful, your Inovelli switch LED Bar (Button B - Figure 1.1) will turn GREEN (if unsuccessful, the LED Bar will turn RED)

- In addition, your app will show a device called, “Inovelli LZW31 Dimmer” – feel free to rename it
- Click back to the main devices tab and look for your switch

Checking For Success
The last step in the process is to ensure everything was included/paired properly and your device is operating as it should.
- Open up your SmartThings app
- Locate your Inovelli Red Series Dimmer Switch and click on it
- First, try turning on and off your switch to check remote control
- If remote control does not work, please see: Remote Control Issues (HYPERLINK)
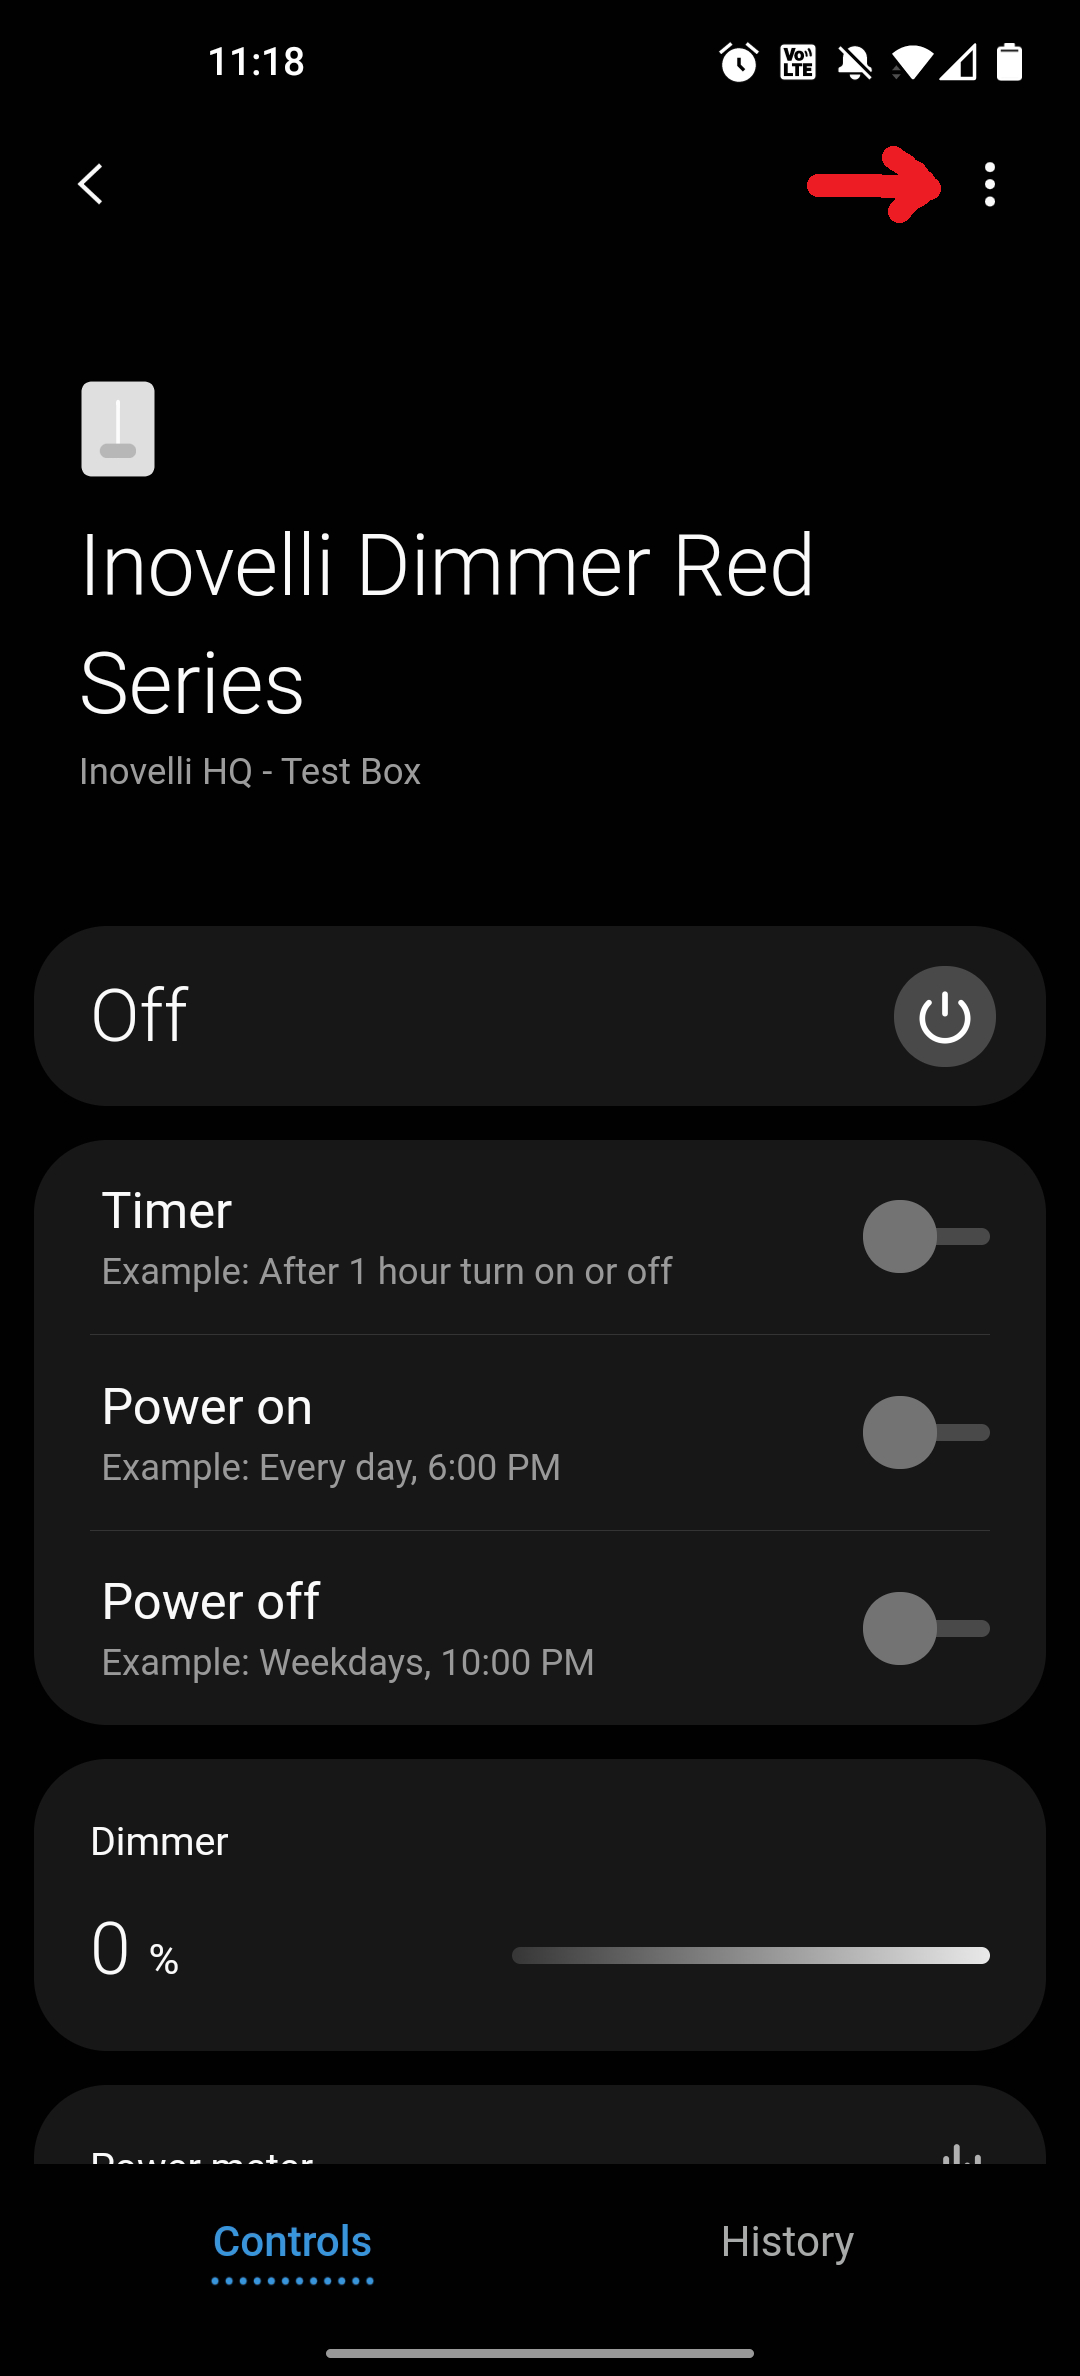
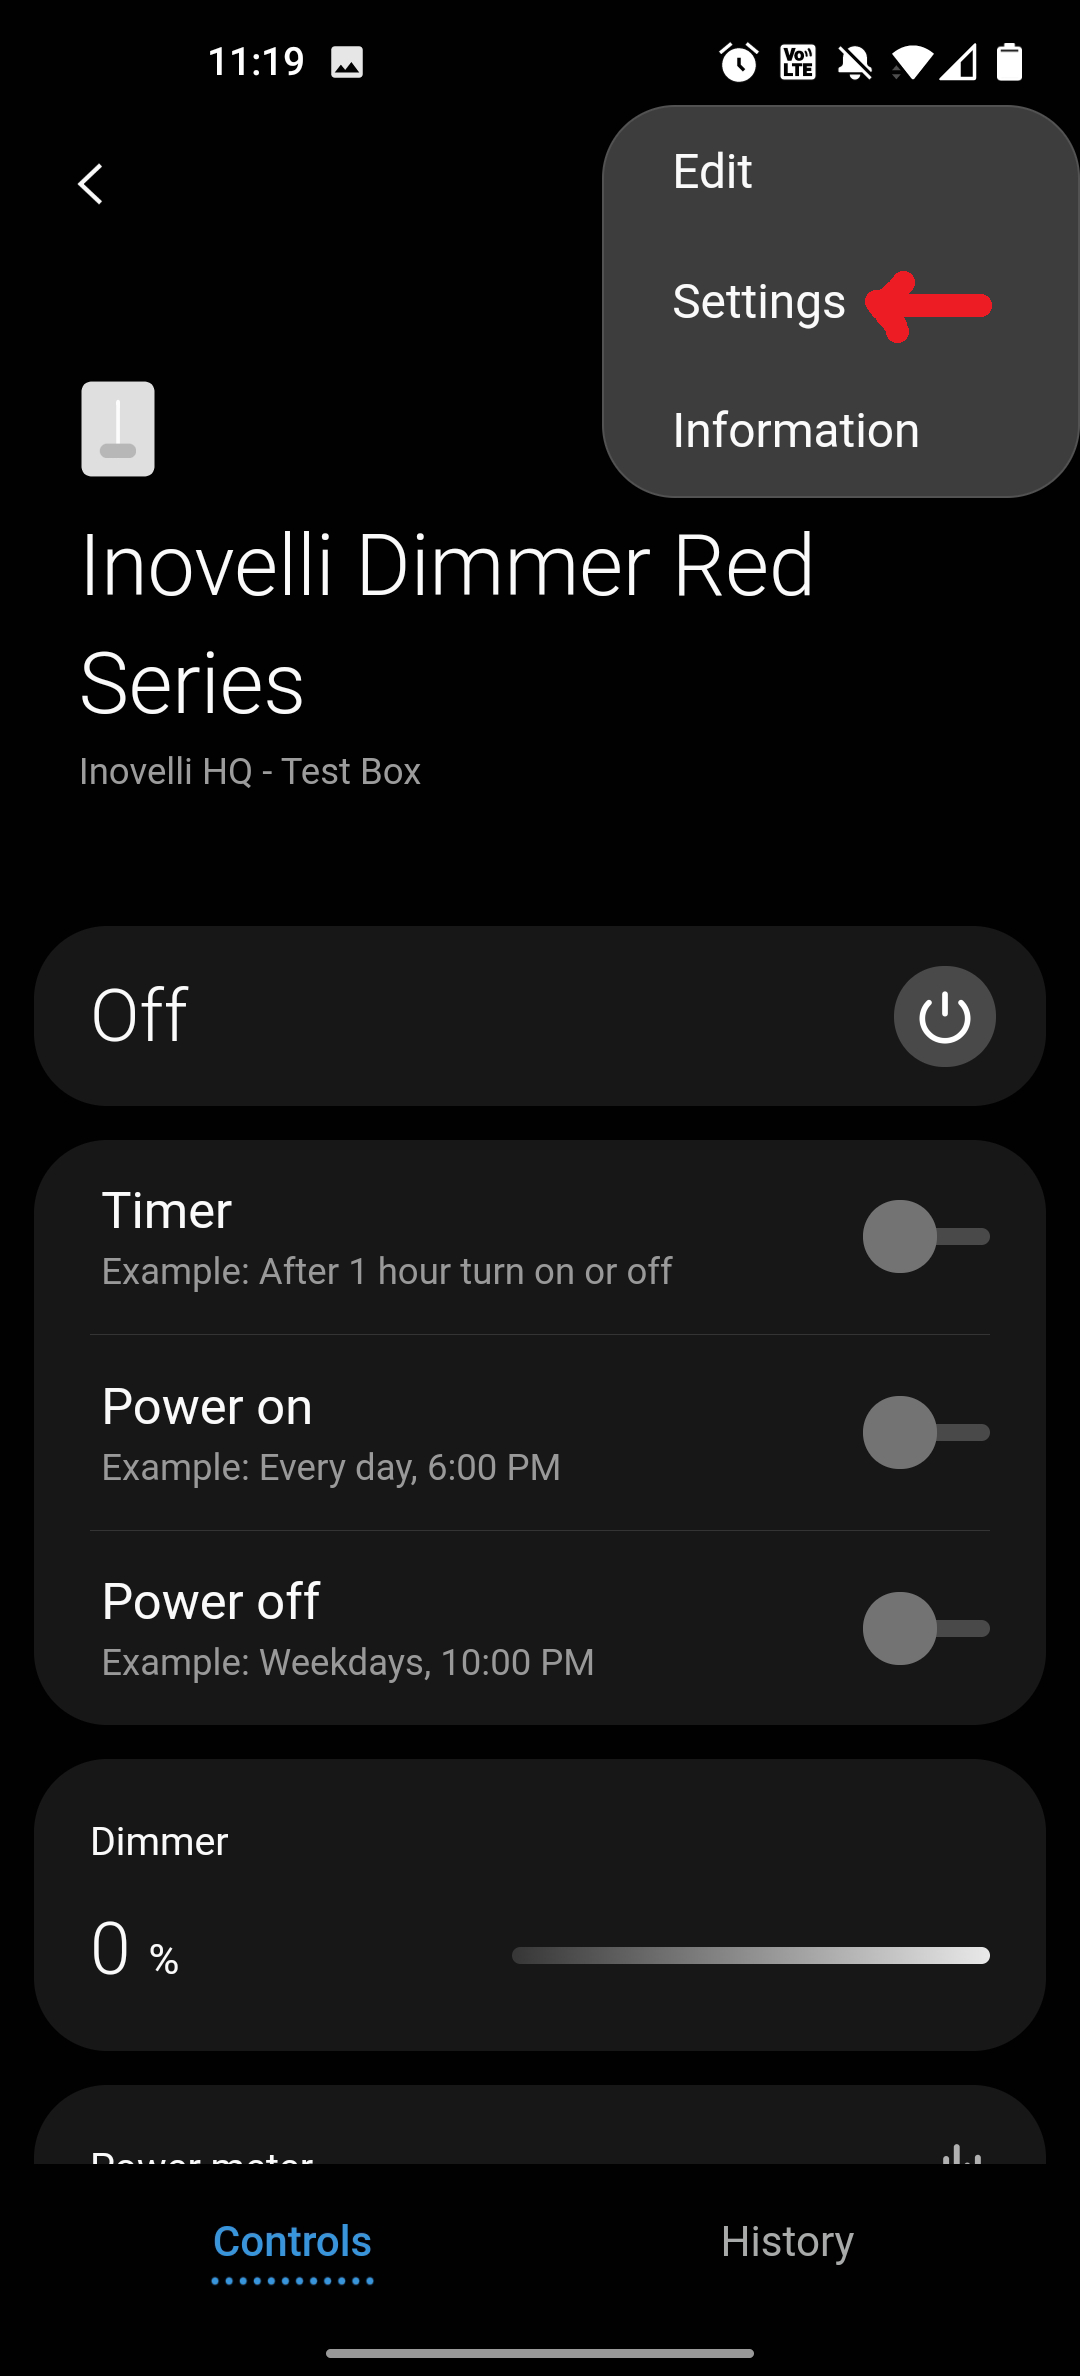
- Next, click on the three dots at the top right and select, “Settings” (shown in Figure 1.2 below)
- You should see a ton of options available to you now (starting with Dimming Speed) - (shown in Figure 1.2 below)
- If you do not see these settings, please see: Inclusion / Pairing Issues - Applying the DTH
Programming Multi-Switch Setups
If you have a switch that’s wired in a multi-switch setup (ie: 3-Way, 4-Way, 5-Way, etc), you will need to program it to work properly.
- In the ST App, click on your Inovelli device
- Next, click on the three dots at the top right and select, “Settings”
- Scroll down to where it says, “AC Power Type” and select it
- Select, “Non Neutral” if your setup does not have a neutral wire and press, “Ok”
- Select, “Neutral” if your setup has a neutral wire and press, “Ok”
- Next scroll to where it says, “Switch Type” and select it
- Select, “3-Way Toggle” if you are using a dumb/existing switch and press, “Ok”
- NOTE: You cannot choose this setting if you have a non-neutral setup – you must purchase an aux/add-on switch
- Select, “3-Way Momentary” if you are using a special add-on switch (GE/HomeSeer, etc) and press, “Ok”
- Select, “3-Way Toggle” if you are using a dumb/existing switch and press, “Ok”
- Go back to the home screen and wait a few seconds for SmartThings to change the parameters – then test out your switches
How-To's
Now that your switch is setup, it’s time to explore some things you can do with it.
List out how-to Wiki’s (will likely link to other pages). Maybe we break this down into categories with hyperlinks to specific wiki’s.
Troubleshooting
Inclusion / Pairing Issues
Switch Will Not Include / Pair
There are a few reasons why your switch will not include/pair and below will walk you through some common solutions. Before we start any of these, it’s important to make sure the LED Bar (Button B - Figure 1.1) is lit up blue.
If it is not lit up and is gray, please check your wiring and ensure there is power to the switch. None of the below solutions will work if the LED Bar is not lit up.
Please try the below in order:
- Exclude the switch (once complete, try inclusion/pairing again)
- If the switch LED bar still turns red and the switch is unable to exclude, please move onto #2
- Factory reset the switch (once complete, try inclusion/pairing again)
- If you still cannot include the switch, please move onto #3
- Check Z-Wave Range
Advanced Features Not Showing Up
In this case, the switch has paired properly and you’re able to operate the switch locally and remotely, but none of the advanced features are showing up (as shown in Figure 1.2). The most common solution to this is to ensure the Device Handler (DTH) was installed applied correctly.
- In IDE, click on, “My Devices”
- Locate your Inovelli Red Series Dimmer Switch and click on it
- Scroll to the bottom and click, “Edit”
- Scroll down about halfway where it says, “Type” and click on it (a dropdown will appear)
- In the dropdown, scroll down until you find, “Inovelli Dimmer Red Series LZW31-SN” and select it
- Click, “Update” and you should be all set