[HOW-TO] Using the Z-Wave Association Tool in SmartThings

The Z-Wave Association Tool is a SmartApp that was created to allow our customers to easily create device-to-device “associations” with Inovelli devices and other compatible Z-Wave devices. The tool requires special code to be present in the device handler so it will only work with Inovelli devices. Anyone is free to add the code to other device handlers though if they would like.

The purpose of a direct association is to have one z-wave device speak directly to another to create something like a “virtual 3-way” between two switches, or have a dimmer be able to directly dim up & down bulbs in real time. The communication is usually much faster than if it were to go through your hub and the hub is not required for the association to work after it is setup. For example, the hub could even be completely shut down and the 3-way or the communication with the bulbs would still work.

Code
The most up-to-date code for the app can be found here. It consists of 2 pieces of code that need to be installed in the “My SmartApps” section of the SmartThings IDE. One is a parent app and one is a child.

Parent App

Child App

Terminology
Source Device:

This is typically going to be the device that does not have the “load” (or light) attached to it. It is the device that you want to use to control the other device. Generally an Inovelli Switch or Dimmer.

Destination Device:

This is the device that you want to be controlled. If it is in a virtual 3-way, it is the switch or dimmer that has a “load” (light) attached to it. Technically, you can put multiple devices in this group which may be the case if you are trying to control multiple bulbs.

Group

An “association group” is a z-wave concept that lets you define a “group” of devices that are controlled from a “master” device. The groups can have different capabilities, but our devices use these particular groups:

Group 2: Used to send ON / OFF commands to the devices in this group.
Group 4: Used to DIM UP / DIM DOWN devices in this group.

So, when you create an association from a switch to another, you simply need to create an association for group 2. When you create an association for a dimmer device, you configure an association for BOTH groups 2 & 4.

Now that this is defined, below is a simple step by step on how to create an association for ON / OFF.

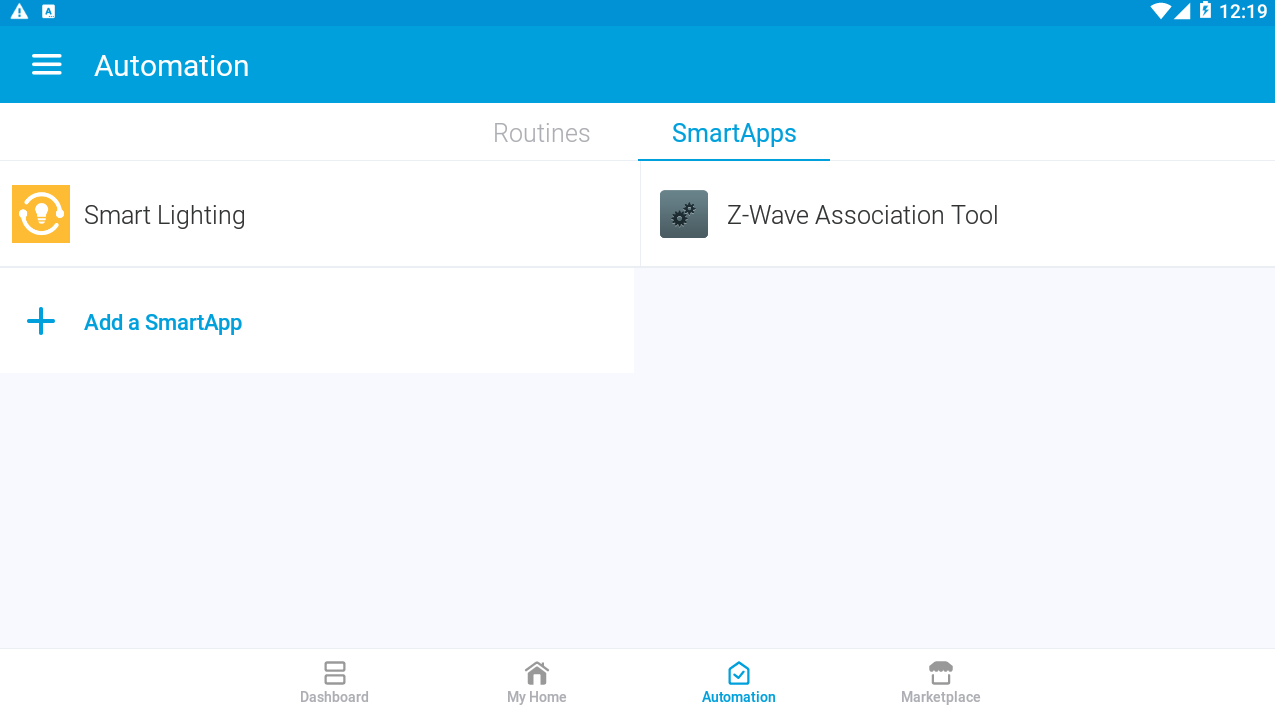
First, we open the Z-Wave Association Tool app from the “SmartApps” section of the SmartThings app.

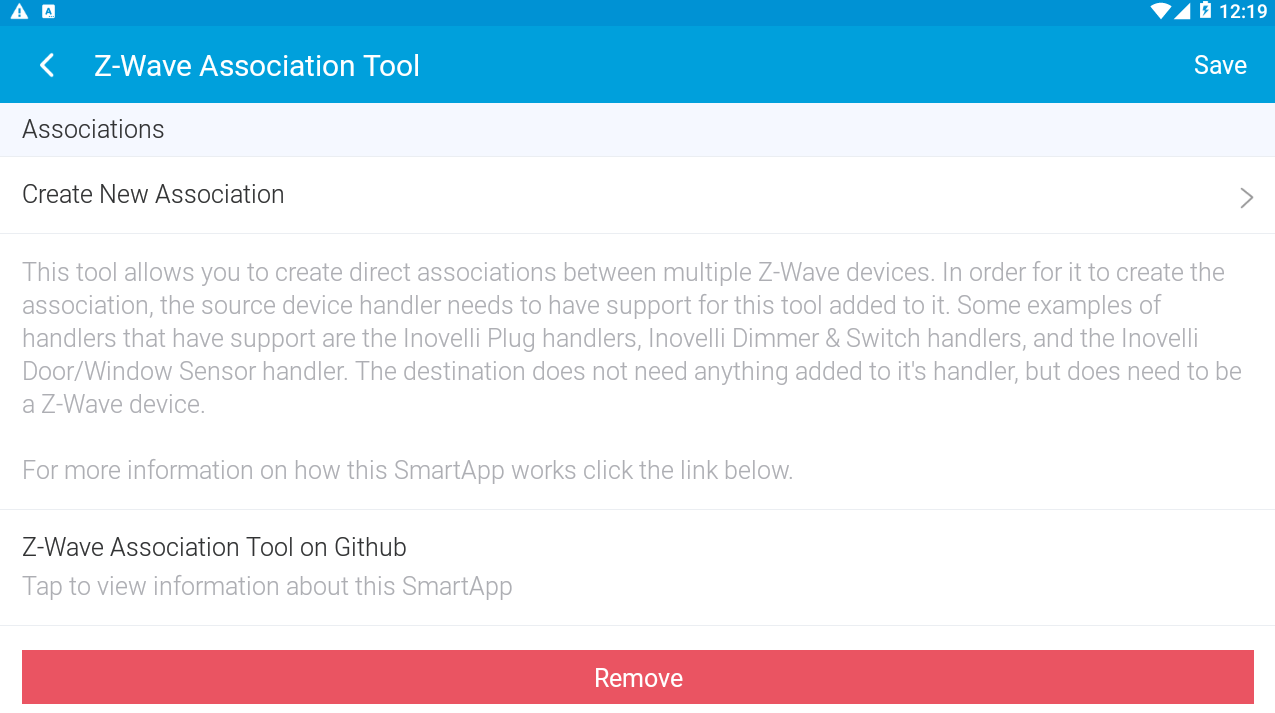
Next, click on “Create New Association”

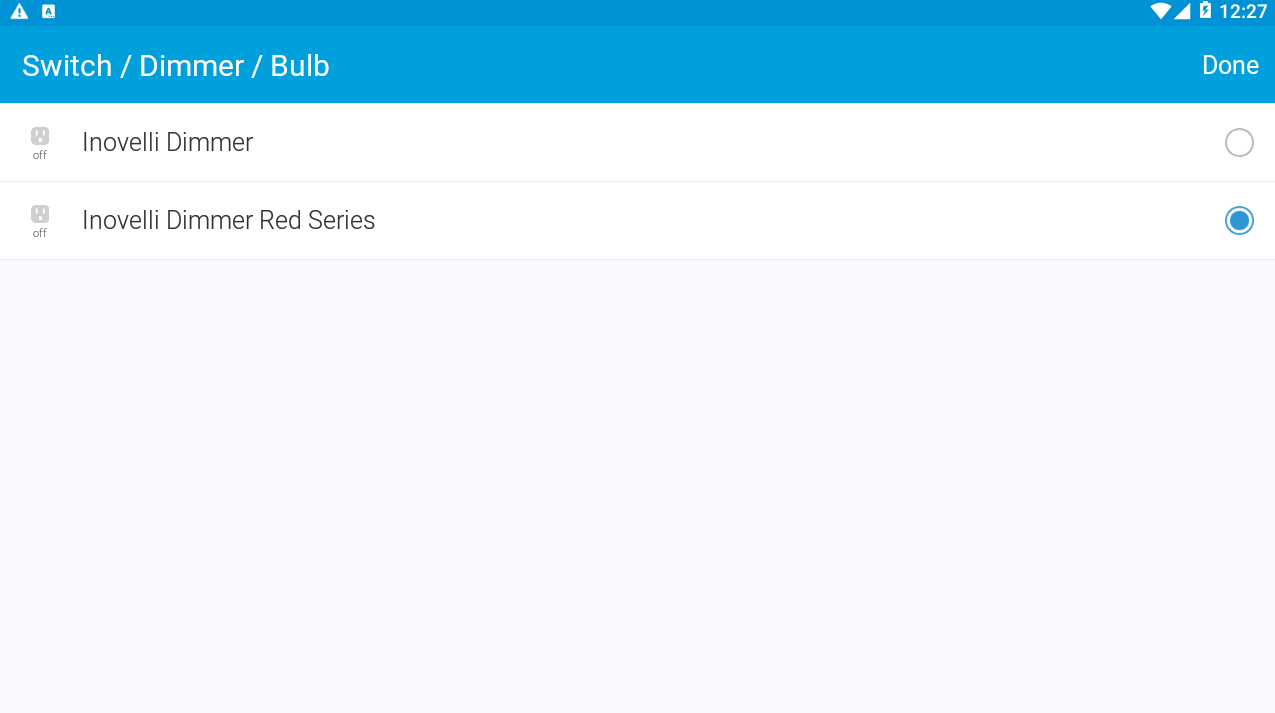
Then, click the “capability” drop down and choose “Switch / Dimmer / Bulb”. Next, select the source device. Use the terminology above to decide which device you want to be the source. It is the device that you want to use to control the other(s).

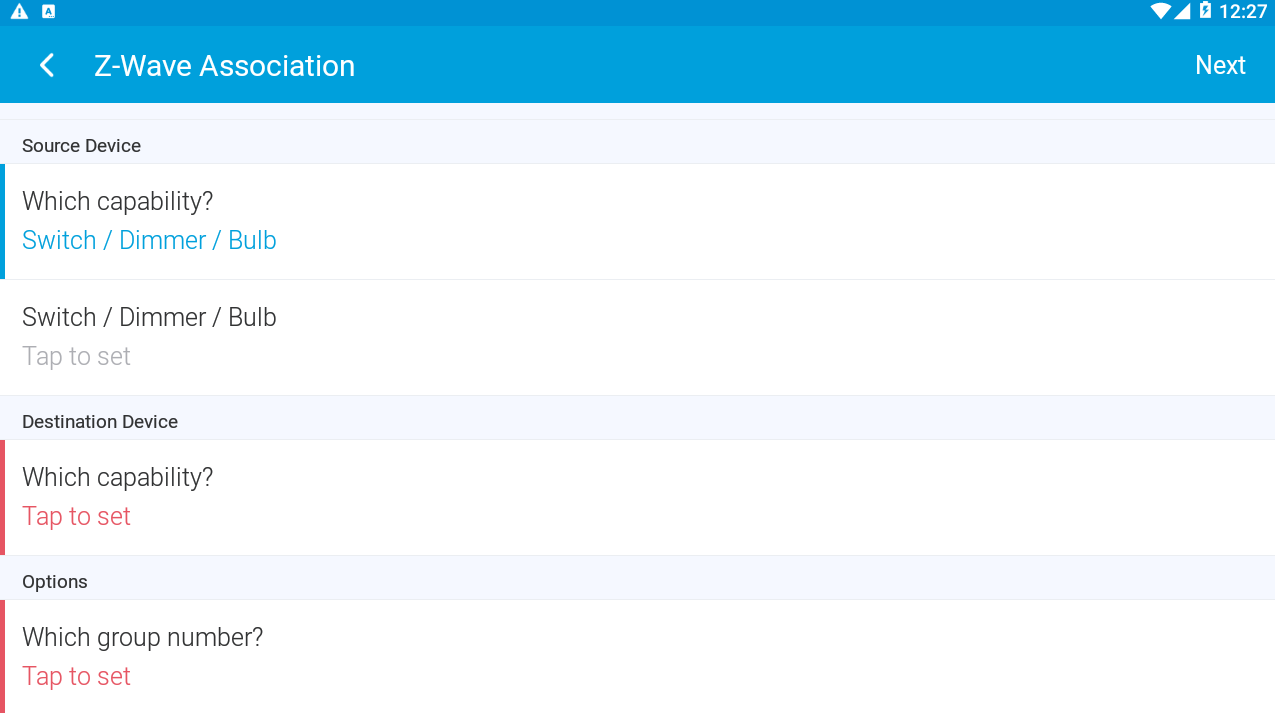
For the destination device, choose “Switch / Dimmer / Bulb” and select your device(s) as needed. Also, use the terminology to determine which devices to choose here. They are typically going to be the devices that you "want to control.

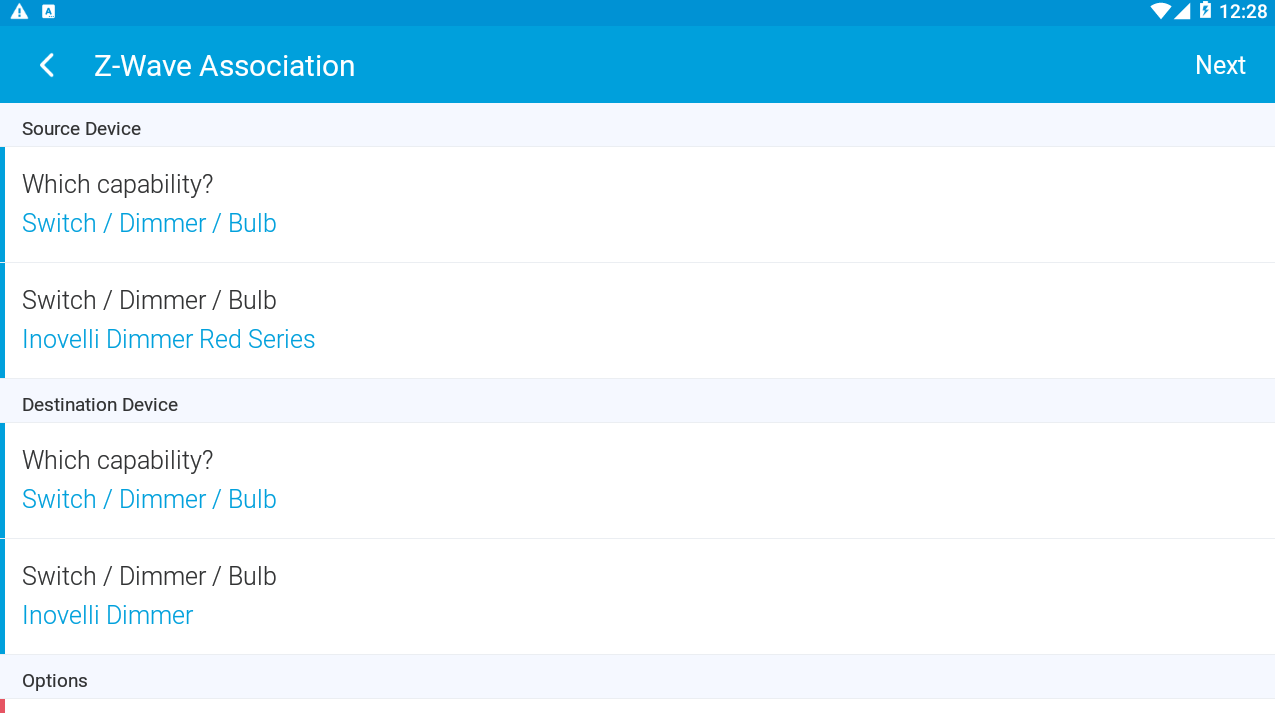
Lastly, select the group that you want to use in this association. Group 2 to control ON / OFF or Group 4 to control DIM UP / DIM DOWN.

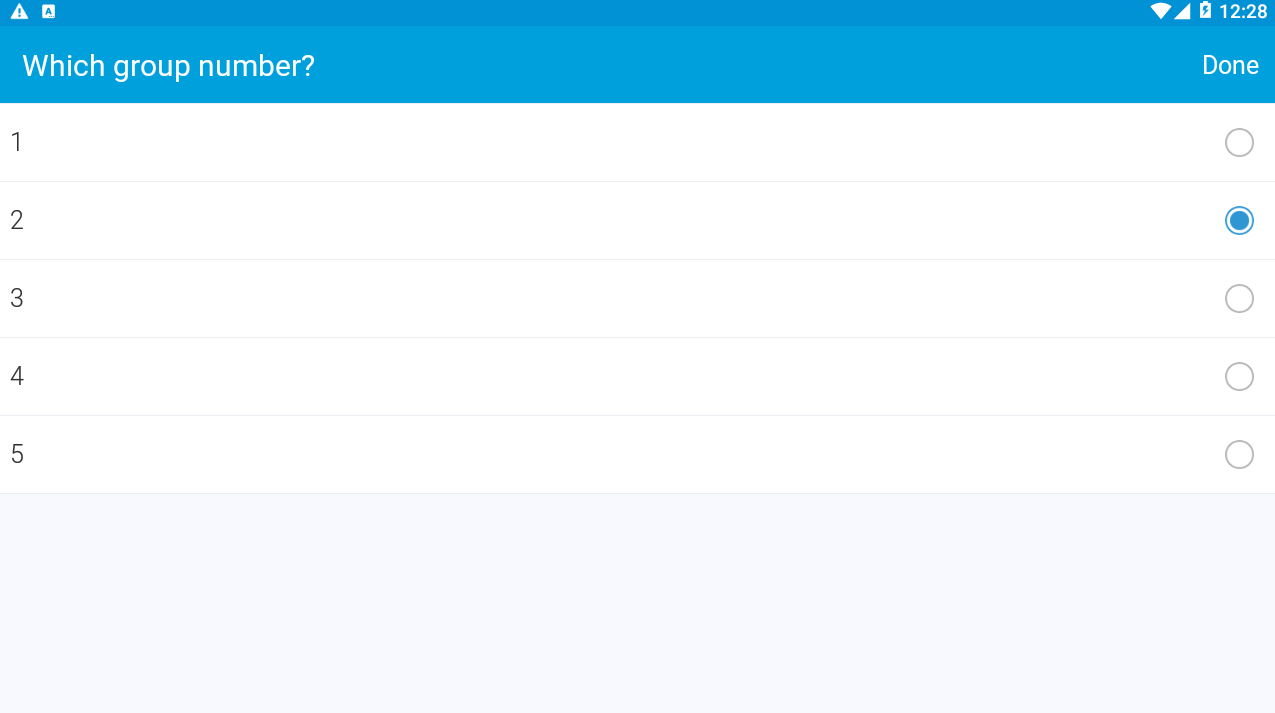
Note: When using a dimmer you are likely going to want to control BOTH ON / OFF & DIMMING. You will need to go through the process shown above again and create a second association for the other group.

In the end it would look something like this:

That should be it. After a few seconds the app will configure the associations on the “Source” device and you should be able to start enjoying the benefit of direct Z-Wave associations!

Troubleshooting

A common issue with SmartThings is when one device gets included with z-wave security and one doesn’t. When this happens, the devices can’t communicate with each other. To see if that is the case, look at the “Raw Description” of each device. For secure devices the “zw” entry will show Ls. For non-secure devices the “zw” entry will show just L. See the images below.

Secure

image

Non-Secure

image

If this happens, you need to exclude and include the devices until they match. Since SmartThings tries to do secure pairing first, I recommend that you exclude the non-secure device(s) and try again until they pair secure.

If you are interested in adding the association tool code into your own device handler / driver, check out this post:

3 Likes

Seriously? If this is what I think it is I’m going to be very very happy. :hugs:

I’m looking forward to testing @EricM_Inovelli :slight_smile:

Missing a huge opportunity here to assign direct associations for multi-tap like all Jasco switches/dimmers have. That’s really the only thing stopping me from replacing my GE dimmers. A separate group for each #x tap would be ideal.

This has definitely been on our list for a while. It may not make firmware 2.0 because that version is focused on bug fixes + a few extra features, but it is planned.

:heart::heart::heart::heart::heart::heart::heart::heart:

Can’t wait!

@EricM_Inovelli - thanks for this guide. So I’m trying to set this up in a room where I have a red series dimmer tied to 6 sconce wall lights…each with an illumin bulb in them. Can you show us what we need to do in the settings of the red series dimmer to make it where it doesn’t turn off the load, but turns off & dimms the bulbs using the association? Am I supposed to disable local and remote control from the switch or from the child devices (bulbs)…very confused.

A few comments for you. First, the association group only supports 5 devices. :frowning:

Other than that I recommend that you configure the dimmer as follows:

  • Local control disabled
  • Set the “Dimming Speed” option to 0 (this is the first preference option).
  • Dimming speed (from switch), Ramp rate, Ramp rate (from switch) should be set to 101 (to keep them the same as the “Dimming Speed”.
  • Default level for local & Z-wave to 100
  • State After Power Restored to 99

You can disable remote control as well, but remember that if you ever need to turn the switch off or change a setting, you need to enable remote control to do so. This includes setting up the associations. So if you have remote control disabled and you try to setup the associations with the tool, it won’t work.

Try setting it up with Group #2 first and test it. On & Off should work in this test and once everything looks good, you can try group 4.

With all of this in mind, check the “Troubleshooting” section in the first post if you are still having problems.

1 Like

Does the LZW31-SN support secure pairing? I’ve excluded and re-paired it multiple times but never pairs securely.

Yes, it does. It supports S2 security and will downgrade to S0 if S2 fails.

Are you using SmartThings? You might want to try to reboot your hub or make sure you aren’t on the edge of your z-wave range.

Yep, using SmartThings and the switch is actually 5 feet nearer my hub than another that is paired securely. I gave up on getting it to pair securely and just swapped out the dimmer switch nearby that did pair securely. I needed to associate it with an inovelli switch at the other end of the 3-way setup since I couldn’t make the 3-way work with a dumb switch or auxiliary switch. That’s a whole different conversation, but I was tired of going down that rabbit hole and found an alternate solution. Anyway, it’s all good now, just wish there was an easier way to set up securely.

Yeah, it definitely bugs me that you can’t choose what type of inclusion you are doing in SmartThings.

Some devices I’ve used in the past had one sequence for a secure join and another for an insecure join. Hubitat blocks secure joins from all but locks and garage door openers by default so it isn’t generally an issue there.

Yep, you are correct. Hubitat does allow you to change the setting to secure join every device, but it is disabled by default.

Quick question (apologies if this is a stupid question, but I am new to this) - I have a scenario where I have a hallway/entrance light and a stairway light (neither are smart bulbs). They are on separate circuits and are on 2 separate Inovelli switches. I would like for both lights to turn on/off and dim together and to be able to control this from either switch. Would your solution posted here help to create the functionality I have just described?

Thanks in advance!

It sounds like this can be accomplished with using association groups 2 & 3, but I actually haven’t tested that setup.

One issue might be that the destination switch would only change its level after you let go of the button on the source switch. So, say both switches are at 90% and you hold one down to dim down to 20%. The other switch won’t dim down to 20% until you release the button on the first switch. That might take some getting used to.

I have installed both parts of the App from the links above in SmartThings IDE “My Smart Apps”, however the app never shows up in my Smarthings app (classic or the new one). It should be under Automation/Smart Apps. I have installed, uninstalled, installed again over the last two days multiple times but the app never shows up. I could use some help. Other apps (WebCoRe) i have installed this way have worked.

Hi Sir! I have another issue with the association tool. Could you please give me some advice/guidance on this one? Dimmer LZW31-SN Red SmartThings - Dimmer not joining Association

Hi @Bingwit, the app should show up as described. Did you make sure that the app is installed and published?

Also, you need to install the app in the SmartThings app as well.

Automation > + Add a SmartApp > My Apps > Z-Wave Association Tool

I setup an association between two dimmers in a 3 way configuration. I wanted both of them to constantly be in sync no matter which you controlled.

Here is what I had to do.

On each device I had to set the association behaviour (parameter 12) to local. The reason being is I found it created a loop of I left it at all. Watching the logs the devices just kept sending the changes back and forth to each other. Setting it to local only it would only send the change when controlled at the switch. The one downside is they don’t stay in sync if I operate them remotely. I’m still playing with this.

Then on each dimmer I added the other dimmer to groups 2 and 3.

Everything seems to work fast and better than using the hub. If I turn on or off either switch the other does the same. If I dim either switch the other does the same. And only one of the switches is actually controlling the light.

I’m trying to figure out how I can keep this functionality working when sending commands remotely and avoiding the loop mentioned above. It must be one of the association behaviour options.