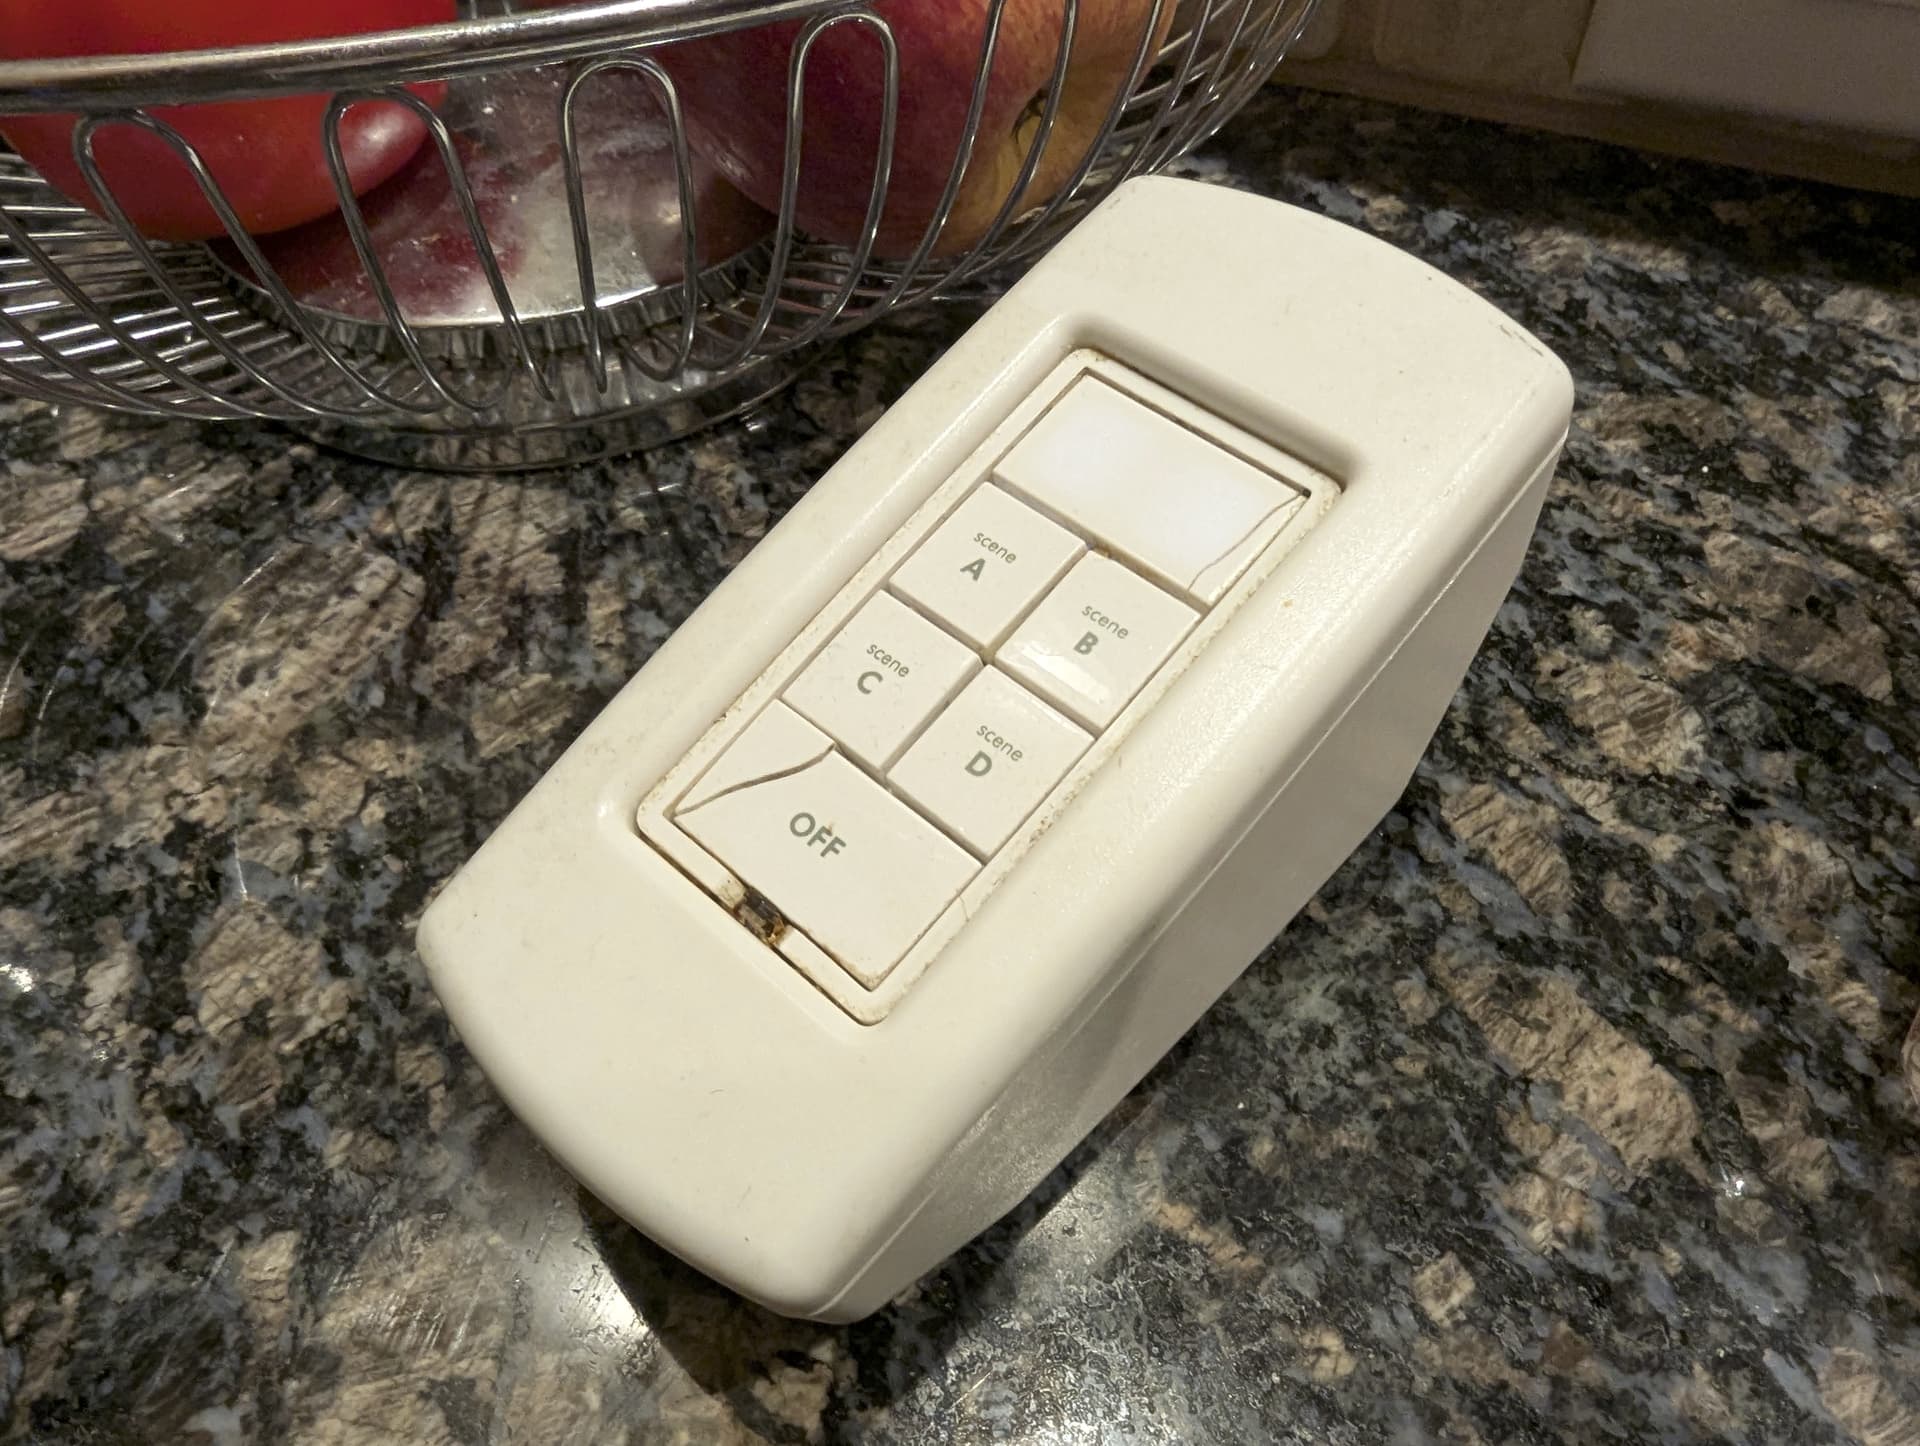
I’d love a nice looking table top case so I can turn a smart paddle or button switch into a table top controller and not look like a junction box with a faceplate. My inspiration is an old Insteon enclosure which does just that,
It’ll have heat set inserts in the front plate and screw together from the back for a totally clean look, I’m working on those details next.
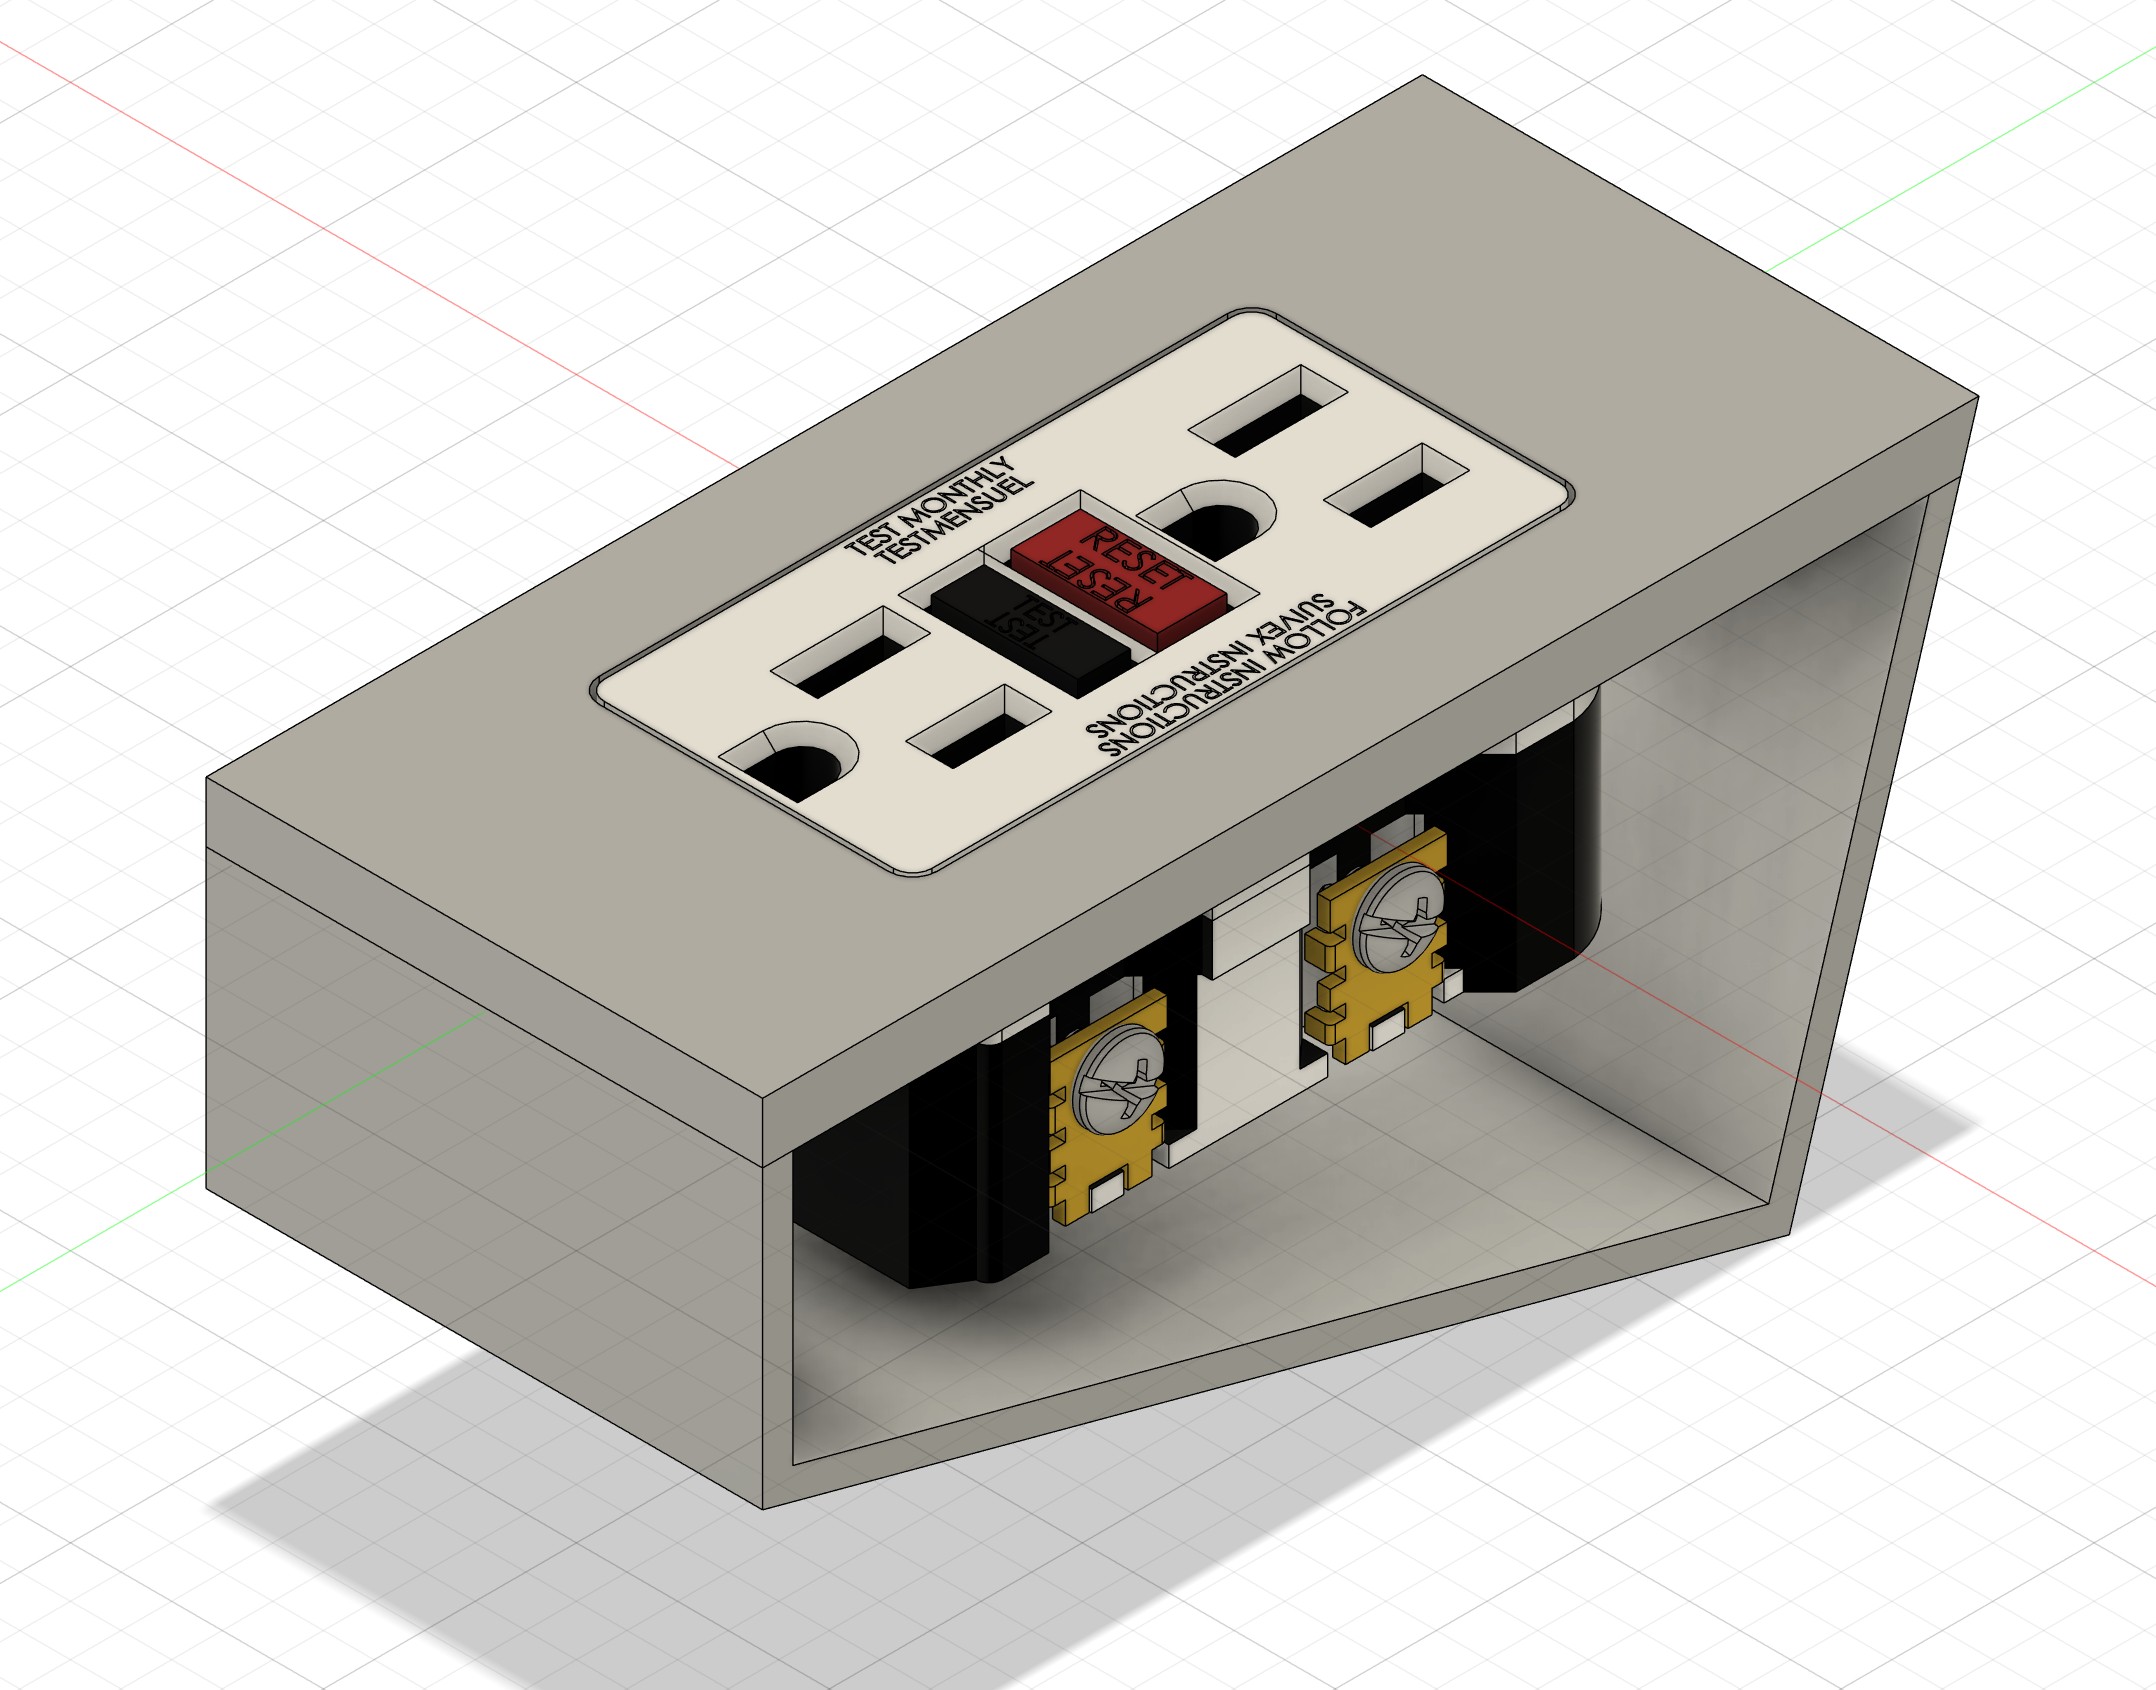
I’ll share it on Makerworld for free when it’s done, and don’t worry it’ll be a bit more refined by then. I was wondering if maybe @EricM_Inovelli might be willing to share with me a STEP model of a Blue Series switch just so I could replace the GFCI with the real thing and make sure everything fits nicely? Doesn’t really matter much which device assuming they have similar dimensions, the upcoming button controller would of course be the coolest example.
Wired devices, this is to make a wired desktop controller out of any of the devices you’d normally put in a switchbox. Also don’t be thrown by WIP picture not having sides, I’ll add those after I deal with the internal mounting structure.
I’d look around and see if they provide a spec on internal dimensions and such so that yours is compatible with as many different sized 1 gang devices as possible.
Kind of, but prettier. The Insteon and my design won’t use a traditional front wall plate and can have curved surfaces so they don’t look quite so boxy. The space inside the box isn’t likely to be a big issue as long as I don’t make it too shallow, that’s why I used a GFCI outlet model as a stand-in. The Insteon devices had wires coming out of the device so you had to leave space for wire nuts. The Inovelli devices have screw terminals which eliminate that need.
My design is fully parametric in Fusion, so very easy to tweak later or even have multiple sizes/depths.
The Insteon one is a bit dated and puffy looking. I’m not a design genius by any means, but I’ll try to do something clean and minimal with no visible screws on the top and just a little softening on the edges.
No, because I don’t want any control box on my nightstand. Siri on my Apple Watch can do everything that I would ever need to do from the bedroom.
However, I do use a gray plastic electrical box with a lamp cord on it to provision and test all of my switches. Having an angled box to do that would be nice…just not $109 nice…
I was looking for something like this a while ago. Came across the FSR one and decided not to with the price. Also looking forward to stl file to print one.
@EricM_Inovelli Can you send me a STEP file (or anything else I can import into Fusion) that I can use instead of the GFCI outlet? I don’t need full details of how every piece of the switch goes together, just a good representation of the exterior details.
Insteon sold or still sells desktop modules like the one you are working on that would hold the inovelli products. (Tabletop Enclosure Kit for Keypads and Switches – Insteon). not advocating you purchase them from Insteon as I had over 100 of their products and couldn’t wait to get them all out of my home for inovelli matter products. I did have a few of these laying around and also wanted to print something similar. if you do happen to finalize the design or I can take a stab as well I would be more than happy to print these for folks who are interested.
Thanks, that Insteon enclosure is my inspiration for this, I’ve got one on my kitchen counter that needs to go away. I know I want one to hold the Inovelli Smart Button Controller & Dimmer when that comes out. I’ve got the basics of a design, I just need to work out the internal screw guides and method to bolt everything together. It’ll use a pair of heat set inserts in the top and screw from underneath. I’d like to use 3mm socket head bolts and the heat set inserts I’ve got around, but that remains to be seen.