[HOW-TO] Hubitat: Setting Up "Scenes" in Rule Machine

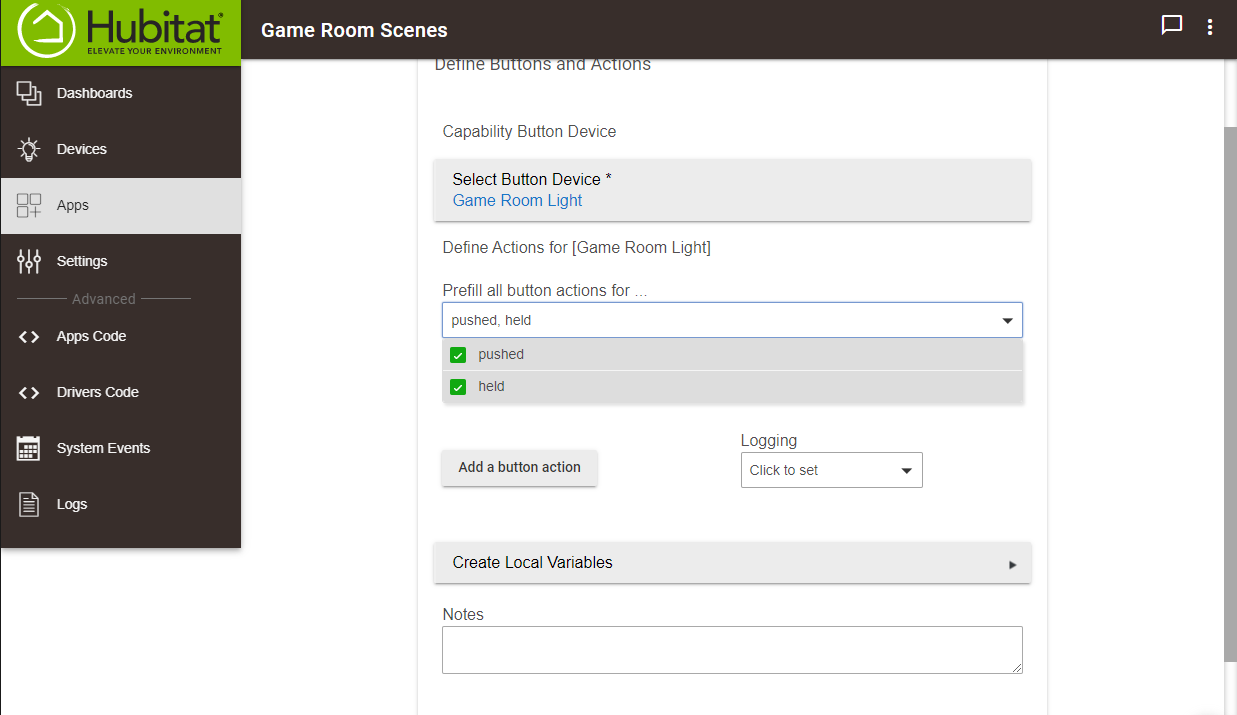
Note: If you don’t see the option to “Prefill all button actions for”, first go into the Inovelli device page and hit “Save Preferences” with our driver installed. This will send the “numberOfButtons” event that is needed for that option to be present.

Our Red Series dimmer and switch support the nifty feature of Z-Wave “Central Scene Command Class”. This is the technical term for what we simply call Scenes. When a scene is activated (by a double, triple, quadruple, etc. tap on the switch), a number of actions can be triggered. For example, a scene could turn all the lights in the house off or turn your Philips Hue bulbs a certain color. Maybe you triple tap on the down button to lock all of your doors or press on the switch’s config button to have your Sonos speakers start playing. These may be called “Routines” on other platforms.

Here is a screenshot tutorial of how to use “Rule Machine” in Hubitat to take advantage of this feature. Remember, this feature is available on our “Red Series” line of switches.

Since systems like Hubitat and SmartThings don’t natively support Z-Wave Scenes, we convert the events sent by the switch to button events. Here is the mapping of button events to use below during Rule Machine configuration:

Button Mappings
1 pushed - Up 1x click
2 pushed - Up 2x click
3 pushed - Up 3x click
4 pushed - Up 4x click
5 pushed - Up 5x click
6 pushed - Up released

1 held - Down 1x click
2 held - Down 2x click
3 held - Down 3x click
4 held - Down 4x click
5 held - Down 5x click
6 held - Down released

7 pushed - Config button 1x click

Button 8 was later for those that want to differentiate the button held event vs. button released event.

8 pushed - Up held
8 held - Down held

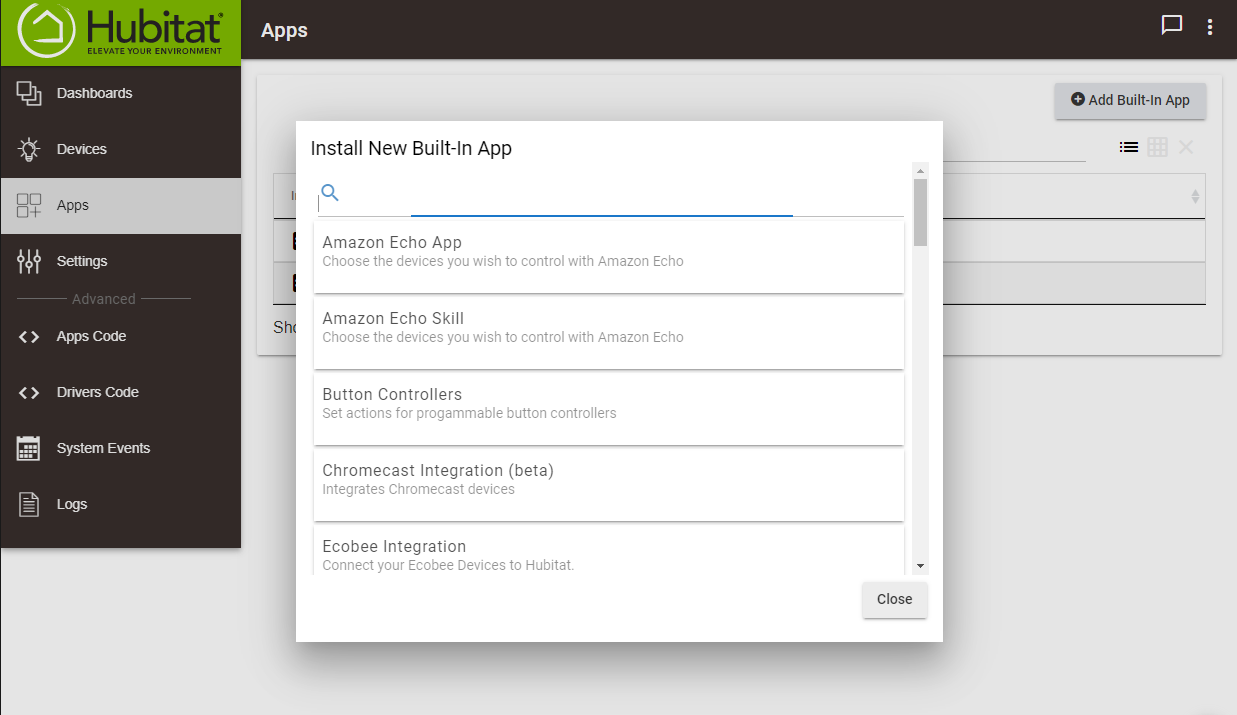
1. First, in the Hubitat web interface choose “Apps” > “Add Built-In App” (upper right corner), and then choose “Rule Machine”.

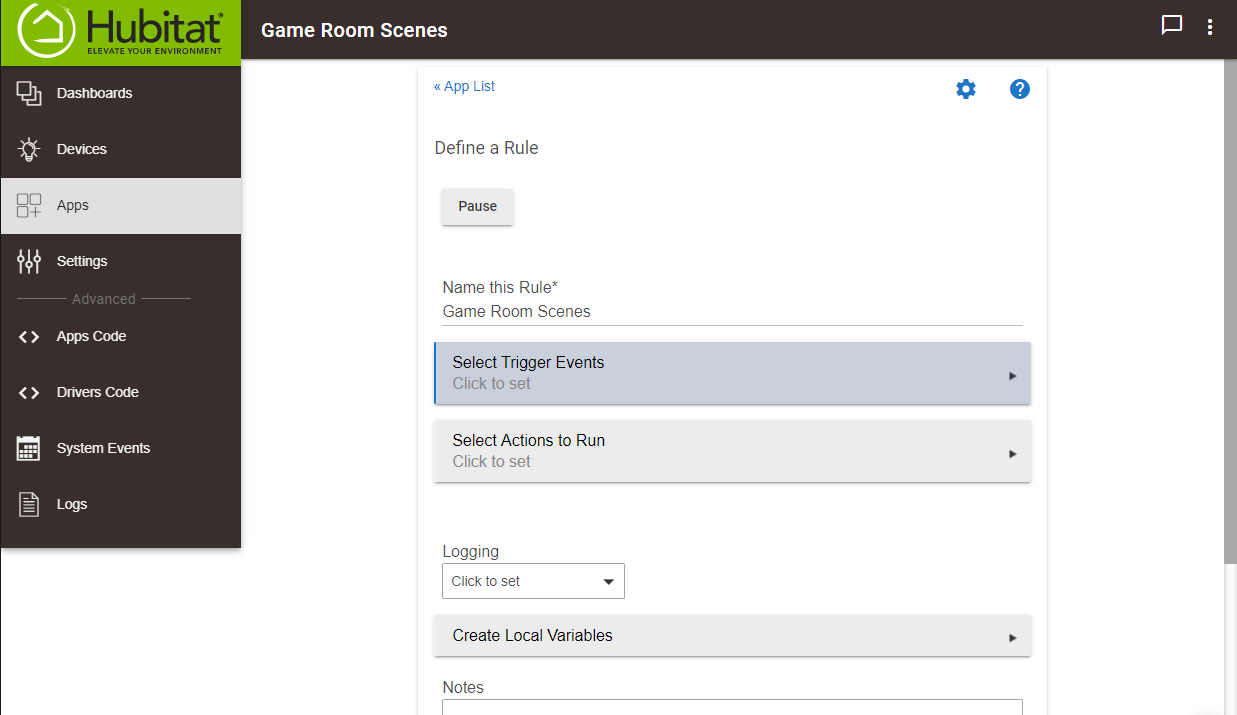
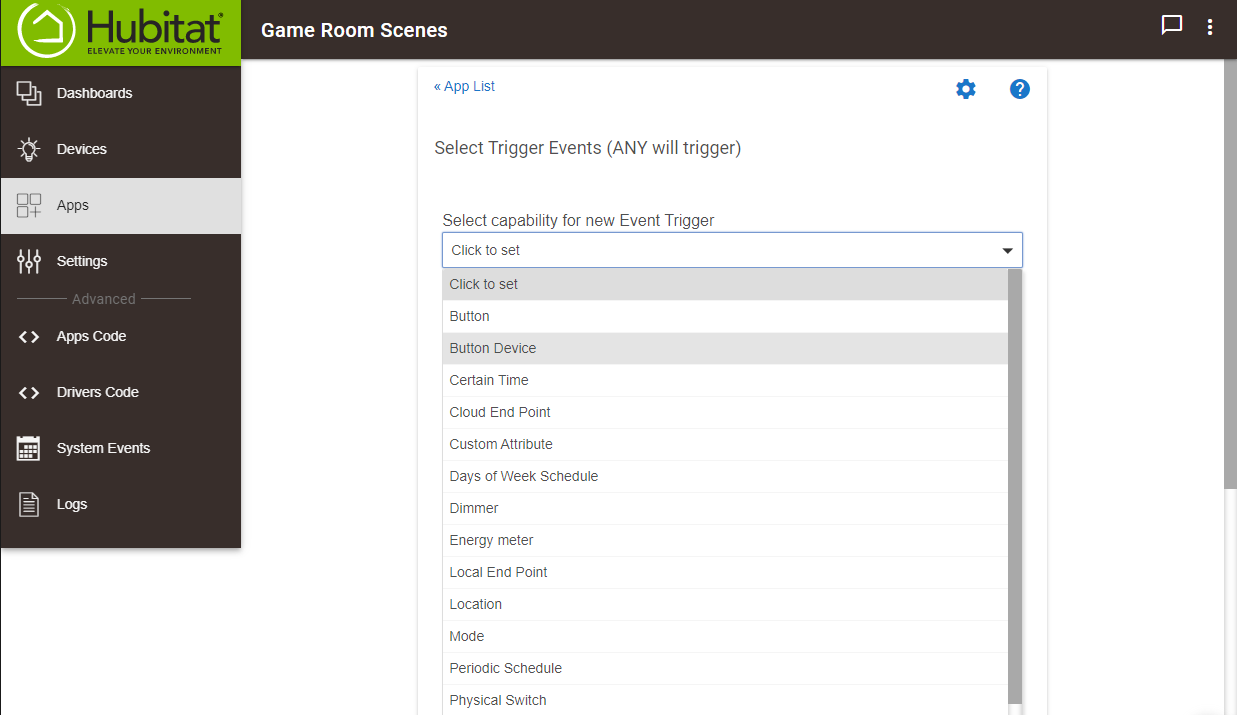
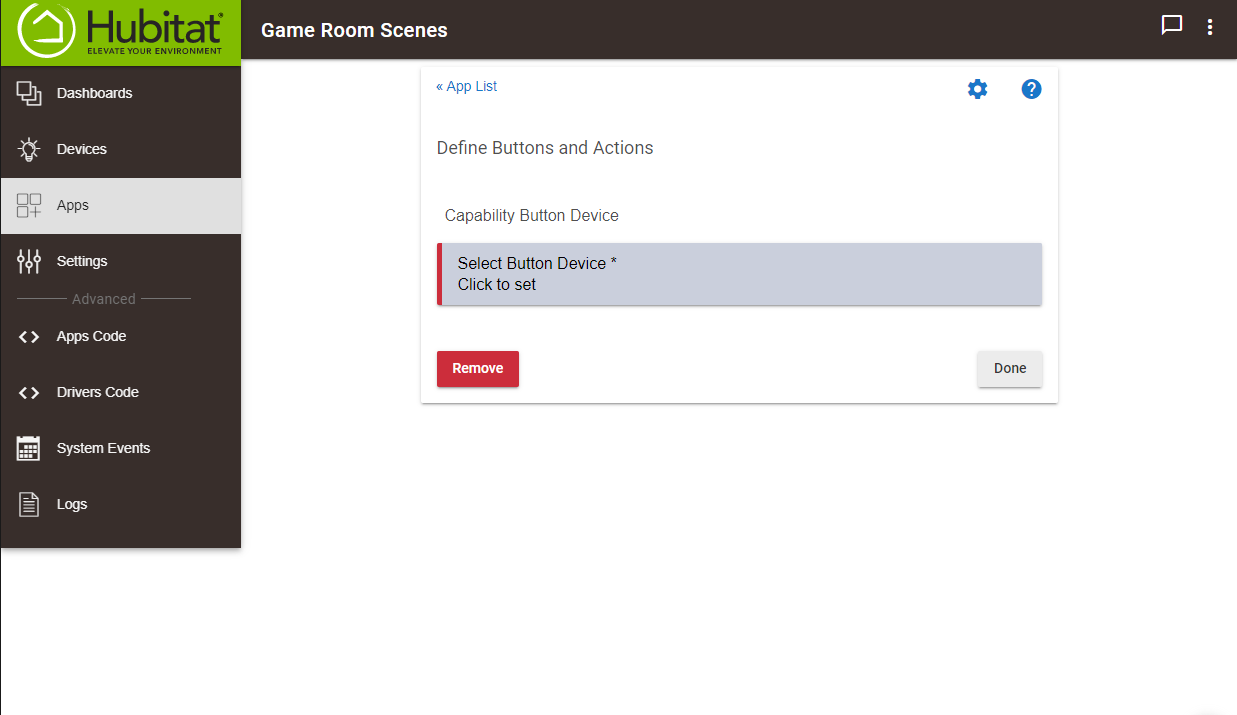
2. After naming the rule, select “Trigger Events” > “Button Device” and choose the Inovelli switch or dimmer you are setting up.

3. Probably the easiest thing to do at this point is to click on the “Prefill all button actions for” and select both “Pushed” and “Held”.

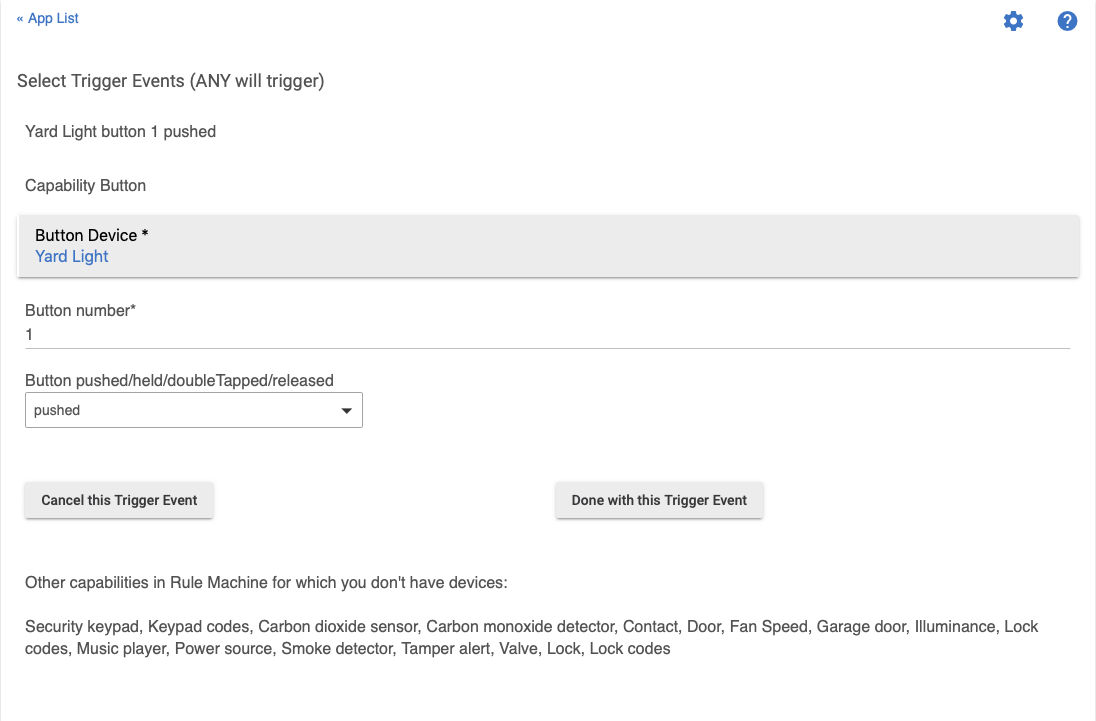
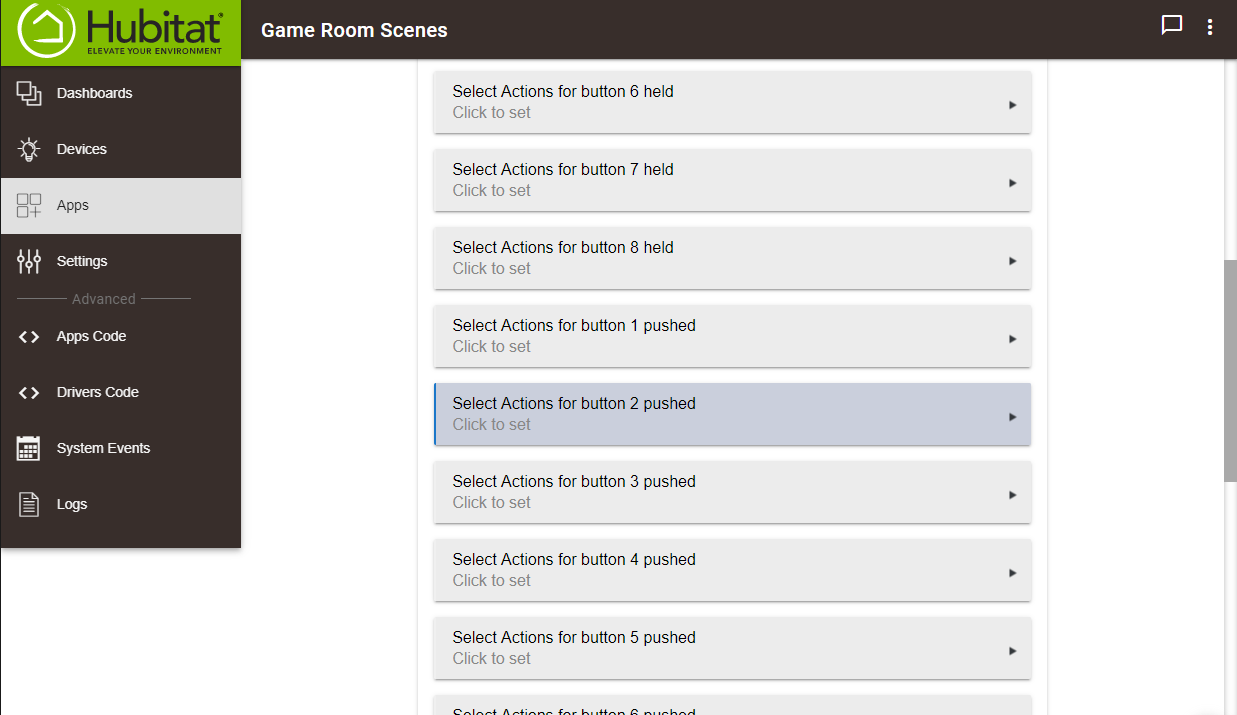
4. From here you can start to setup the scenes and have them assigned to different button combinations. Refer to the button mappings posted above. In this example I am setting up “Double tap of the Up button”. According to the mapping, I need to edit the Actions for “button 2 pushed”.

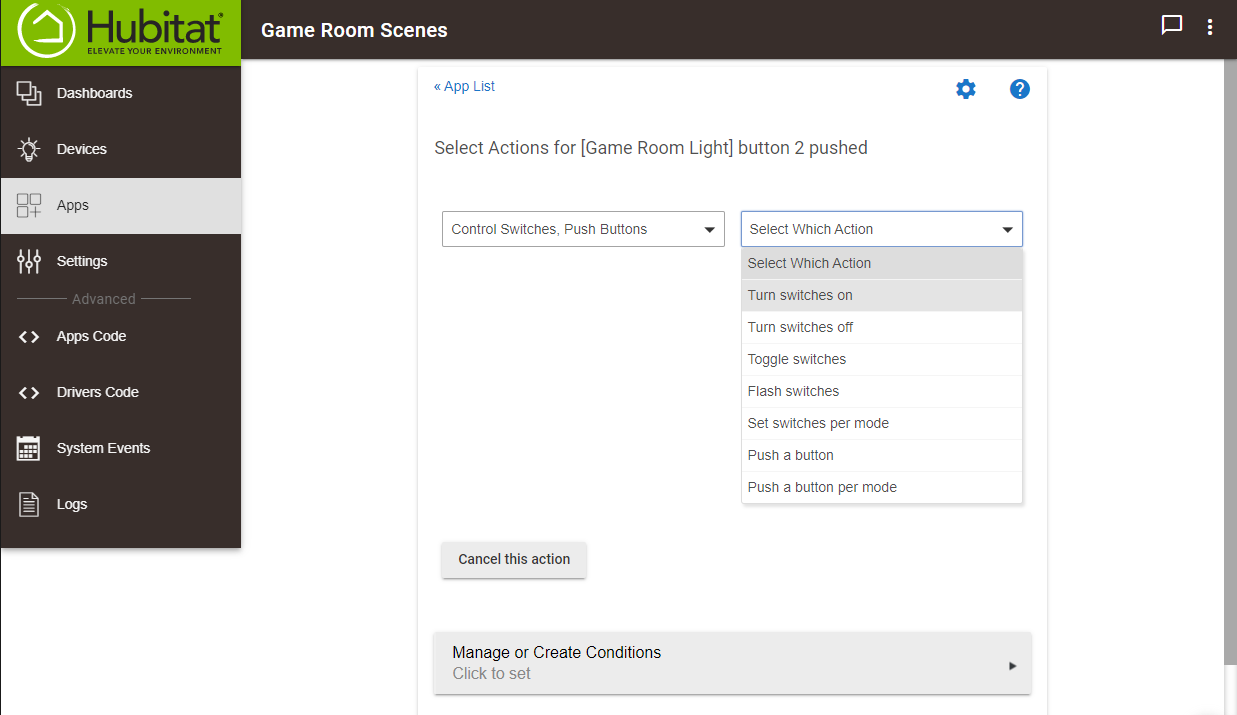
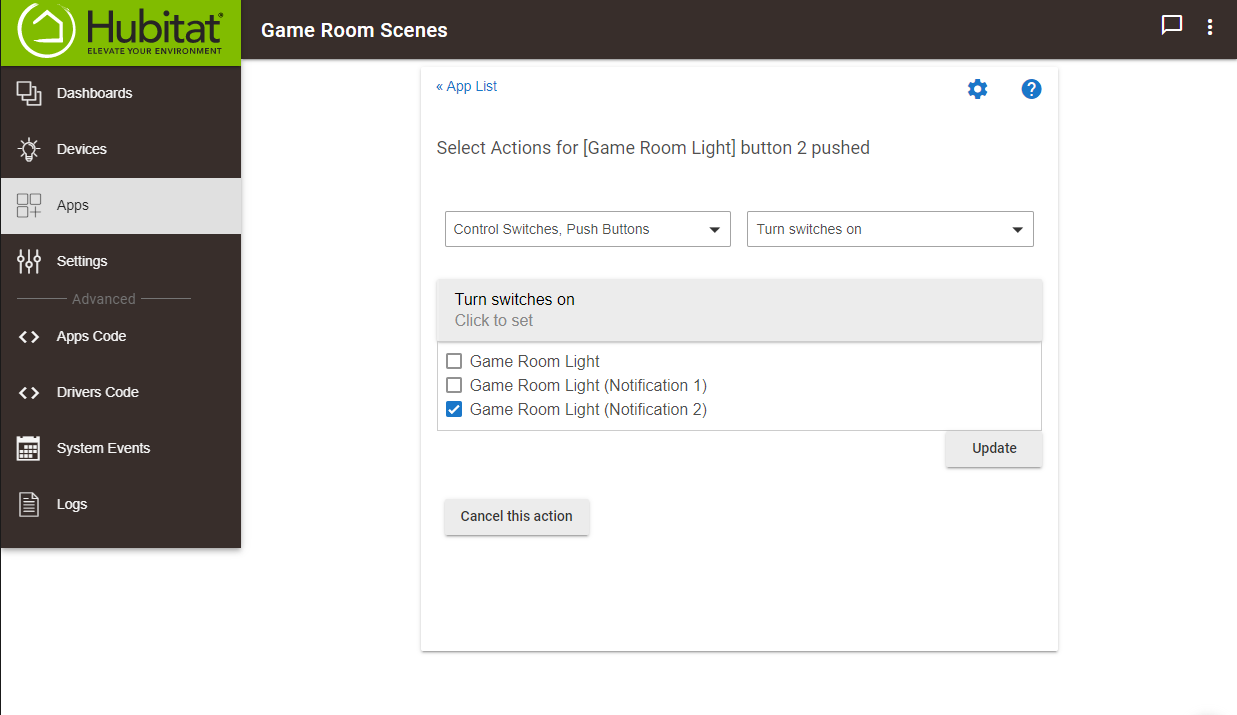
5. The next step is where you can get really creative. You choose the category of action you want to setup. For example, you can choose “Control Switches, Push Buttons” to turn lights on or off. You can choose “Set Dimmers and Bulbs” to set the level of a dimmer or change the color of some bulbs. You can even configure the scene to speak a message, send a notification, arm the alarm, lock the doors, open your blinds, adjust your thermostat, etc. The possibilities are endless. In this example I am turning on a switch which is actually activating a “Notification” on the dimmers LED bar (makes the LED bar flash red quickly).

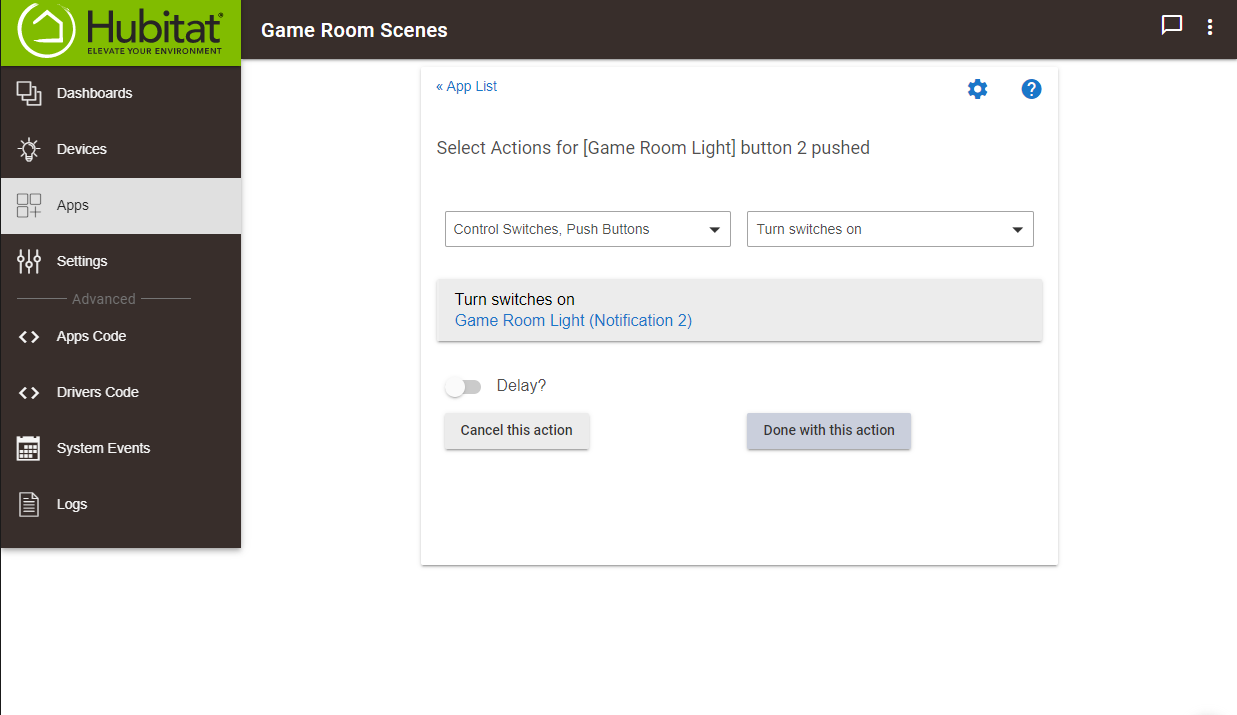
6. After adding all the actions you want in the previous step, click on “Done” a few times to finish setting up the rule. You can go back into this rule and setup different actions for the different button presses if you would like.

This is a basic example, but it shows you how much customization you can use with our switches and Hubitat. If you have any really cool uses that you want others to know about, go ahead and post them below! :slight_smile:

3 Likes

Hi Eric, was this done with a current version of Hubitat? The step by step laid out here, and the UI in my Hubitat are different. There seems to be steps missing as well. Everything through the end of step 2 is fine, but after that, it’s nothing like the current Hubitat version. There is no way to get to this “Prefill all button actions for” prompt, it doesn’t seem to exist in the current version of Hubitat.

Create new rule
Click “Select trigger events”
Select “Button”
Click “Button device - click to select”
Click Checkbox next to red switch you want to use
Click “update”
It is after this point that your tutorial, and the current version of the Hubitat diverge. The following windows from step 3 onward simply don’t exist in the current version. I’ve attached a screen shot of what it looks like in the current version of Hubitat after clicking “update”.
My Hubitat version is 2.1.8.117 Hardware Rev C-5.

Hi @shewhorn, I think that will happen if the device doesn’t send its “numberOfButtons” event. Our driver sends the event during inclusion or when the “save preferences” button is pressed. I’m not sure if / when the default Hubitat drivers do this. They force the use of their drivers upon inclusion so you have to go in and select ours (if you are using theirs).

If you go into the device and hit “save preferences” with our driver, it should change what you see in Rule Machine.

Thanks, I was definitely using your drivers, and I know I’d hit save preferences as I’d changed several parameters (including dimming speed, ramp speed, and AC type). Seems happy now. (shrug)

The next problem to solve is… why does it take thirty seconds to turn off three lights, and turn on one? That strikes me as a purely a Hubitat problem though.

1 Like

Actually, this was the problem. You want “Button Device,” not “Button,” as the trigger type. The former brings up the old Button Controller UI (this used to be a standalone app and makes it easy to set up multiple button numbers/events on the same device to do different things), whereas the latter is mostly just usable as part of a “classic” trigger-based rule.

None of this would explain the delay, though. You can try narrowing down the cause by evaluating live or past logs (to see when things really happen and where the delay is), seeing whether you can get the same behavior by manually manipulating the dimmer from its device page (which would rule out an app/rule problem), or observing whether you have any other general hub slowdowns or things that might not be specific to this app or device (sometimes caused by runaway custom code).

3 Likes

@shewhorn, I’m not sure about the delay, but it seems like it might be a Hubitat issue. Do all of them turn on / off quickly when controlling individually?

1 Like

I’m 99.999% certain it’s a Hubitat issue. When just turning a switch on/off directly the response is immediate (I would assume in that case that control is happening locally on the switch, yes?). After first configuring two presses up to turn on my yard light, and turn off three kitchen lights, and two presses down to turn off the yard light, and turn on three kitchen lights… it worked once, and then the second time it worked but it was slow… and then on the third try it didn’t respond. I thought it was user error so I tried tapping slow… tapping fast, up, down, etc. Well, it queued all of these up, and then started playing them all back very slowly over the next 10 minutes so… manually turn the kitchen light on, and it goes off. Turn it off… then it goes on… and then off, and then on. It would seem as if the processor that was specified for the Hubitat is a little underpowered which is impressive because none of this is computationally intense stuff.

I’ve seen the same behavior not only in the rule machine, but also in the Groups and Scenes app. I created a scene called “puppy mode” which turns off all lights in the area. After about four lights total, it became so sluggish as to be unusable, it was just faster to turn things on/off by walking around and hitting the switches, or telling Alexa to turn things on/off.

This might be worth splitting into it’s own topic, but what custom apps/drivers are you using on your hub? You could try rebooting it and see if the performance issues persist. I know some things can cause problems.

Also if you haven’t already try running a zwave repair (settings > zwave > zwave repair) and see if that helps.

1 Like

Totally agree… This should be run after every mains powered device install… My z-wave network on hubitat is amazingly fast because of all the mains powered repeating devices and proper maintenance… Also a major thing that helped was getting any pre z-wave plus devices off my network… I know zigbee is faster at the tx rate, but my z-wave network runs circles around my zigbee network.

1 Like

Helps that I have a ton of inovelli devices that all but 1 are mains powered repeaters :wink:

1 Like

Hello. I have a number of LZW31-SN Dimmers in 3-way configurations with companion GE/Jasco “Add-On” switches. Is there a way to derive button pushed or held events for scene control when the “Add-On” switch is used? The “parent” LZW31-SN in the 3-way configuration only reports on/off/dim events, but no button pushed/held events when the companion “Add-On” switch/dimmer is used.

Unfortunately the aux switch does not trigger scenes. The only way to do this as of now is to use another Inovelli dimmer and setup a direct association from one to the other.

Bummer. I’ve tried creating associations using the Z-Wave Association Tool, but have been unable to get that to work. I have followed the instructions verbatim, but no luck with the LZW31-SN’s.

Hey so I was struggling hard on getting my switch to associate with my bulbs last night (yes, even we have problems lol) and I finally figured out the issue on my end and maybe you’re having the same one.

While I’m using ST, I could be the same with Hubitat.

Are you able to send the Raw Code for each of the devices you’re trying to associate?

I’ll send a screenshot when I’m off mobile to show you and I’m actually going to update the Knowledge Base article with this issue and how to solve it.

Essentially what was happening was the switch was pairing securely, whereas the bulbs were not and if there’s different levels of security, association will not work.

What I did to solve this was move my bulbs very close to the hub and paired them and they were able to pair securely. I think they were just too far away from the hub to pair securely.

The associations I have been trying to create are between LZW31-SN’s using the Inovelli device driver (https://github.com/InovelliUSA/Hubitat/blob/master/Drivers/inovelli-dimmer-red-series-lzw31-sn.src/inovelli-dimmer-red-series-lzw31-sn.groovy) on Hubitat. I had a 1-to-3 association that would only respond to off commands. I had a 1-to-1 association that would not respond to anything. I set up Group 2 and Group 4 associations for both. I’m pretty sure the LZW31-SN’s are not paired secure, but do not have access to them at the moment.

Yeah, check your z-wave settings to make sure the devices were included the same. If your hub is set to include all devices secure and one of the completed securely and one failed so it is non-secure, that may be the issue.

I just tried a few associations with Hubitat and they are working for me. So there must be something else going on. With the 1-to-1 association make sure that the source device is the dimmer that is not connected to the load. The destination device should be the dimmer that IS connected to the load. There should be an association for group 2 & 4 like you mentioned. So two associations should be all that you have in that “virtual 3-way”. The source device should have a the associations listed in its state variables like below:

Perhaps I do not understand z-wave associations correctly. In both of my scenarios all devices have a load connected to them. I was hoping to create a “group” where one in the group controlled itself and the others in the group. I have a “Rule Machine” rule for both scenarios, but the lag is bothersome. I was hoping to have a more instantaneous on/off/dim experience as both scenarios control recessed lights in the same room(s). In your second paragraph you state “the source device is the dimmer that is not connected to the load” which I interpret to mean the source device (device that the associations are being applied to) cannot have a load connected to it?

I checked if my LZW31-SN’s had paired securly. They are not. When I can get Z-wave pairing to work, the “destination” LZW31-SN will only respond to an off command. It will not respond to on or dimming commands.

This has stumped the chump. :wink:

Maybe they are out of range of each other?