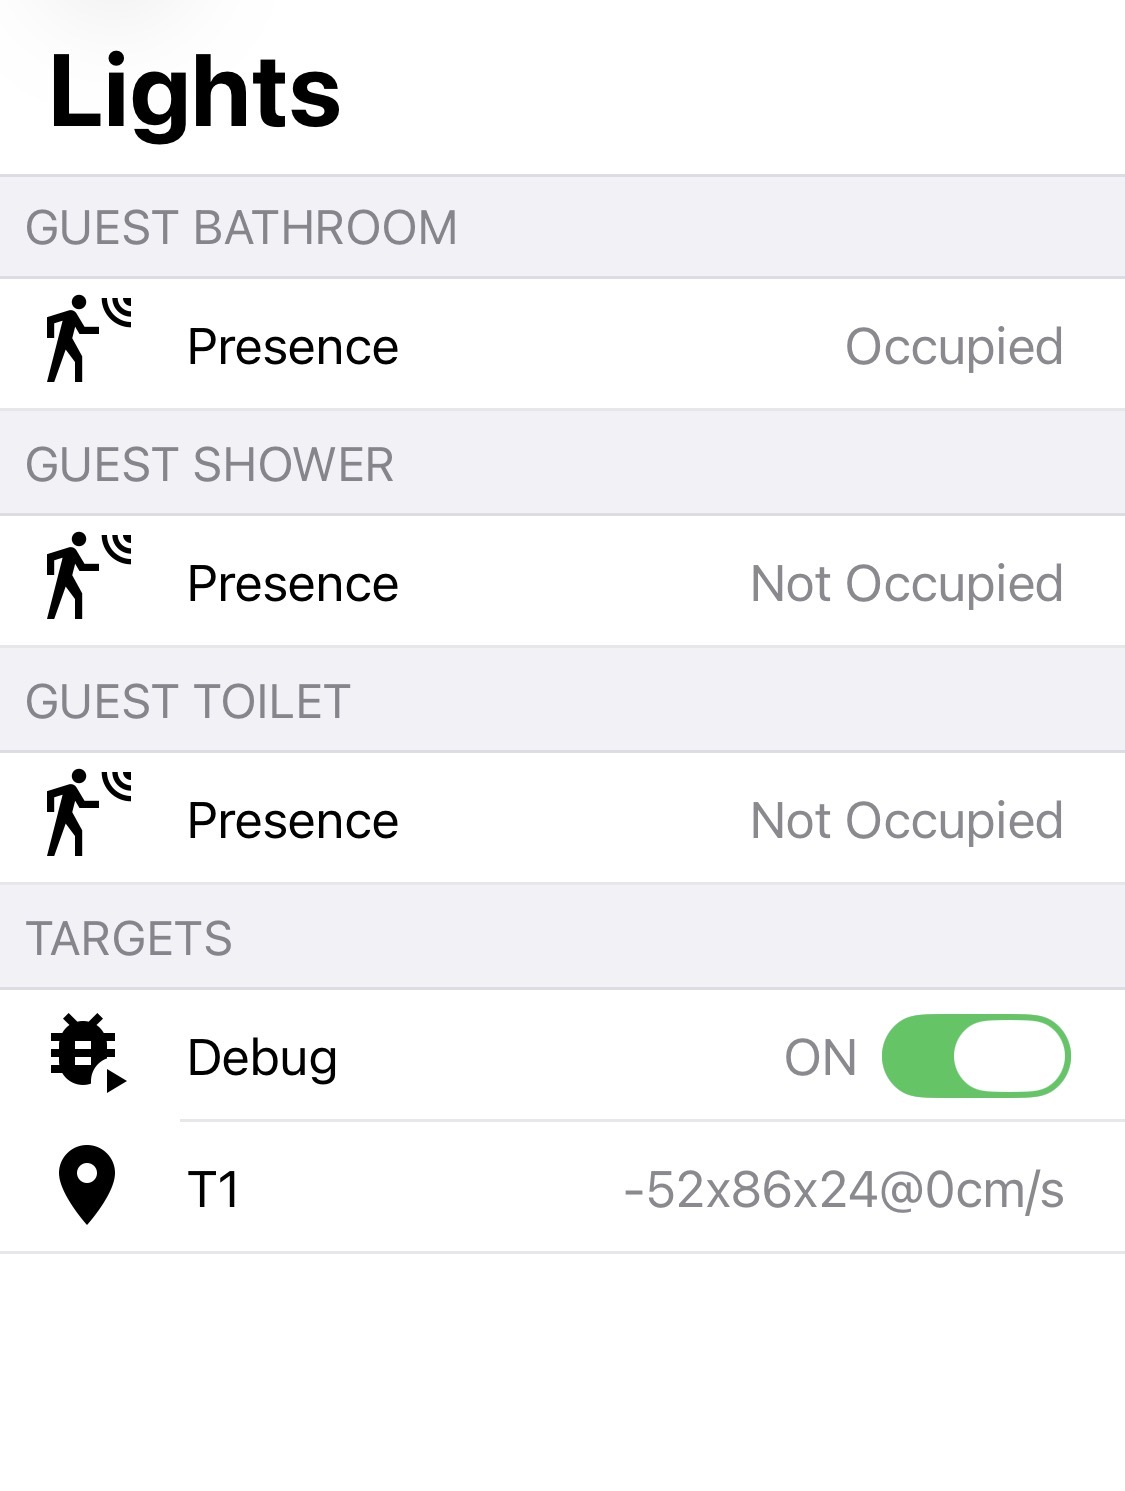
I use openHAB, not Home Assistant, Hubitat, or SmartThings, so this won’t translate directly to many users of this forum, but here’s a screenshot of my “debug” screen for a single switch in a bathroom. It’s driving three separate zones, and I use these zones to drive various automations - for example, if you’re in the shower or on the toilet for longer than a minute, the exhaust fan automatically turns on. In the evening, the separate lights over the shower will turn on when you go there.
Being able to see exactly where the switch thinks I am is crucial to defining highly precise zones like this.
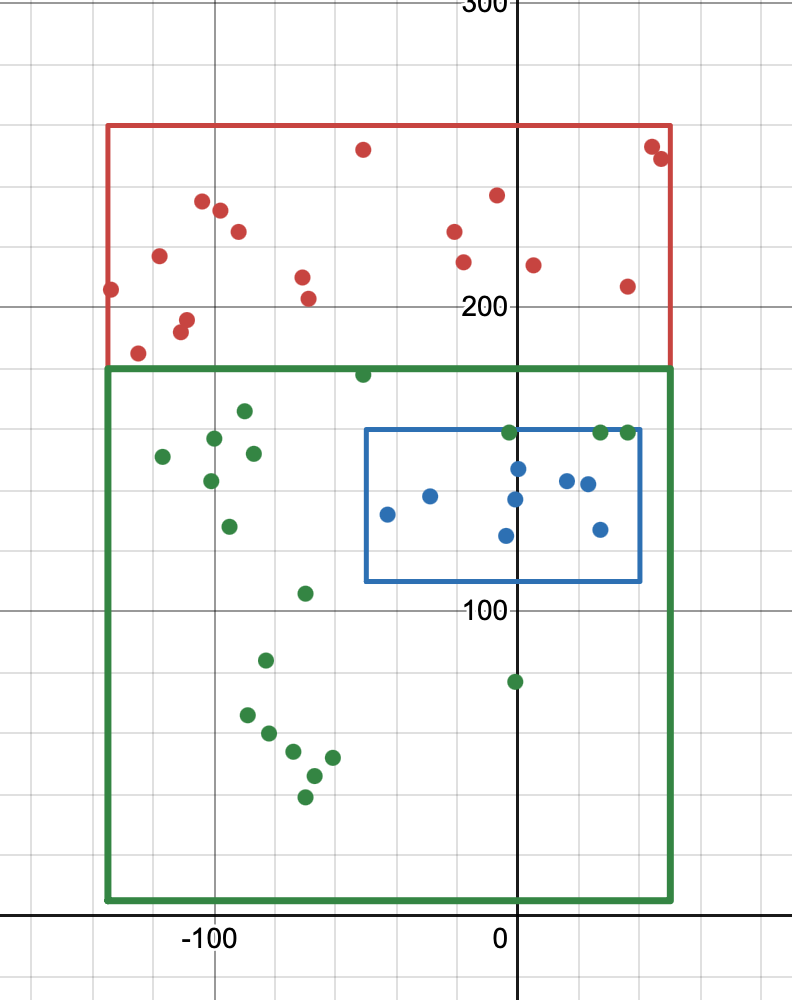
EDIT: Oh yes, I wanted to post my strategy for how I build my zones. I slowly walk (or sit/lay!) around the borders of my intended zone taking screenshots every step or so. Then I dump all of those points into this nifty website I found that will graph my points, and then I can also create a shape around them of my intended zones, making it easy to visualize how well my resulting zones will behave. For the bathroom screenshotted above, here is my graph: Guest Bathroom Lights Switch | Desmos . (Screenshot as well, in case this link eventually goes dead in the future):
On another switch (the one in my small water closet), I’m taking advantage of multiple zones because the switch readily sees through the wall, and it augments my occupancy sensors for my bedroom on the other side, filling in a small “dead spot”.
In a laundry room, I was able to fine-tune the interference area for the dryer shaking because I could both see the exact location the switch thought things were, and the being able to see and precisely set interference areas. With the automatically inferred interference area, it was too large and was ignoring a person that was leaning over the dryer. I plan to do the same with a switch overlooking a tub - my wife fills the tub before she gets in, and the switch sees the filling water as a person, but when I had it automatically infer the interference area, it no longer saw her once she actually got in.
In another instance, I no longer plan on having an mmWave switch for both sides of a doorway - I’ll just be able to use the one with zones for both sides, so it’s saving me money.
One issue I’ve had is that the reportTargetInfo no longer seems to make sense when the switch is tracking multiple targets. It would be very helpful if you could get clarification from the manufacturer/developer on how to interpret it. Here are several messages I’ve gathered by enabling debug logging in Z2M:
01 01 deff 9400 f3ff 0000 01
01 01 e4ff 9900 dbff 0000 01
01 01 bcff 3300 0600 9001 02
01 01 1f00 9800 feff 0000 02
01 02 2a00 6100 0000 0000 01 a9ff f2ff 0000 2c01 7b
01 02 3200 9000 0600 0000 02 c7ff d4ff 0000 2c01 a9
01 03 13ff df00 faff 8403 01 73ff e3ff 0000 c800 40 0200 0000 0000 0000 00
01 03 9eff 3000 e2ff 2c01 01 69ff efff 0000 c800 0e 2c00 0000 0000 0000 00
The first 01 tells me this is a reportTargetInfo message. The second byte is how many targets there are in this message. When it’s 1, the rest of the message makes sense - two bytes each for X, Y, and Z, then a single byte for an ID - which seems like it’s normally 1, but can be 2 if the switch was recently tracking 2 targets, and then the first one disappeared. Very nice for knowing which target disappeared. Given this, when there are 2 or more targets, I would have guessed the IDs would be 1, 2, 3, or 4 (instead of an arbitrary ID). But looking at these messages, not only is that not the case, but if I assume the structure of the targets simply repeats the entire message doesn’t make sense. For example, the Y value is negative for the 2nd target in all of these examples, which should be impossible. And for the 3-target examples the third target looks to have Y, Z, Dop, and ID of 0 - which not only seems incredibly unlikely, but also does not come even close to where I had people standing when I captured this.
So yeah, clarification here on how exactly to process this (or if there’s a bug that’s perhaps shifting bytes for multiple targets, which doesn’t seem out of the realm given that the documentation states the ID is supposed to be 2 bytes, but there’s only 1 byte available in the messages) would be fantastic.