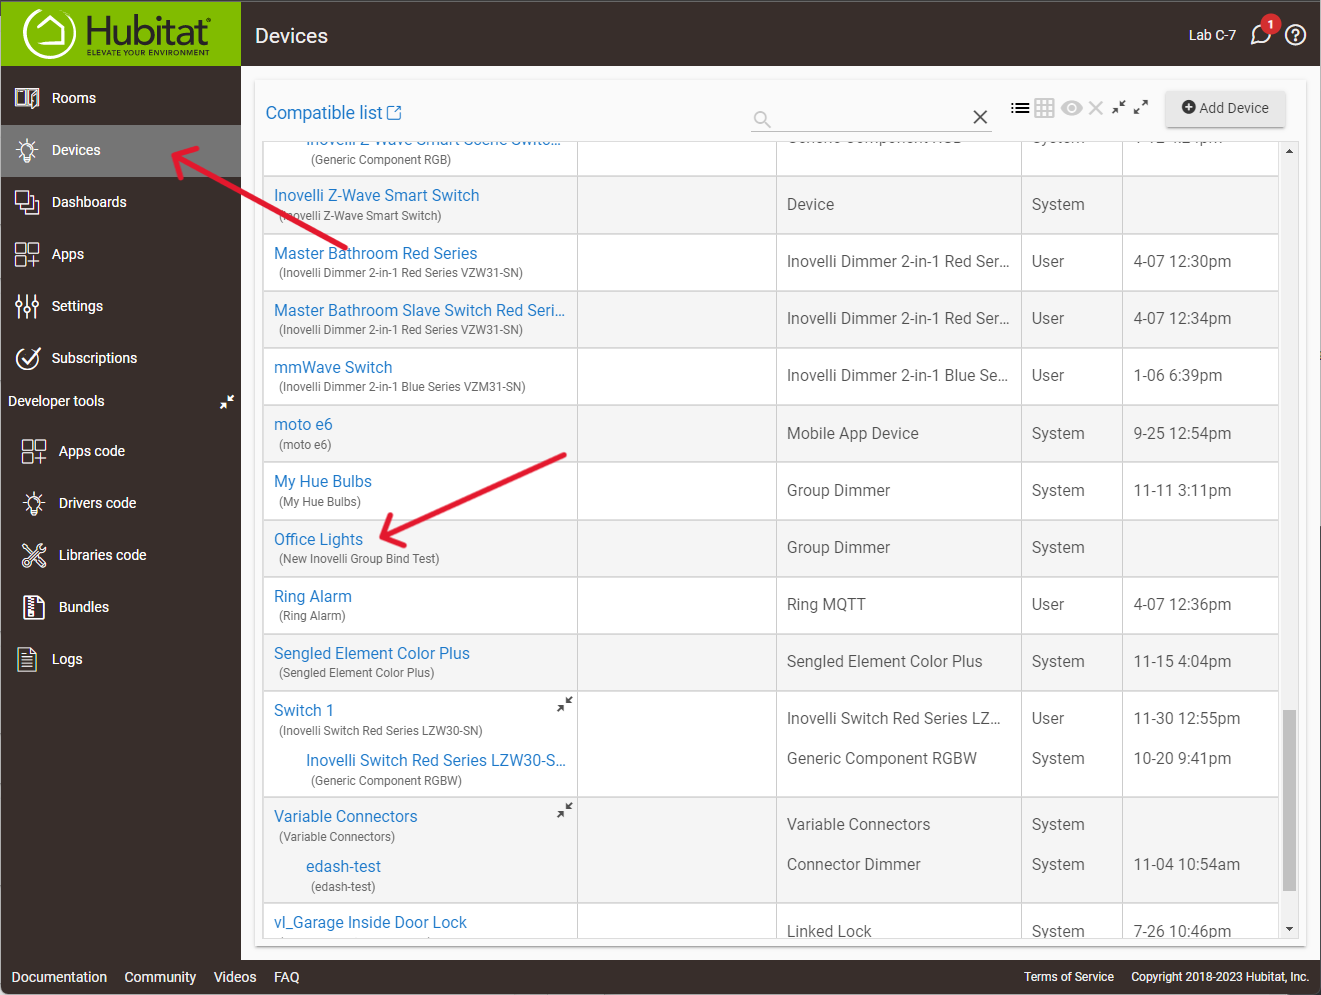
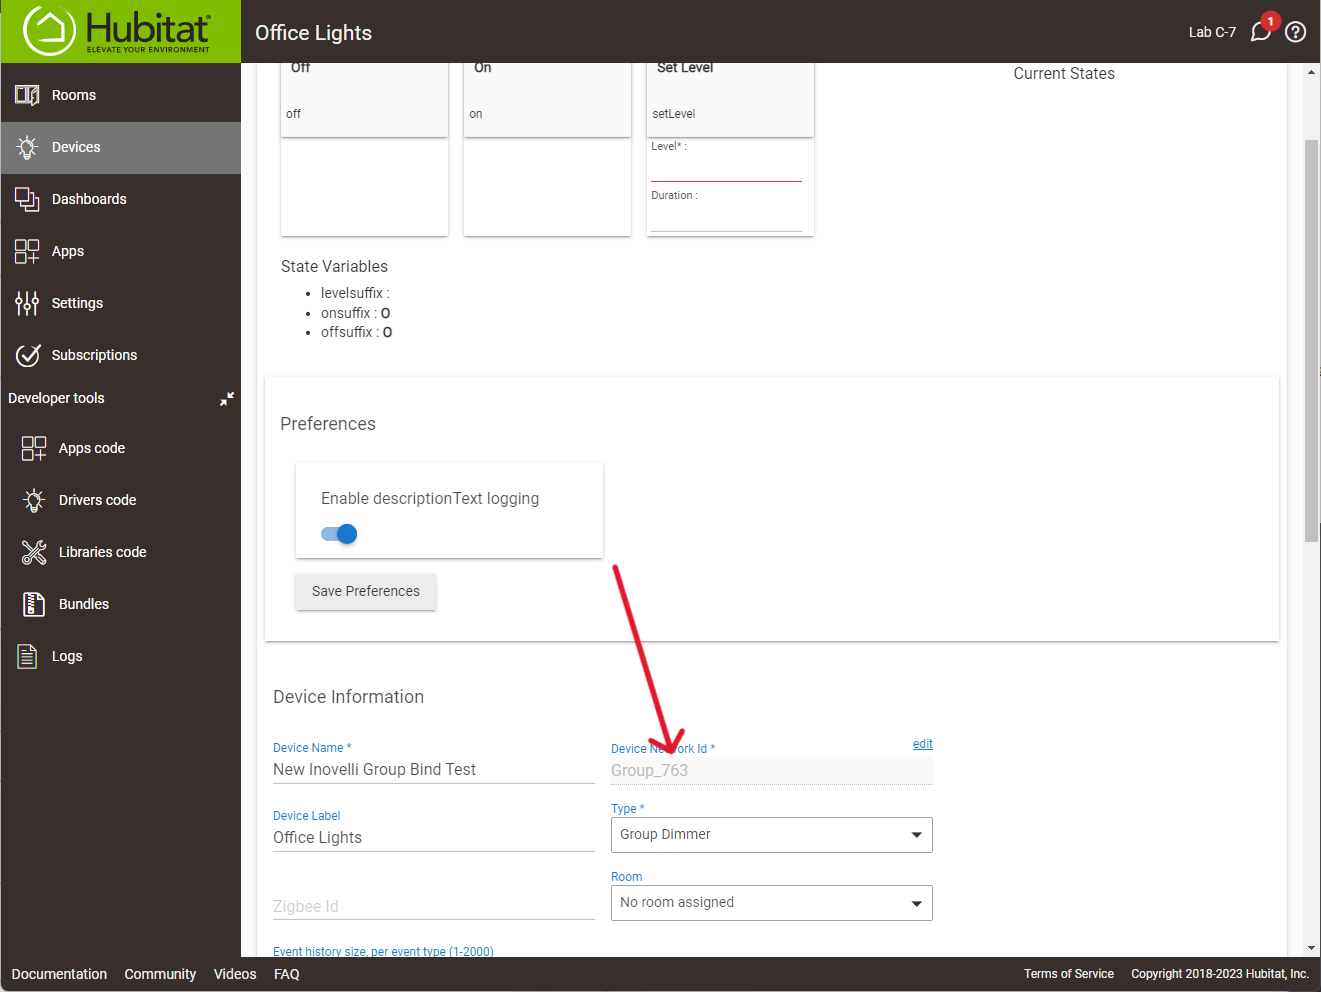
Next, navigate to the newly created group device in the “Devices” page and click on it. We need to get the Zigbee Group number that Hubitat assigned to it.
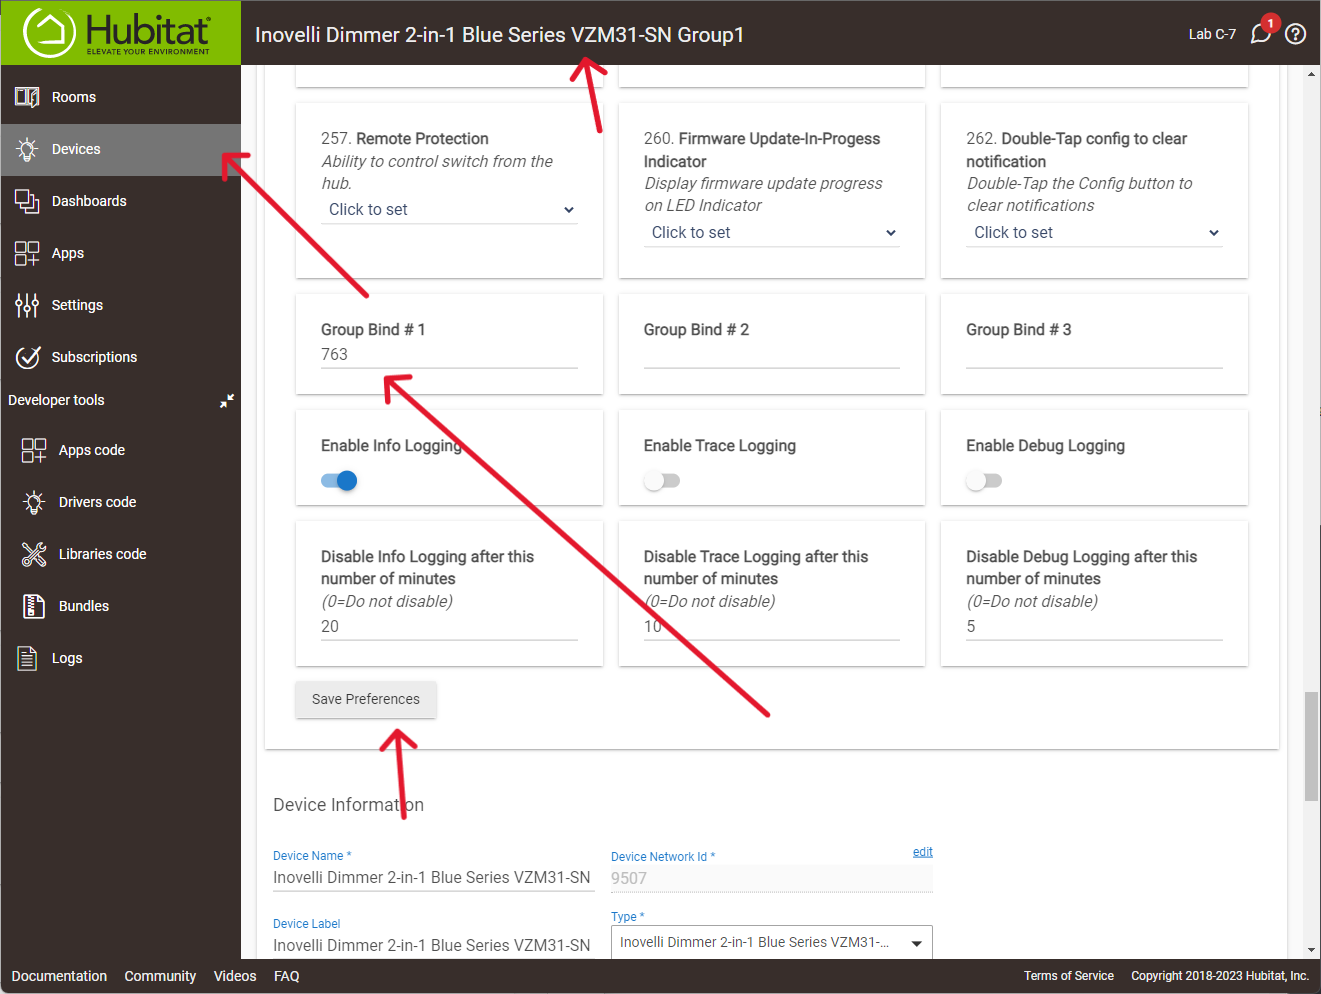
Go into the Inovelli Switch device page and navigate down to the bottom of the “Preferences” section. Input the group number that you retrieved in the previous step (763).
Lastly, click on “Save Preferences” to bind to the group. You should now be able to control your group of devices directly from the switch! This “multicast” method of communication should be instant and very reliable.
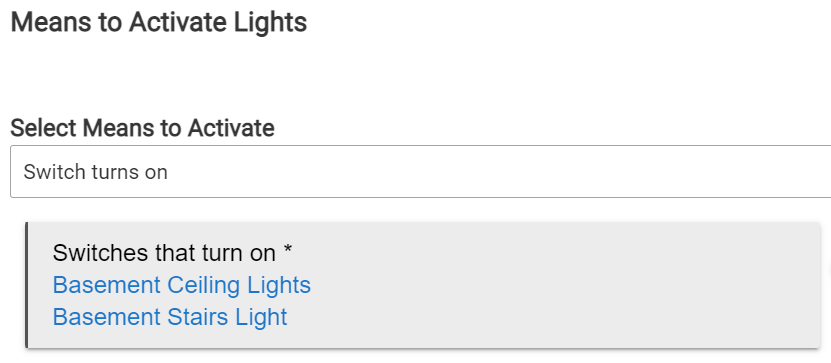
It appears you can also use this with Room Lighting app if you select the “Activate as group with Zigbee Group Commands” option.
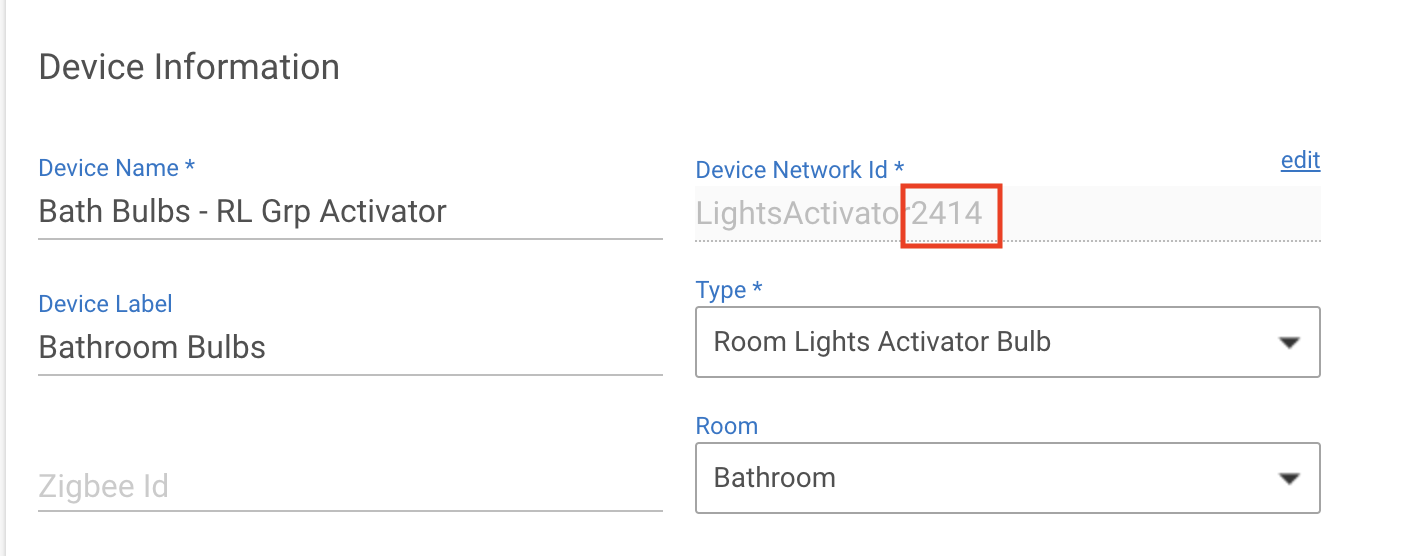
Then, use the Room Lighting application ID as the group number, you can get this from the url of the group lighting app instance. E.g. if your app url looks like this then 712 is the group number to use:
If you have an Activator set up for the corresponding RL group, it looks like you can use also still use Eric M’s Device-page technique for the ID #… Nice to have a couple possible ways to verify that #!
Sorry for asking the n00b question but how is this different from setting the devices to activate in RL? This feels like a more convoluted way of activating an RL app then just specifying which devices in the app itself. I can’t imagine that it could be cutting out the hub if the “group” being activated is the RL app itself.
The switch will control the group (on / off, and real time dimming) directly without going through the hub. Should be as fast, reliable, and responsive as you can ever get in the home automation world.
But what role is the hub playing when you use a Room Lighting app as the binding id? Similarly, when you set startup level, etc in the switch device via the driver and you activate with RL, which one takes precedent?
I’m confused, the “Groups” or “Room Lighting” apps are creating a zigbee group on the zigbee network. This group is assigned a number between 1 - 65536. Hubitat creates a “virtual device” to represent this group and you can control it from the Hubitat app.
Using the process listed above, you can then bind the Inovelli switch to this group number. So the switch will send its commands directly to the zigbee group without any involvement of the Hubitat hub.
Are you referring to the “Default Level” options? If you enable option 125 on the switch and turn the lights ON from the switch or remotely it will use the “Default Level” options when adjusting the group. If you control the group virtual device in Hubitat (to turn ON), it will go to whatever setting the bulb has. Likely it will the bulb to its previous level. That would be because you are not using the switch to control the group.
Here is an example of where I’m struggling a bit to understand:
I have 5 lights in my basement, 3 on Inovelli Blue switches, 2 on zigbee outlets. I create an RL app to control them all together when I flip on a switch. I set the Blue’s as the activation device for the RL app. I set activation levels for each of the lights in the RL app. Because of this thread, I’ve also taken that RL ID and added it to the binding for all of the switches and I’ve set default activation levels on the Blue’s device pages.
When I turn on any of the switches I set as activation devices in RL, what happens? Do competing actions happen, one from the zigbee binding group direct to the other switches from the one I turned on and another action from the RL app reacting to that switch turning on telling each switch to activate based on the RL settings?
What is the behavior and what is the suggested best practice for using these groups in combination with RL apps. This is a real life example for me.
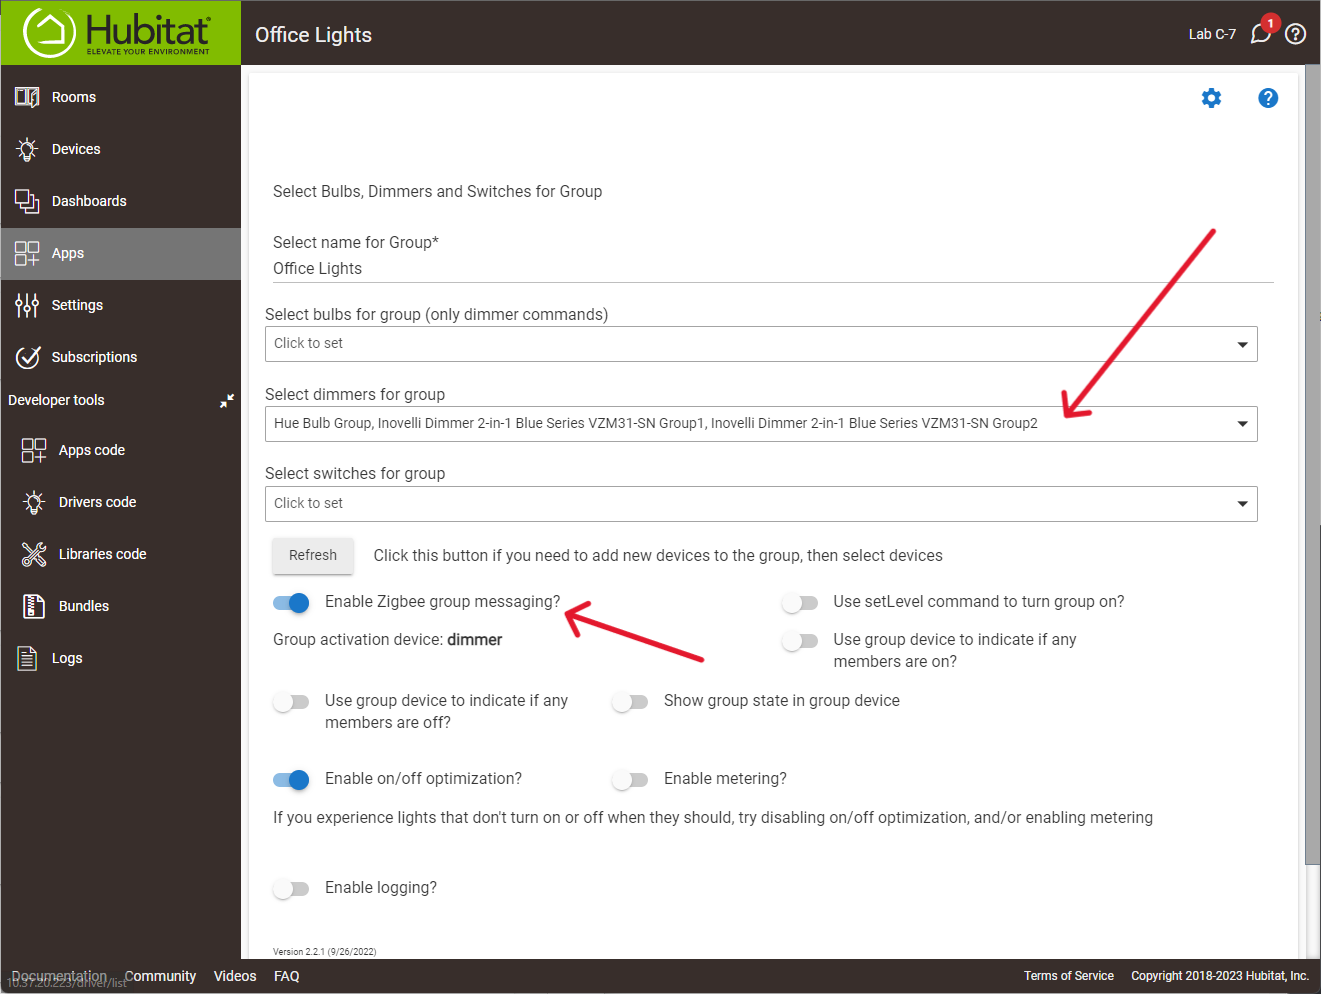
Sounds like the way you have it setup there may be conflicting actions. I’m not too familiar with the RL app but maybe there are some Hubitat users that can comment. The way that I set up my lights is that I have multiple Blue switches and multiple Zigbee bulbs that I want to control together. I have them placed in a Zigbee group and then the Blue switches are bound to the group. When I control the virtual device in Hubitat, they all adjust to the same level. If I use the wall switch then they all adjust to the same level. If I were to setup automations (to turn off at a certain time for example), I would set the automation for the group virtual device.
I agree with Eric – I’m not following what things you are attempting to bind, and my initial reaction too was that you likely have conflicting actions.
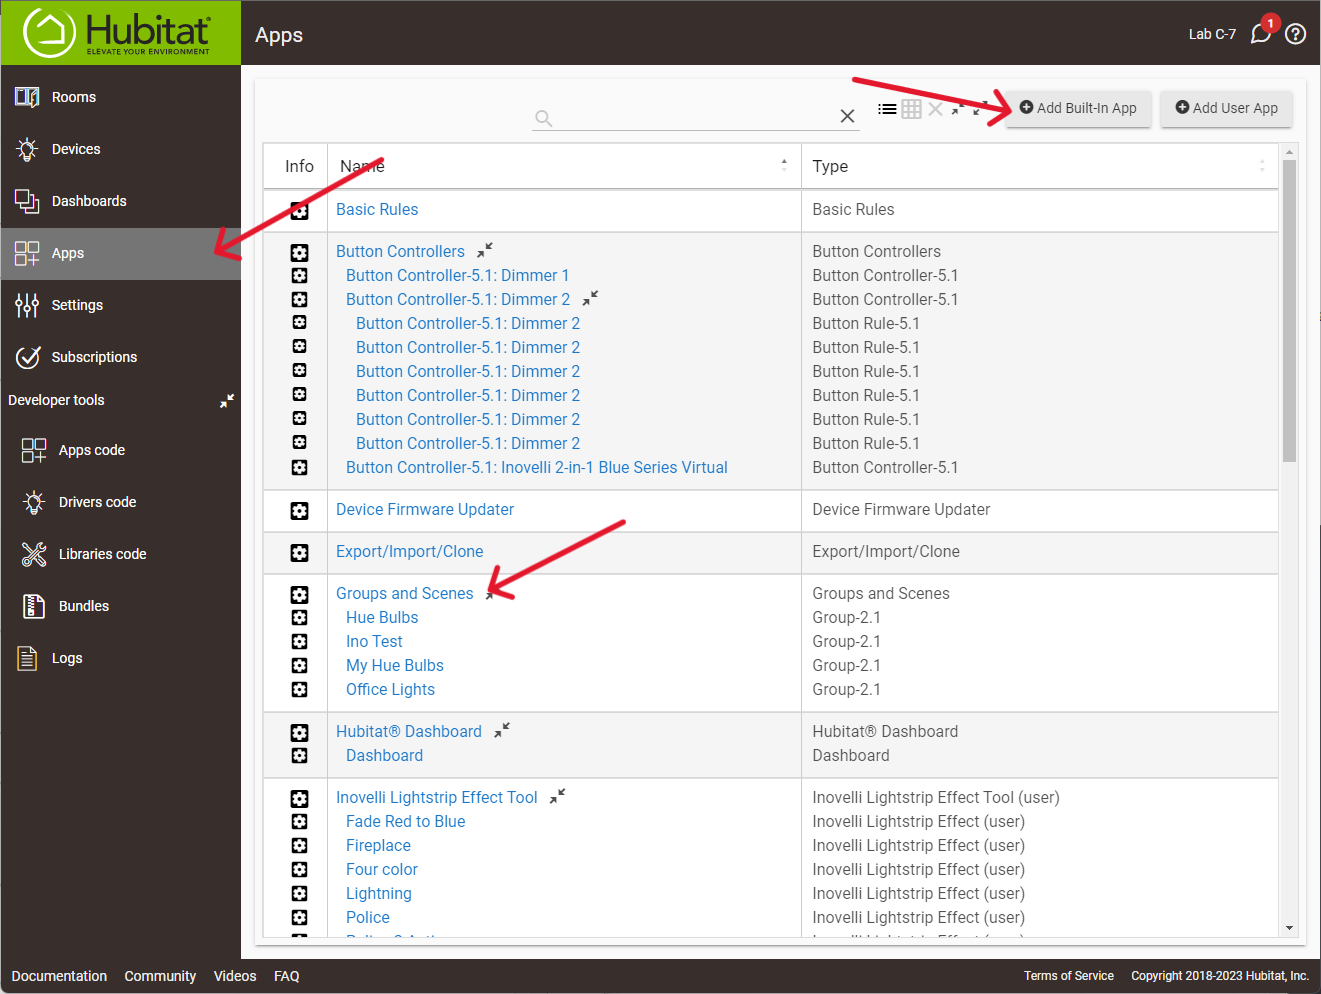
I think the best way to approach building the group you want to bind to a Blue is to start with the (older) Groups & Scenes app – build it there following Eric’s steps earlier in this thread. That can be the end of it – simply use that Group ID to bind to a Blue.
You could migrate that Group to RL by using RL’s built-in G&S migrator/converter – that’s what I did for all of my “old” Groups, since I wanted to move everything over to RL
If you do that, then just think of that RL instance as a basic Group, like the old G&S app. You may very have a separate RL instance involving those very same devices that you use for managing mode-based, motion-based, or time-period-based lighting etc – that’s fine. The one RL instance is a more robust automation, and the other RL instance is just a simple group that you can use for binding.
ETA – the one place I use binding is in our bathroom – my Blue is bound to 2 Hue bulbs. I have one simple RL instance that’s just built as a group for those two bulbs. It’s set to the CT value we use most of the time in bathroom, and 100% brightness. I use that RL’s Activator ID to bind to the Blue.
I have a much more convoluted RL setup for the bathroom involving motion, humidity, etc. I actually use the my previously-mentioned RL group’s Activator Device as the main device in this other more complex RL setup - works like a boss.
I’m just trying to understand how this works so I can then think about when / how to apply it to solve real world needs. In the simple example of just using a group and setting the ID in the bindings - what is the point of the the hub if the point of ZGM is to let the devices command each other without the hub? If you just stick any matching ID in the zigbee bindings on the devices should it work or is the “Group” on the hub actually needed and playing some role? The only way I can imagine this works without the hub is if the act of creating the group reaches out to the switches and sets the group ID. It must be doing this because in Eric’s example he only added the binding to one switch. Otherwise it would seem there is no point to the group other than as a unique number generator.
I tried to experiment on my own and unfortunately I’m unable to get it to work in even the basic example shown above. I created a new group with only 3 blue switches in it. I enabled ZGM for the group. I added the group ID to one of the switch’s bindings and it does not turn on / off either of the other 2 lights. I tried adding the ID to all 3 switches’ bindings as well.
This is what is happening. The hub has to create the group on the zigbee network. The group is assigned a number by the hub. After that is done, the group exists on the network even if the hub is not involved anymore.
Not sure what is going on there. I tried again and the process works for me. Can you PM me the logs (after enabling them all on the switch) when you are binding the switch to the group? Also, there were some driver changes over the last few days so you might want to make sure you have the latest one. Does the group work? If you go into your devices and control the group “virtual device” does it control all the switches?
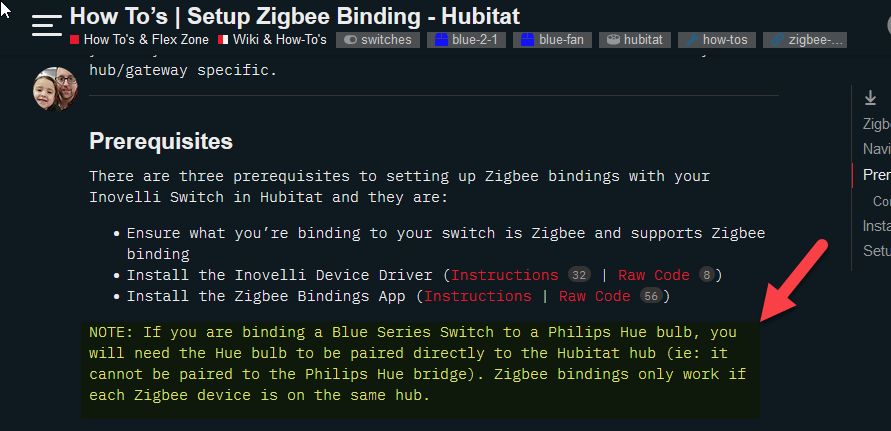
Just to clarify, Eric – I can’t do what you’re describing if I’m using the Hue hub, right? Right now, I have a Hubitat, the Hue hub, and about 20 Blue switches installed. I’ve configured the Blue switches to control all my Hue bulbs through the Hue hub using the Hubitat Button Controllers app. For me to do what you’re describing, I have to remove all the Hue smart bulbs from the Hue Hub and control the bulbs directly from Hubitat/the Blue switch bindings, right?
-Hank