DISCLAIMER
While we (and our community) try to keep these instructions up to date, it’s often hard due to the many updates to our firmware, Home Assistant app & platform changes, as well as many other factors outside of our control. If any updates/edits need to be made to these instructions, please comment on this thread so we can keep it up-to-date:Wiki - General Feedback/Suggestions Thread
COMMUNITY DRIVEN
Our entire Knowledge Base (which includes manuals) is community driven. This means that we at Inovelli work together with our amazing community to keep articles up-to-date. We’d love it if you’d contribute in any way you can, be it making edits, submitting how-to’s so others can learn, participating in our innovation projects, or simply commenting on threads. Thank you so much for your support and dedication to really making an impact in the smart home market.Community Knowledge Base
NOTE: All of the pictures can be clicked on to be made larger. Also, if you’re on mobile, you can either click on the pictures or turn your phone side-ways and the pictures will become larger.
Zigbee Binding Overview
Zigbee binding is when two or more Zigbee products communicate directly with one another without the need to communicate with a hub. There are two main benefits of utilizing Zigbee binding: speed & local control.
From a speed standpoint, cutting out the middle-man (hub) can save precious milliseconds or even seconds depending on your cloud and/or processing power off your hub. Whereas from a local control standpoint, if your hub goes does down and cannot communicate, your products can still talk to each other.
Below is a quick video that shows the speed of Zigbee Bindings:

NOTE: The above video is using Home Assistant via ZHA (however, the speed is identical using Zigbee2MQTT).
For an official explanation, please see this link: Zigbee Bindings
Navigating these Instructions
For desktop users, the, “Table of Contents” is located to the right of the screen, whereas for mobile users, it can be found at the bottom of the screen.
NOTE: If you do not see the table of contents, click here: How To's | Setup Zigbee Binding - Home Assistant (Zigbee2MQTT)
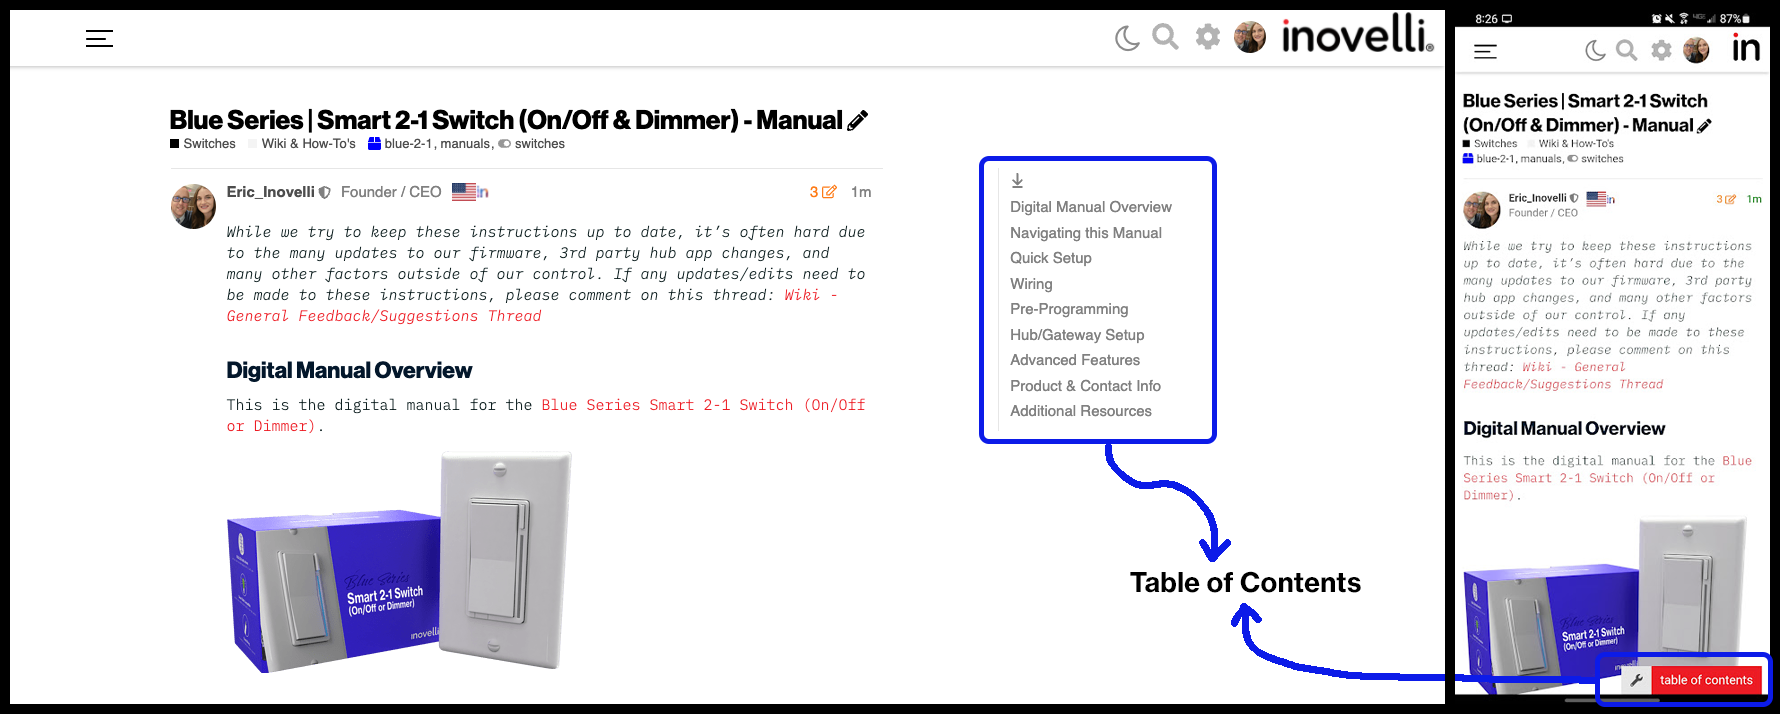
Please click on any of the sections to get started. We recommend working your way down as it follows an intentional flow that is user friendly and hub/gateway specific.
Prerequisites
There is only one prerequisite to setting up Zigbee bindings with your Inovelli Switch in Z2M and it is:
- Ensure what you’re binding to your switch is Zigbee and supports Zigbee binding
Compatible Products
We’ve tested Zigbee binding with the following Zigbee products on our switches:
DISCLAIMER: As an Amazon Associate Inovelli, LLC earns from qualifying purchases.
Setup Instructions
Below we will walk through a few different scenarios where you’d want to use Zigbee binding: Switch to Bulb / Switch (individual binding), Switch to Multiple Bulbs / Switches (group binding).
Smart Bulb Mode (SBM)
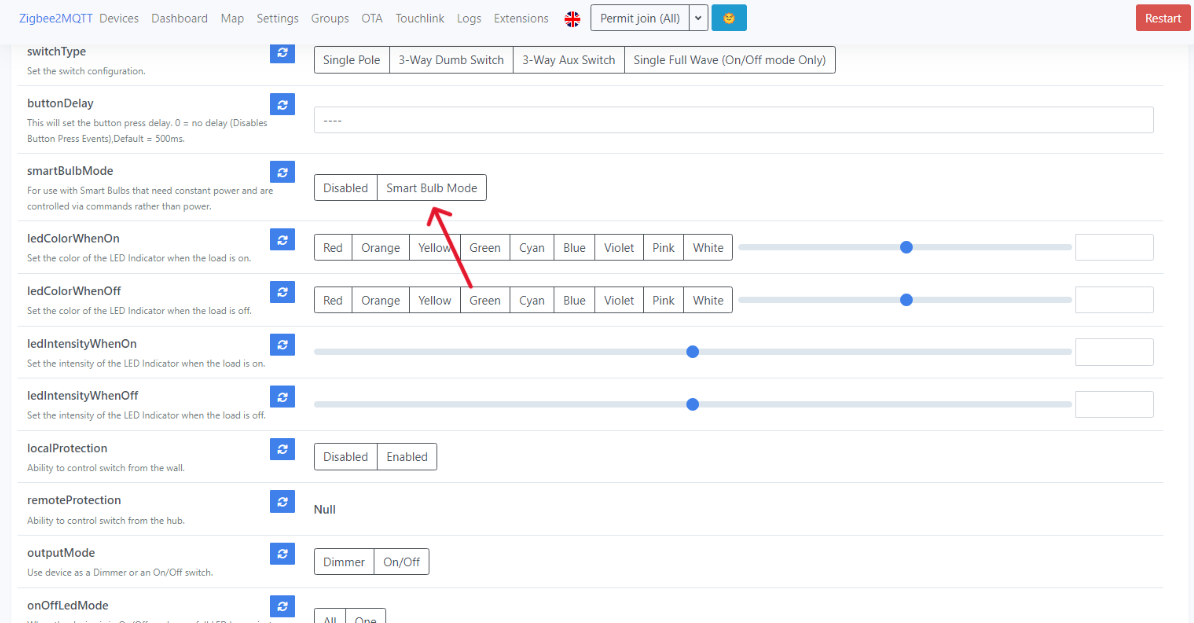
If the load that you are controlling is a smart bulb or a device intended to always be powered, you will need to enable smart bulb mode on the switch that is providing power to the load. To do this:
- Open the Zigbee2MQTT web interface and navigate to “Devices”.
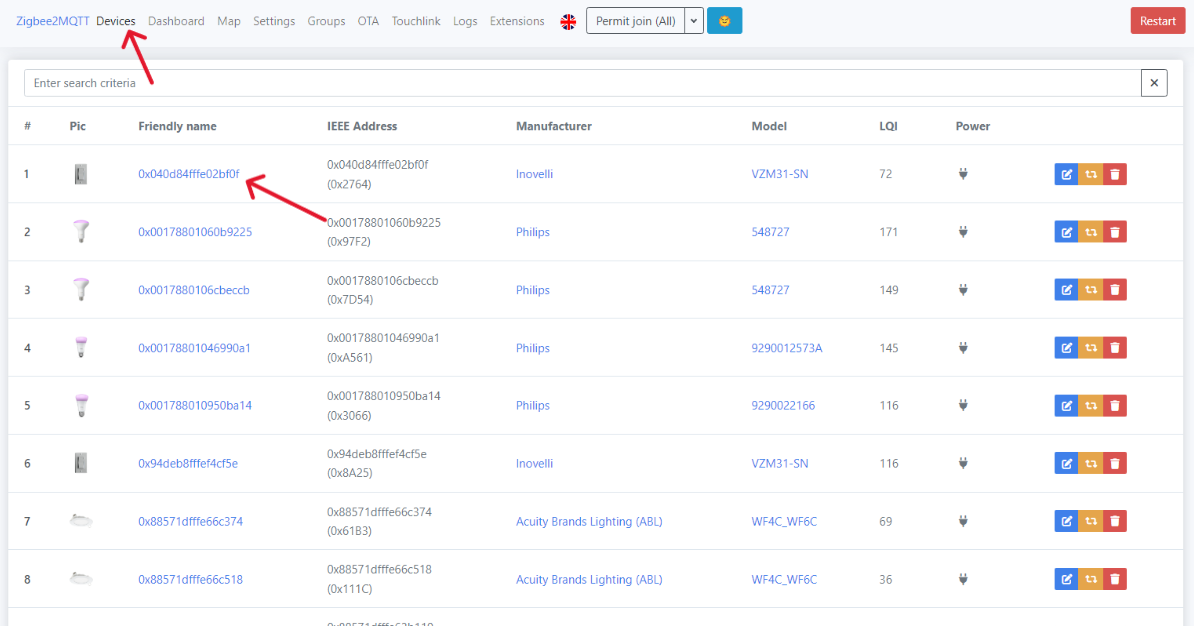
- Select the device that you desire to enable SBM on and click on “Exposes”.

- Scroll down until you find the option “smartBulbMode” and click on “Smart Bulb Mode”.
Individual Binding: Switch to Bulb(s) or Switch to Switch
In this scenario, you will be binding your Inovelli switch to a Zigbee bulb or switch. Please click on the drop-downs to select the option that best suits your setup.
- Open the Zigbee2MQTT web interface and navigate to “Devices”.
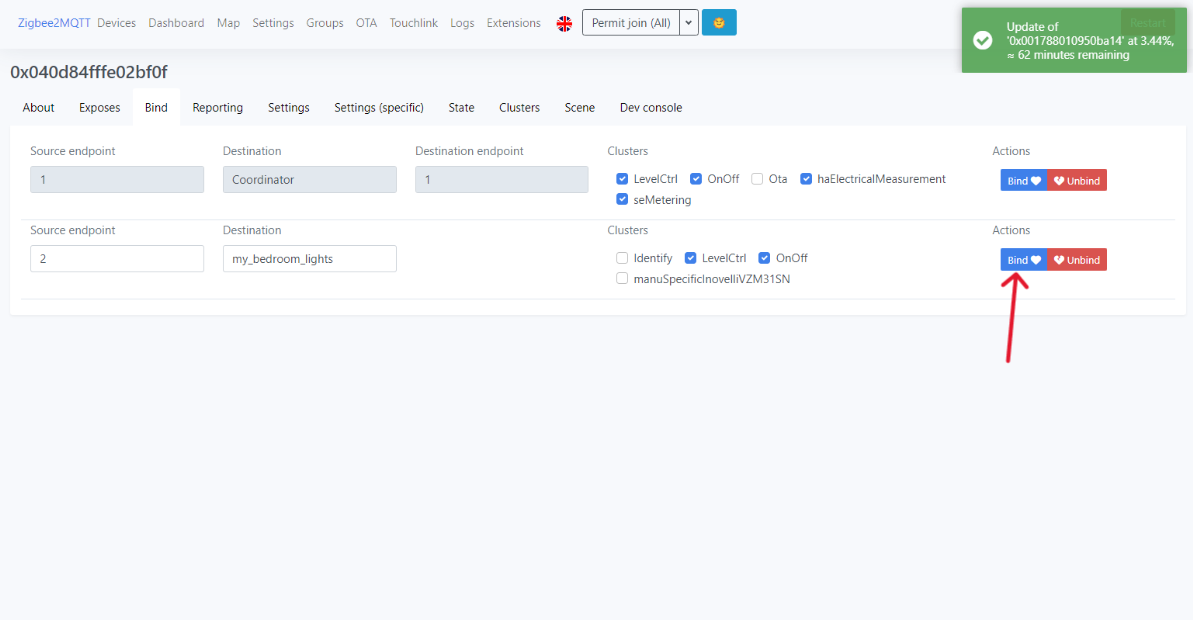
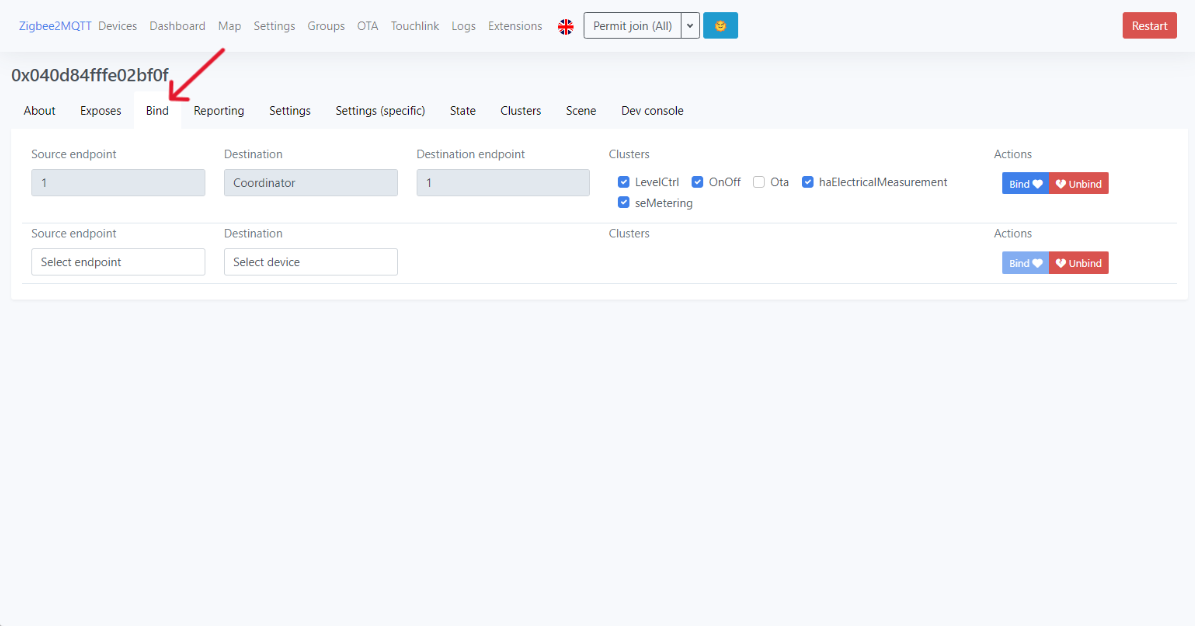
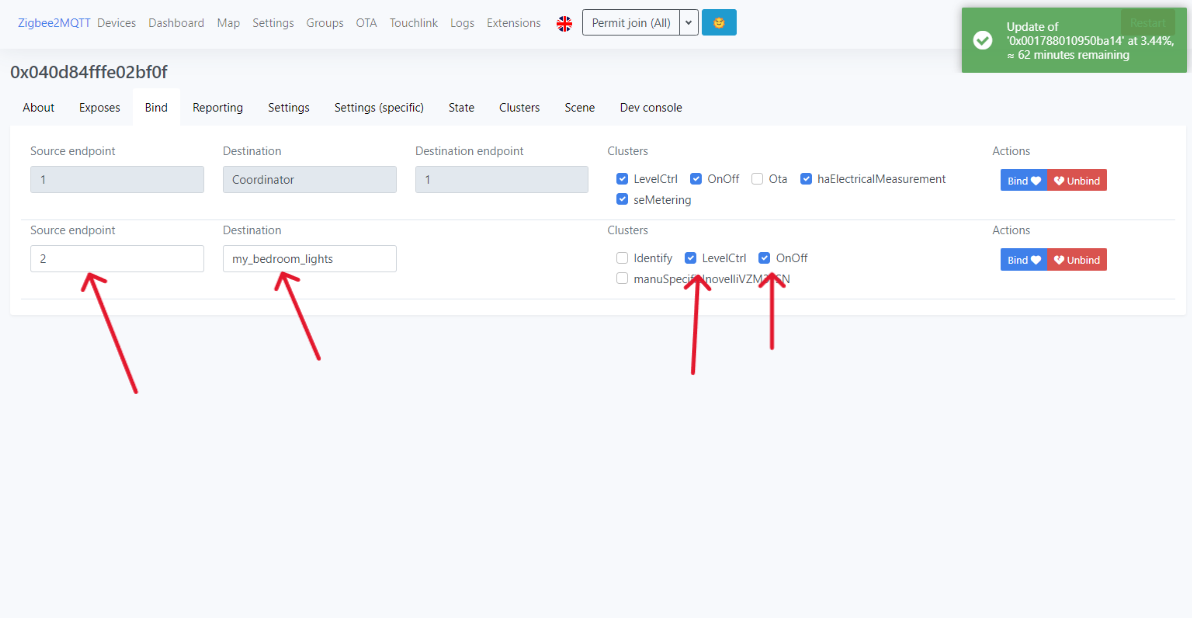
- Select the Inovelli Zigbee Switch and then click on the “Bind” tab.
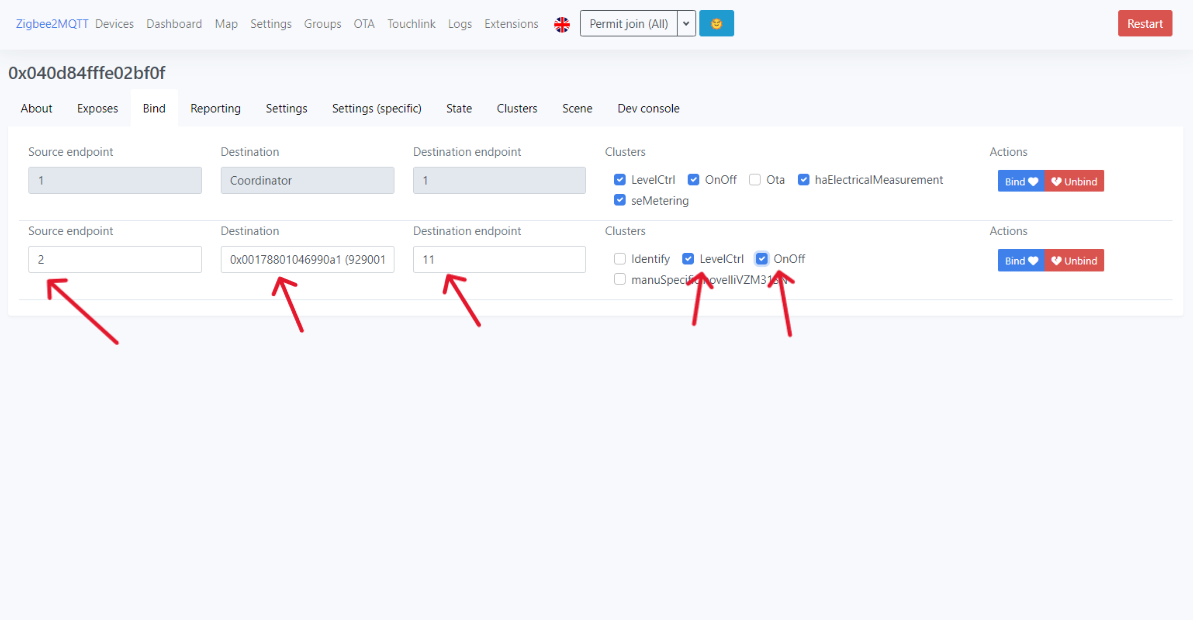
- In the “Source Endpoint” drop down choose “2” (this is the endpoint that we use on our switch to control other devices).
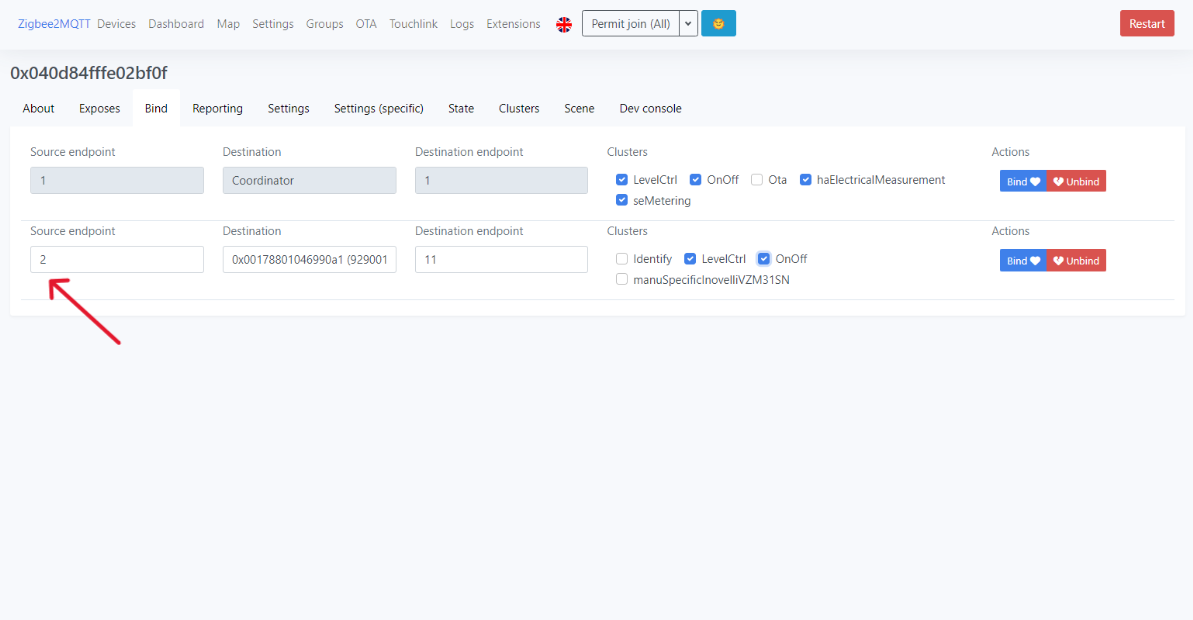
- Next choose the “Destination Device”, and then the “Destination Endpoint”. The destination device is going to be the switch or bulb that you are wanting to control. Also select the “LevelCtrl” and “OnOff” clusters.
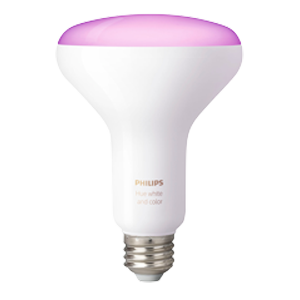
Note: the Destination Endpoint may vary based on which device you are using. Z2M usually chooses this for you, but it can be various numbers. For example, with another Inovelli Zigbee switch it is endpoint 1. With Philips Hue it is usually endpoint 11. With Juno Connect it is 8. You may need to do some asking around, but Z2M will likely have the correct ep for you.
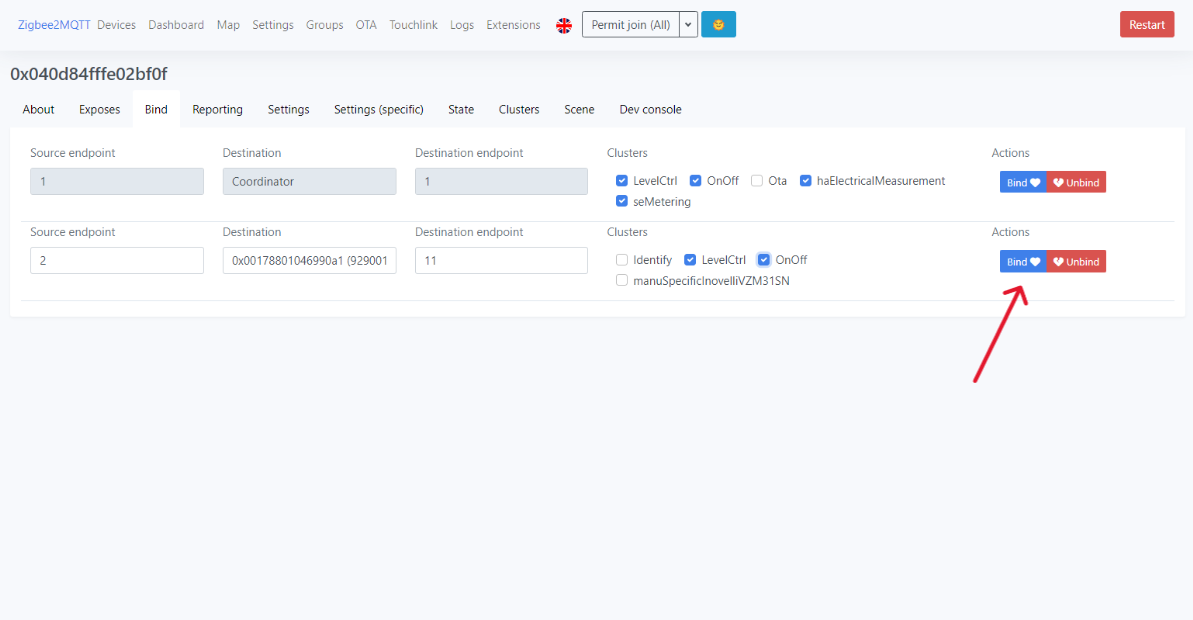
- Lastly click on the blue “Bind” icon with the heart on it. This will establish the binding from the switch to the bulb/switch!
Note: You can repeat this process for multiple bulbs and multiple switches. If you are binding a switch to a switch in a one to one or one to many configuration, you will likely want to create these bindings both ways.
So if you have switch A and B, you would create the individual bindings like:
A → B
B → A
If you have switch A, B, and C, you would create the individual bindings for:
A → B
A → C
B → A
B → C
C → A
C → B
Group Binding: Switch to a Group of Bulbs or Switches
In this scenario, you will be binding your Inovelli switch to a Zigbee group. Please click on the drop-downs to select the option that best suits your setup.
-
First, you need to create a group with the Inovelli switches and bulbs that you want to be controlled together.
-
Open the Zigbee2MQTT web interface and navigate to “Groups”.
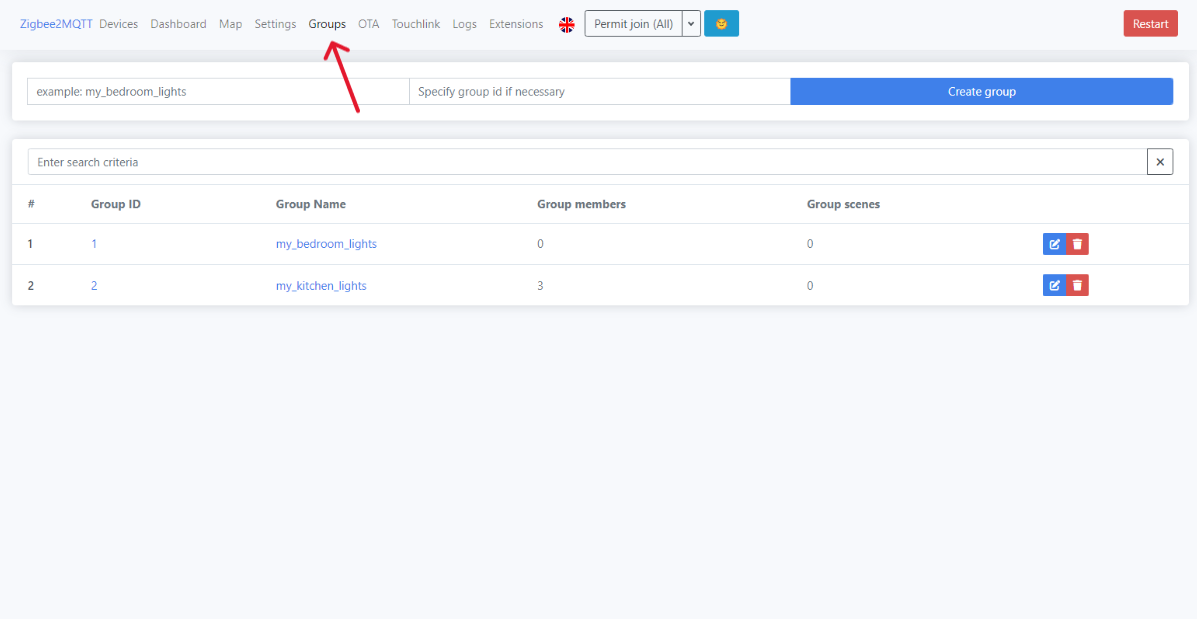
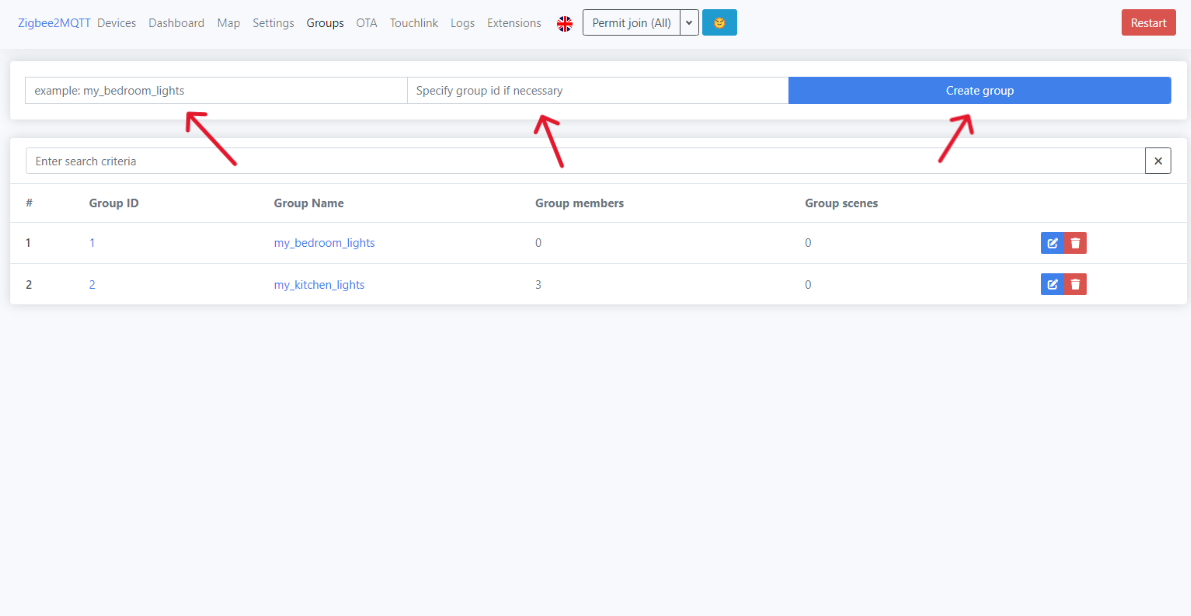
- In the first text field put in a group name, a group id (if desired), and then click “Create group”.
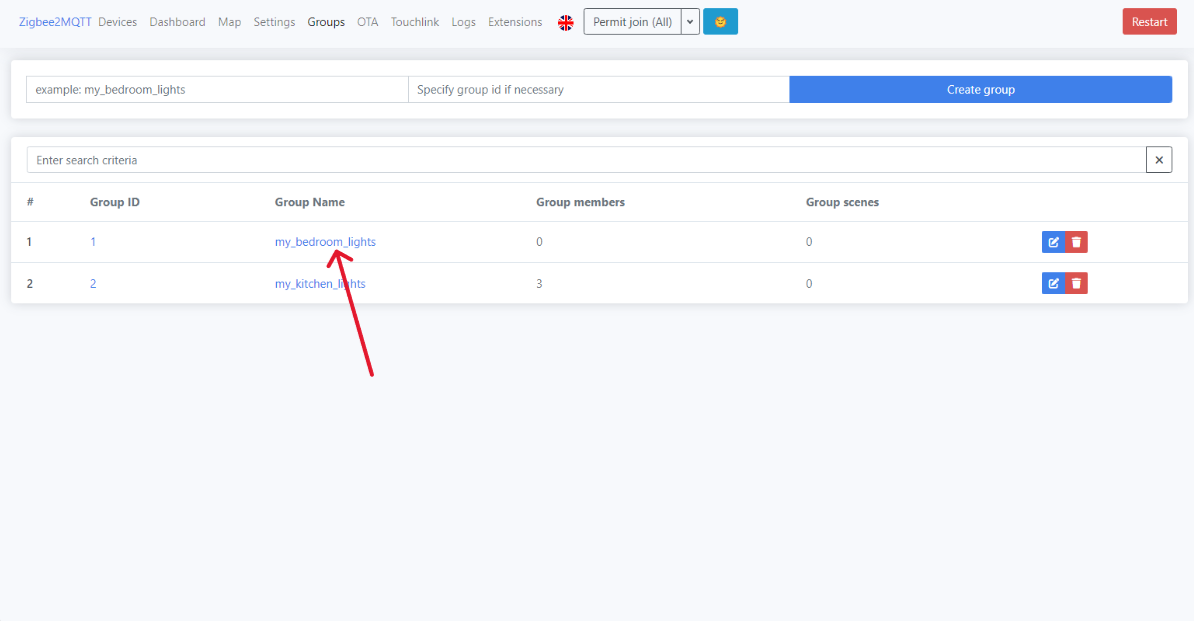
- Click on the created group to begin to add devices.
- Add each device one by one based on the endpoint that is to be controlled. For Inovelli switches this will be endpoint 1. For the other devices, you will need to select their proper control endpoint.
Note: Z2M usually chooses this for you, but it can be various numbers. For example, with another Inovelli Zigbee switch it is endpoint 1. With Philips Hue it is usually endpoint 11. With Juno Connect it is 8. You may need to do some asking around, but Z2M will likely have the correct ep for you.


-
Now that the devices are in a group, you can control the group and all of the devices will stay in “sync”. For example, changing the level of the group to 50 will change the level of all devices to 50.
-
Next, you will probably want to bind the Inovelli switch to the group so that it can control it locally from the switch.
-
Open the Zigbee2MQTT web interface and navigate to “Devices”.
- Select the Inovelli Zigbee Switch and then click on the “Bind” tab.
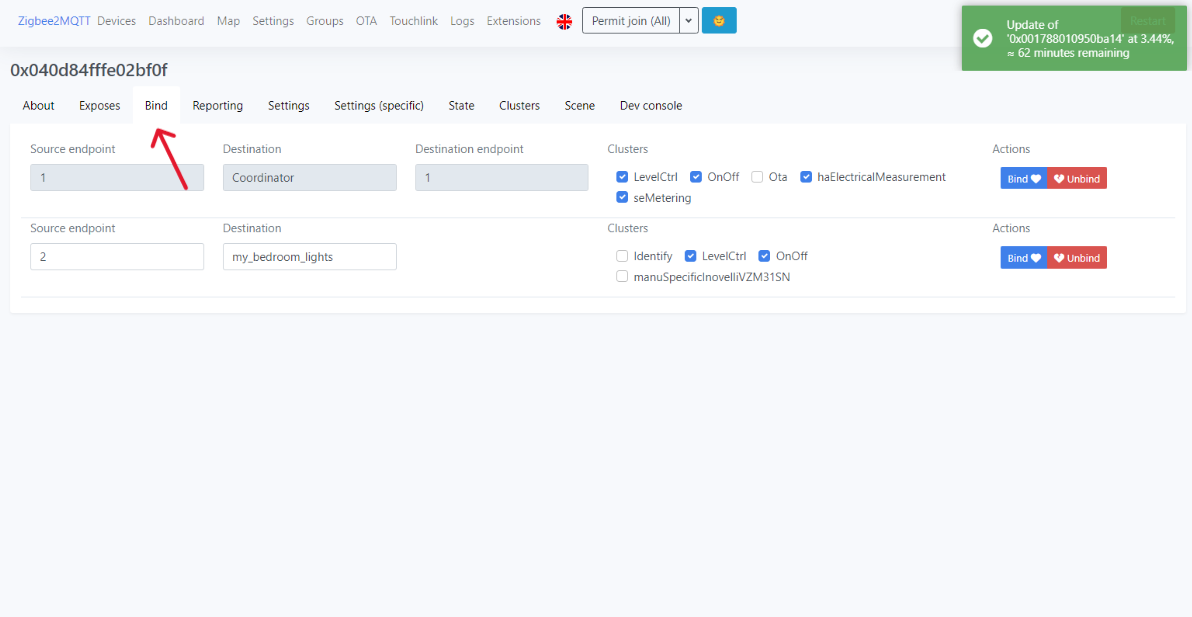
- In the “Source Endpoint” drop down choose “2” (this is the endpoint that we use on our switch to control other devices).

- Next choose the “Destination Device” as the group that you just created. There will not be a destination endpoint in this case because the group is already configured to point to the correct endpoints. Also select the “LevelCtrl” and “OnOff” clusters.
- Lastly click on the blue “Bind” icon with the heart on it. This will establish the binding from the switch to the group!